
- New Products
- Exclusive Gear
- Bushcraft Gear
- Containers
- Cooking
- Fire
- First Aid
- Food Gathering
- Knives & Tools
- Knife Collectors Corner
- Light
- Logo Gear
- Misc. Items
- Navigation
- Packs, Pouches & Bags
- Personal Care
- Repair Gear
- Shelter & Protection
- Signaling
- Urban Survival
- Water
- Writing Gear
- John's Books
- Bargain Bin
Improvised Signaling
There are all kinds of signaling devices available to carry in a survival kit or a pack. But sometimes you might fail to have all of these devices with you when an emergency situation occurs. However, as long as you know that you must let people know where you are and that you are in trouble, you can come up with some interesting ways to signal your position to rescue personnel.
I won't address all of the means in which you can improvise signal devices, as they are only limited by your imagination. I will address some that can be devised with items that you might have on you or can find relatively easily, or can find in the field.
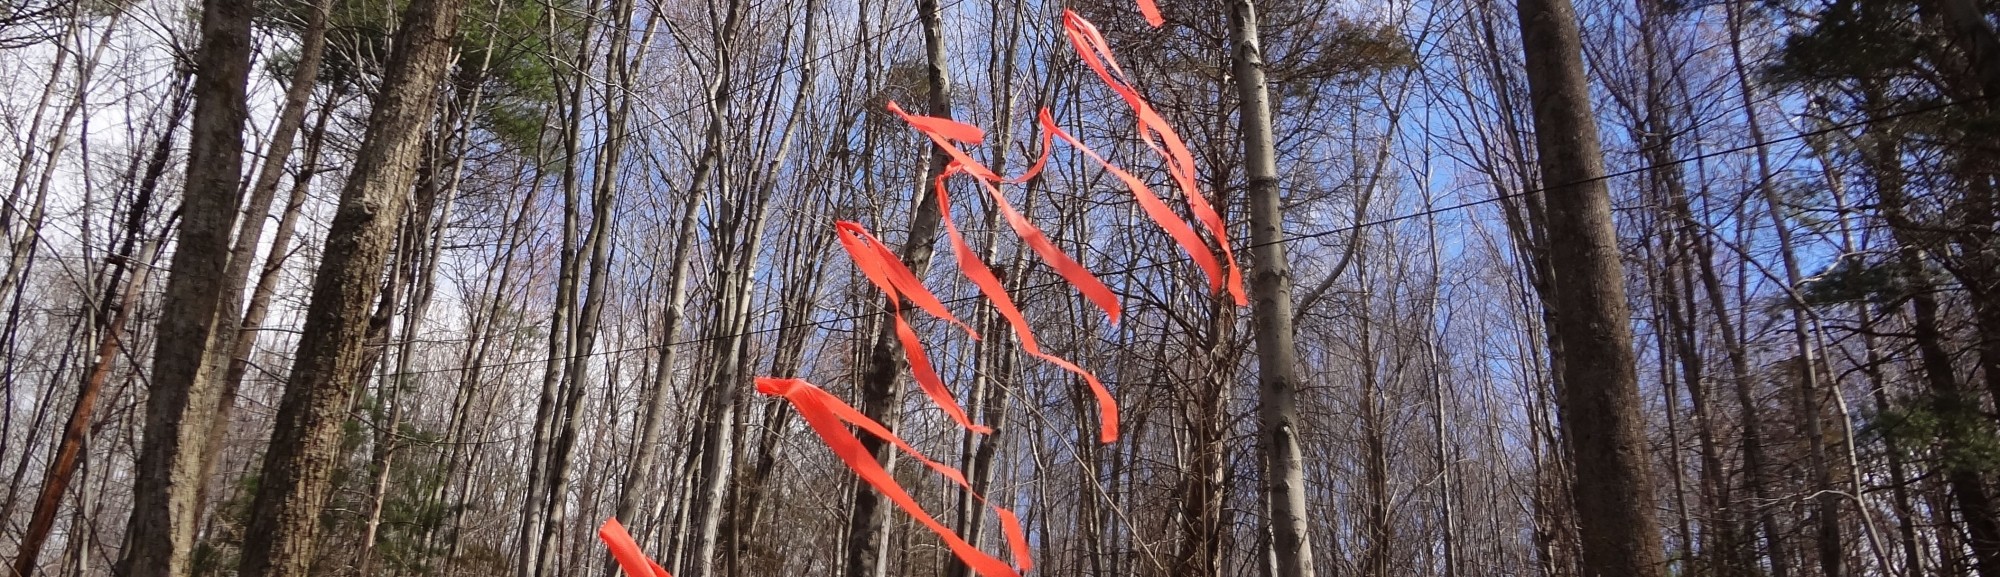
An interesting way to make a signal is with flagging tape and some type of light cord, like fishing or bank line. All you have to do is attach the line to a rock, and either hand throw the rock or shoot it with a sling shot, up over a tall limb on a tree. Try to select a limb that will keep the cord away from other branches and will allow the signaling device to be seen. A lone standing tree works well.
Next, bring the rock back to your position. The cord should now go up and over the limb and you should have both ends. Start attaching long pieces of flagging tape every foot or so on the cord. As you attach the flagging tape, pull them up towards the limb, using the original end of the cord. When you are done, you should have a line of streamers blowing in the breeze and tie both ends off at an angle to the tree. This keeps the streamers away from the tree and makes them more easily observed. If you have two trees in close proximity to each other (10-12 feet), make two cords of streamers and attach the ends to the bottom of the opposite trees on which the limbs were used. This will end up making a large "X" between the two trees. Either way, the fluttering streamers are bound to attract attention!
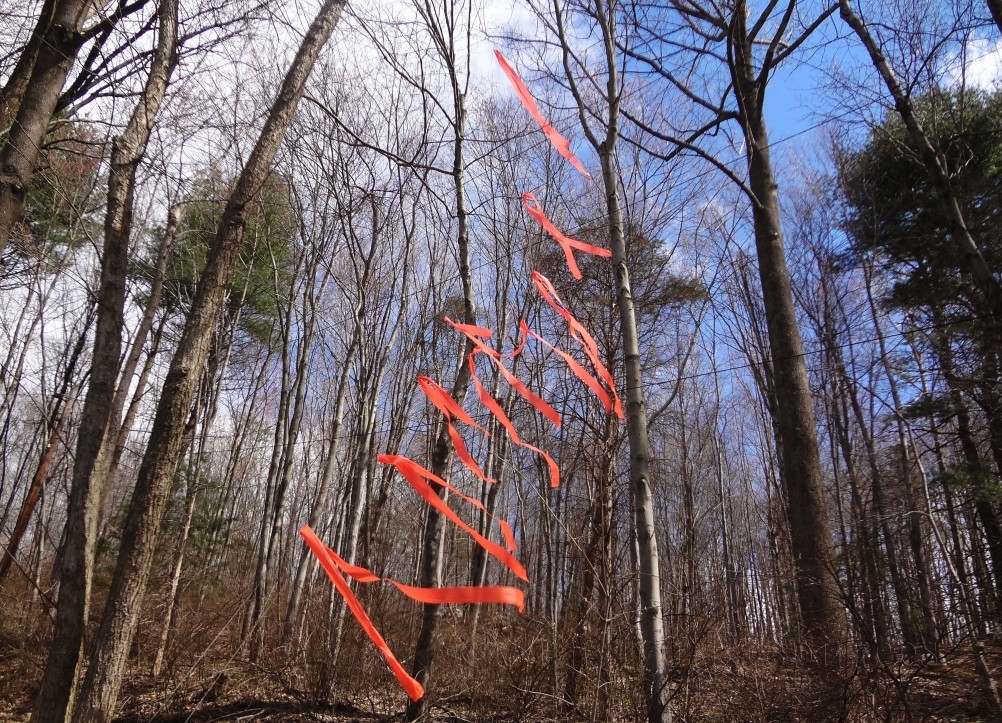 A view of flagging tape streamers attached to braided fishing line, as discussed in the text.
The next technique is an easy one and requires that you have a snap light stick. This technique works best in low light, or no light, conditions. Take the snap light stick and tie a piece of cordage to it about thirty-six inches long. Now when you want to signal, snap the light to activate it, and start spinning it. For an overhead signal, spin it over your head. If you are trying to signal out in front of you then spin it at an angle in front of you (the angle is so the light stick does not hit the ground in front of you). Again, this is an easy, yet effect means to signal you position.
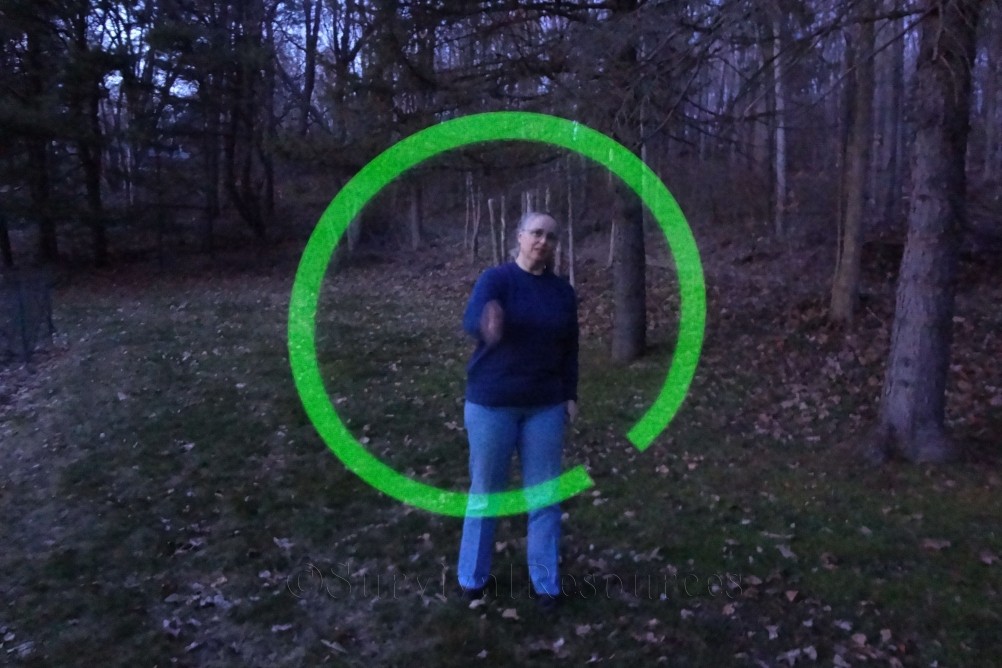 A view of a spinning snap light stick at dusk.
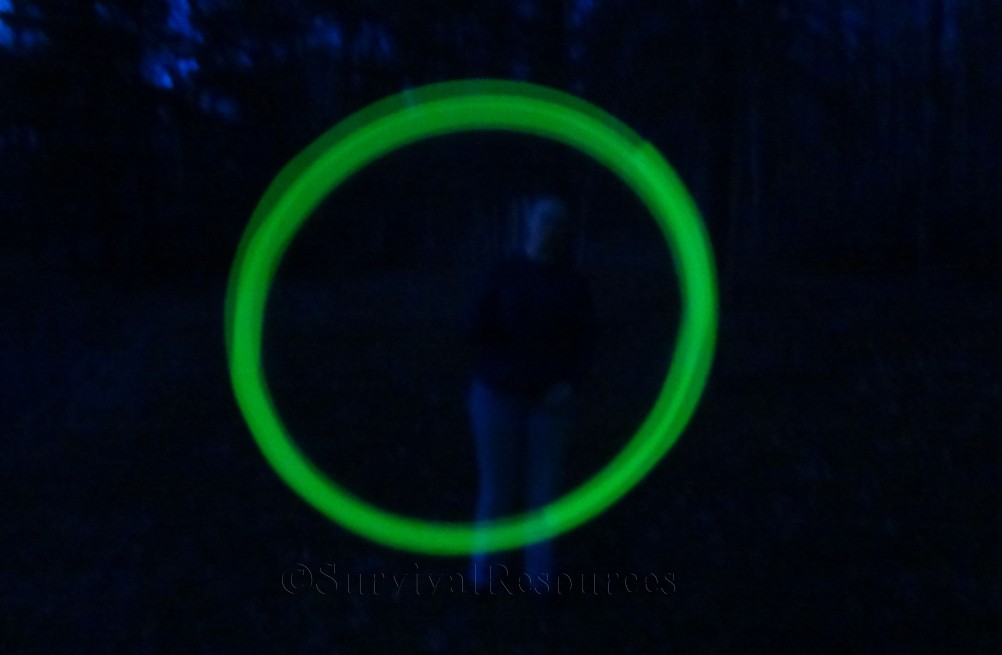 A view of a spinning snap light stick in the dark.
There are items you can find in the wilderness for use as a signal whistle. Two of them you don't even have to modify. One is the cap of an acorn from an oak tree and the other is cap from a water bottle - yes water bottles are often found in the wilderness.
All you have to do is place both thumbs over the acorn cap or bottle cap so that you leave a small "V' shaped opening at the front. You then blow across the top of your thumbs, so that the air goes across the "V' shaped opening. You may have to adjust your thumbs a couple of times to get it right, but when you do you will know it. And now you have a whistle made from debris found in the wilderness. They obviously won't be as loud as a real whistle, but as with everything in survival, something is better than nothing. You can also make a whistle from an old soda or beer can. You can see the article I did called "Making A Can Whistle" HERE.
 A view of a bottle cap and acorn top which can be used as a whistle.
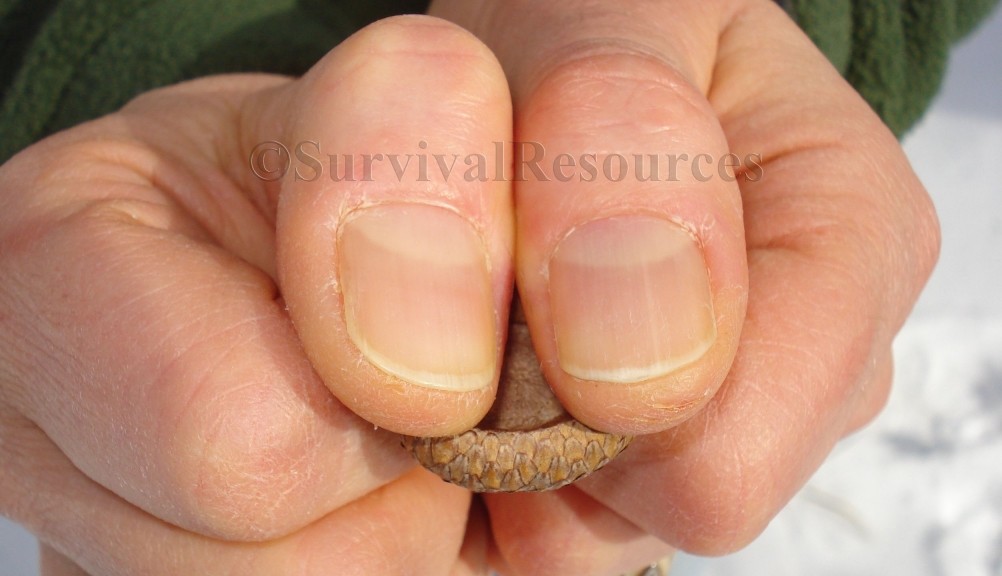 The proper way to place your thumbs over an acorn top.
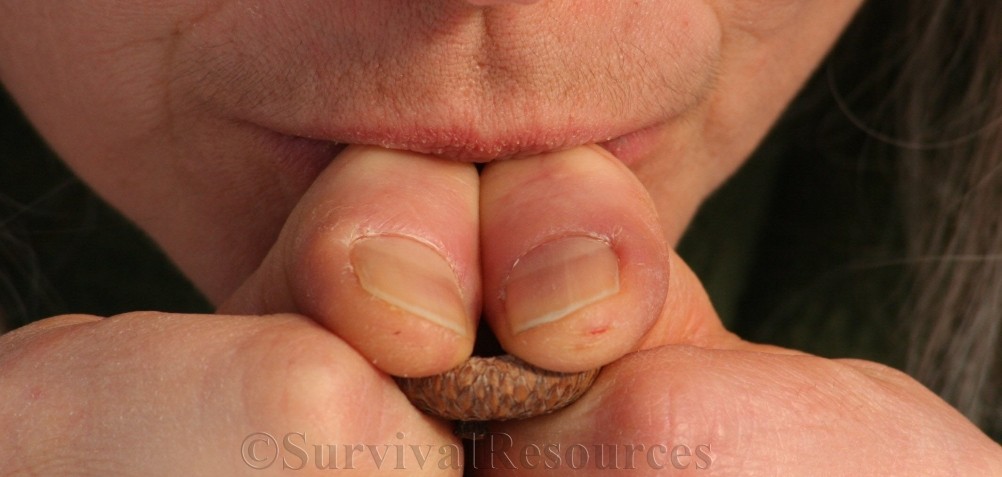 Blow across the top of your thumbs.
You can always make a large "X" on the ground to draw attention to your location. You can make this with large limbs, rocks, etc. Anything that can be seen from above. Keep in mind that the dimensions of each leg of the "X" should measure approximately three feet wide by eighteen feet long. Make the "X" as tall as you can, and with material that is a different color as the ground. You are dealing with both contrast and shadows to help make this signal be seen. The angularity (no straight lines in nature) also helps here.
If you are in snow country you can always mark out an "X" by stomping down the snow. The dimensions should be the same as indicated above. The deeper the trench, the more shadow will be available, which will help the "X" to stand out. If you have any debris, ashes, or boughs, you can add it to the trench for contrast. I have also used a dye marker (normally used in the water) to enhance the contrast of an "X" made in the snow.
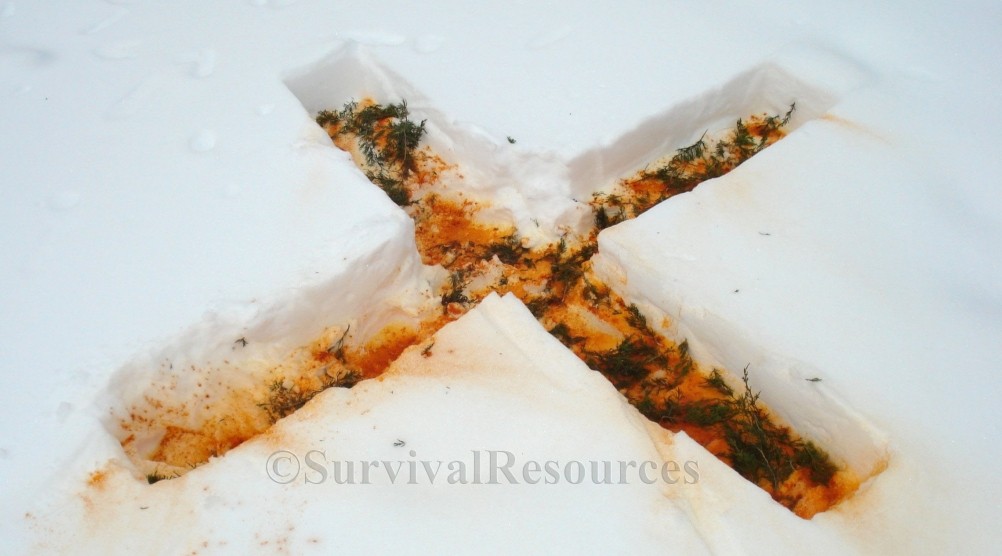 The use of a dye marker helps contrast an "X" stomped in the snow.
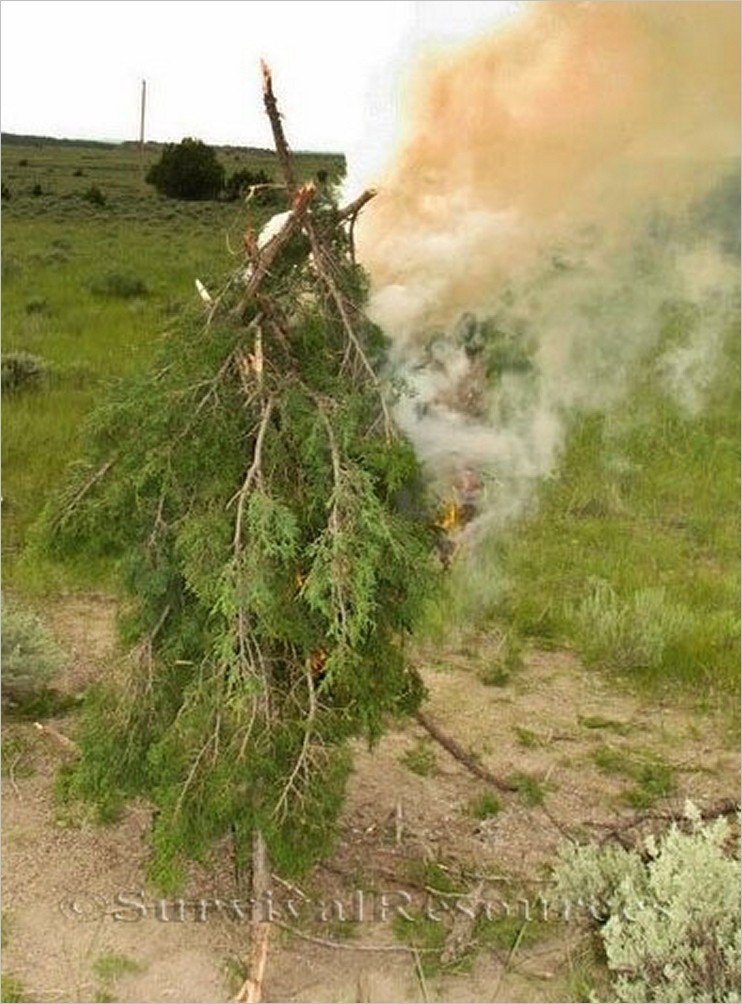
You can also attract the attention of rescuers using fire and smoke, and it is one of the best known signals. If people know you are missing and they are looking for you, then one fire should usually be sufficient. However, if nobody knows your missing and you need help, three fires evenly spaced apart and arranged in a triangle or a straight line, serves as an internationally known distress signal.
If used at night, you should have a very bright fire. If used during the day you will need smoke, and as much as you can produce. Smoke signals are only effective on clear, calm days, where they have been known to be seen up to 50 miles. However, high winds, rain or snow can disperse the smoke and make them much less effective. Smoke tends to be less effective in heavily wooded areas and you should try to get the smoke generated from a clearing if possible.
The smoke you produce should contrast with the background. White smoke created by using green vegetation, or even water, is best used against a dark background. Against snow, a dark smoke works best and can be created using oil, rubber or plastic, if available.
 A Smoke Generator can produce a lot of smoke for signaling.
As you can see, with a little imagination, there are various ways to adapt available items for signaling for help. Again, these are only a few and there are many more things that could be used. Keep your eyes open, and think outside of the box when it comes to items you have.
We hope you enjoyed this article and will help support our efforts by checking out our products. As always, Be Prepared To Survive!
Copyright © 2015 by John D. McCann