
- New Products
- Exclusive Gear
- Bushcraft Gear
- Containers
- Cooking
- Fire
- First Aid
- Food Gathering
- Knives & Tools
- Knife Collectors Corner
- Light
- Logo Gear
- Misc. Items
- Navigation
- Packs, Pouches & Bags
- Personal Care
- Repair Gear
- Shelter & Protection
- Signaling
- Urban Survival
- Water
- Writing Gear
- John's Books
- Bargain Bin
Simple Wild Grape Jelly
We have a lot of wild grapes on our property and they are now ripe for the picking. So we picked a bunch the other day so that we could make jelly. I thought I might do a quick article explaining, and showing how my wife, Denise, and I did so.
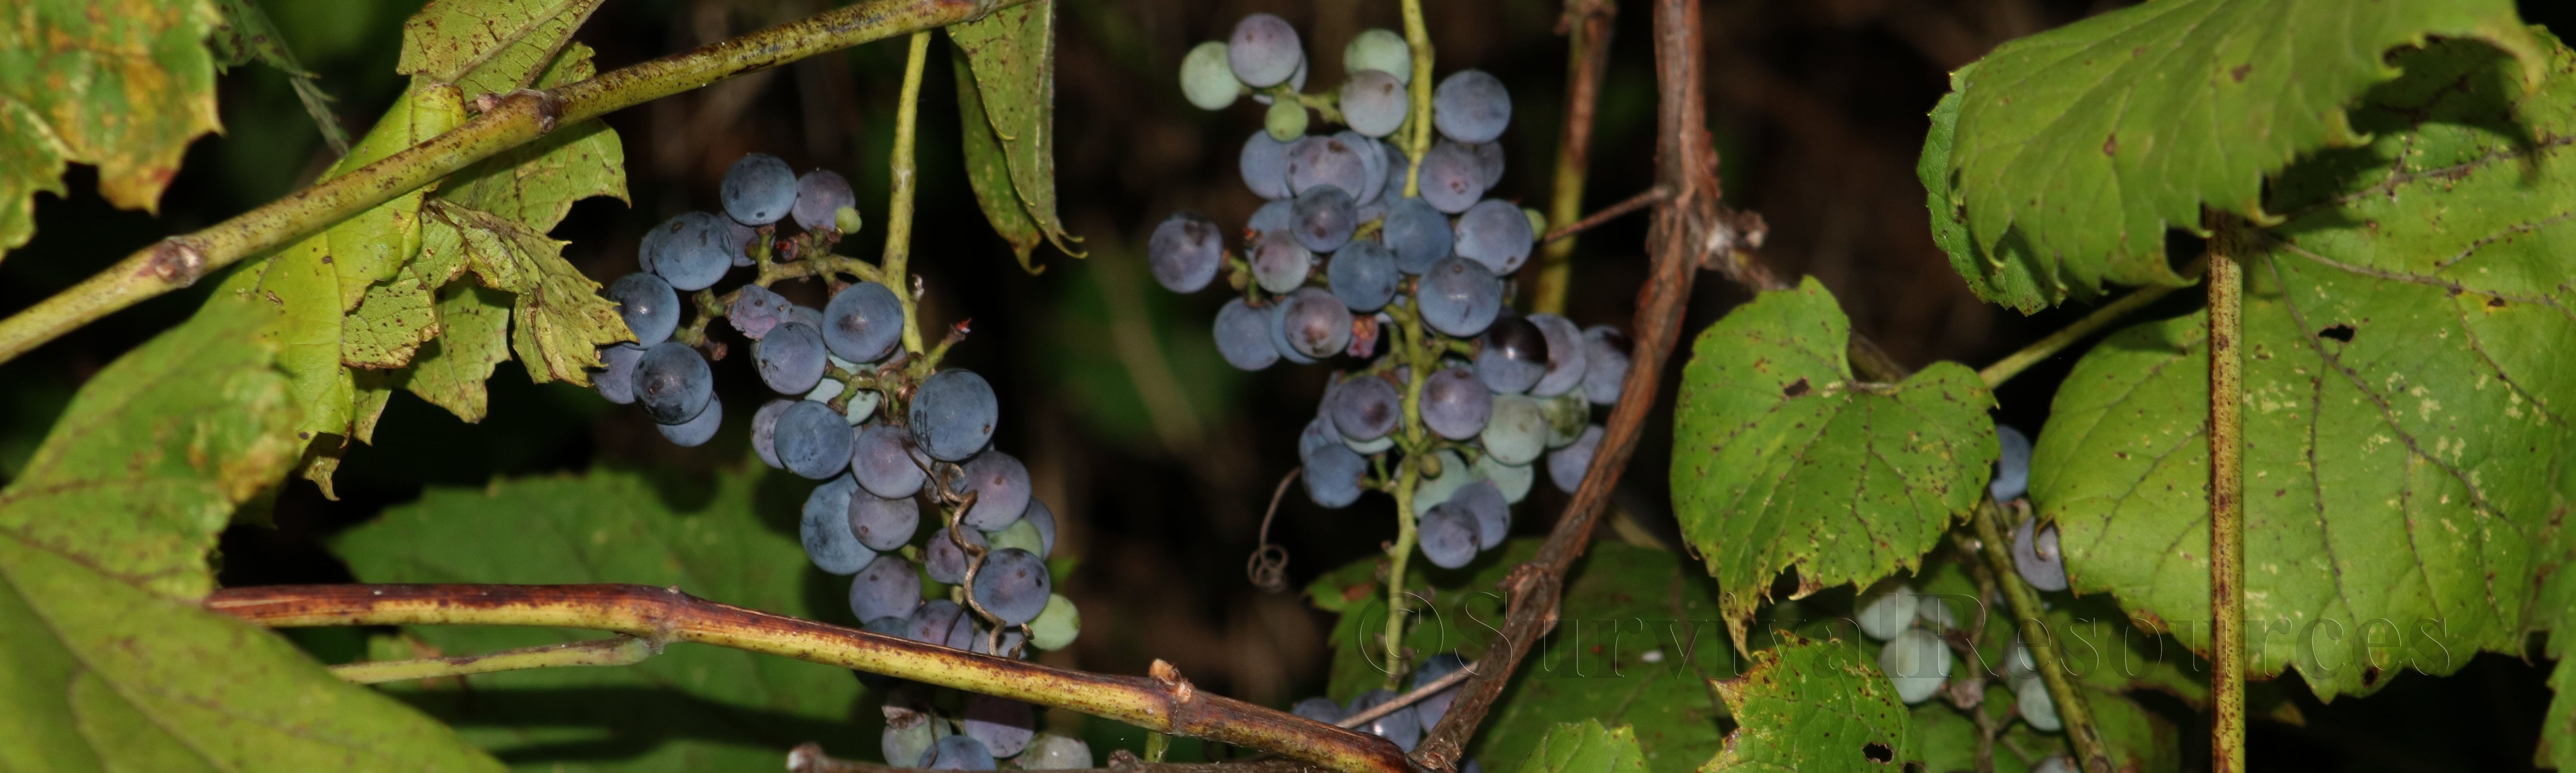
Of course the first thing you have to do is pick the wild grapes. We use pruning shears so that we can gather the grapes by the bunch. When you are picking, be sure to lift the vines and look underneath. You will find many of the bunches hanging on the underside. They are easy to miss if you don't poke around. We were able to gather two 2.5 Gallon buckets of wild grapes.
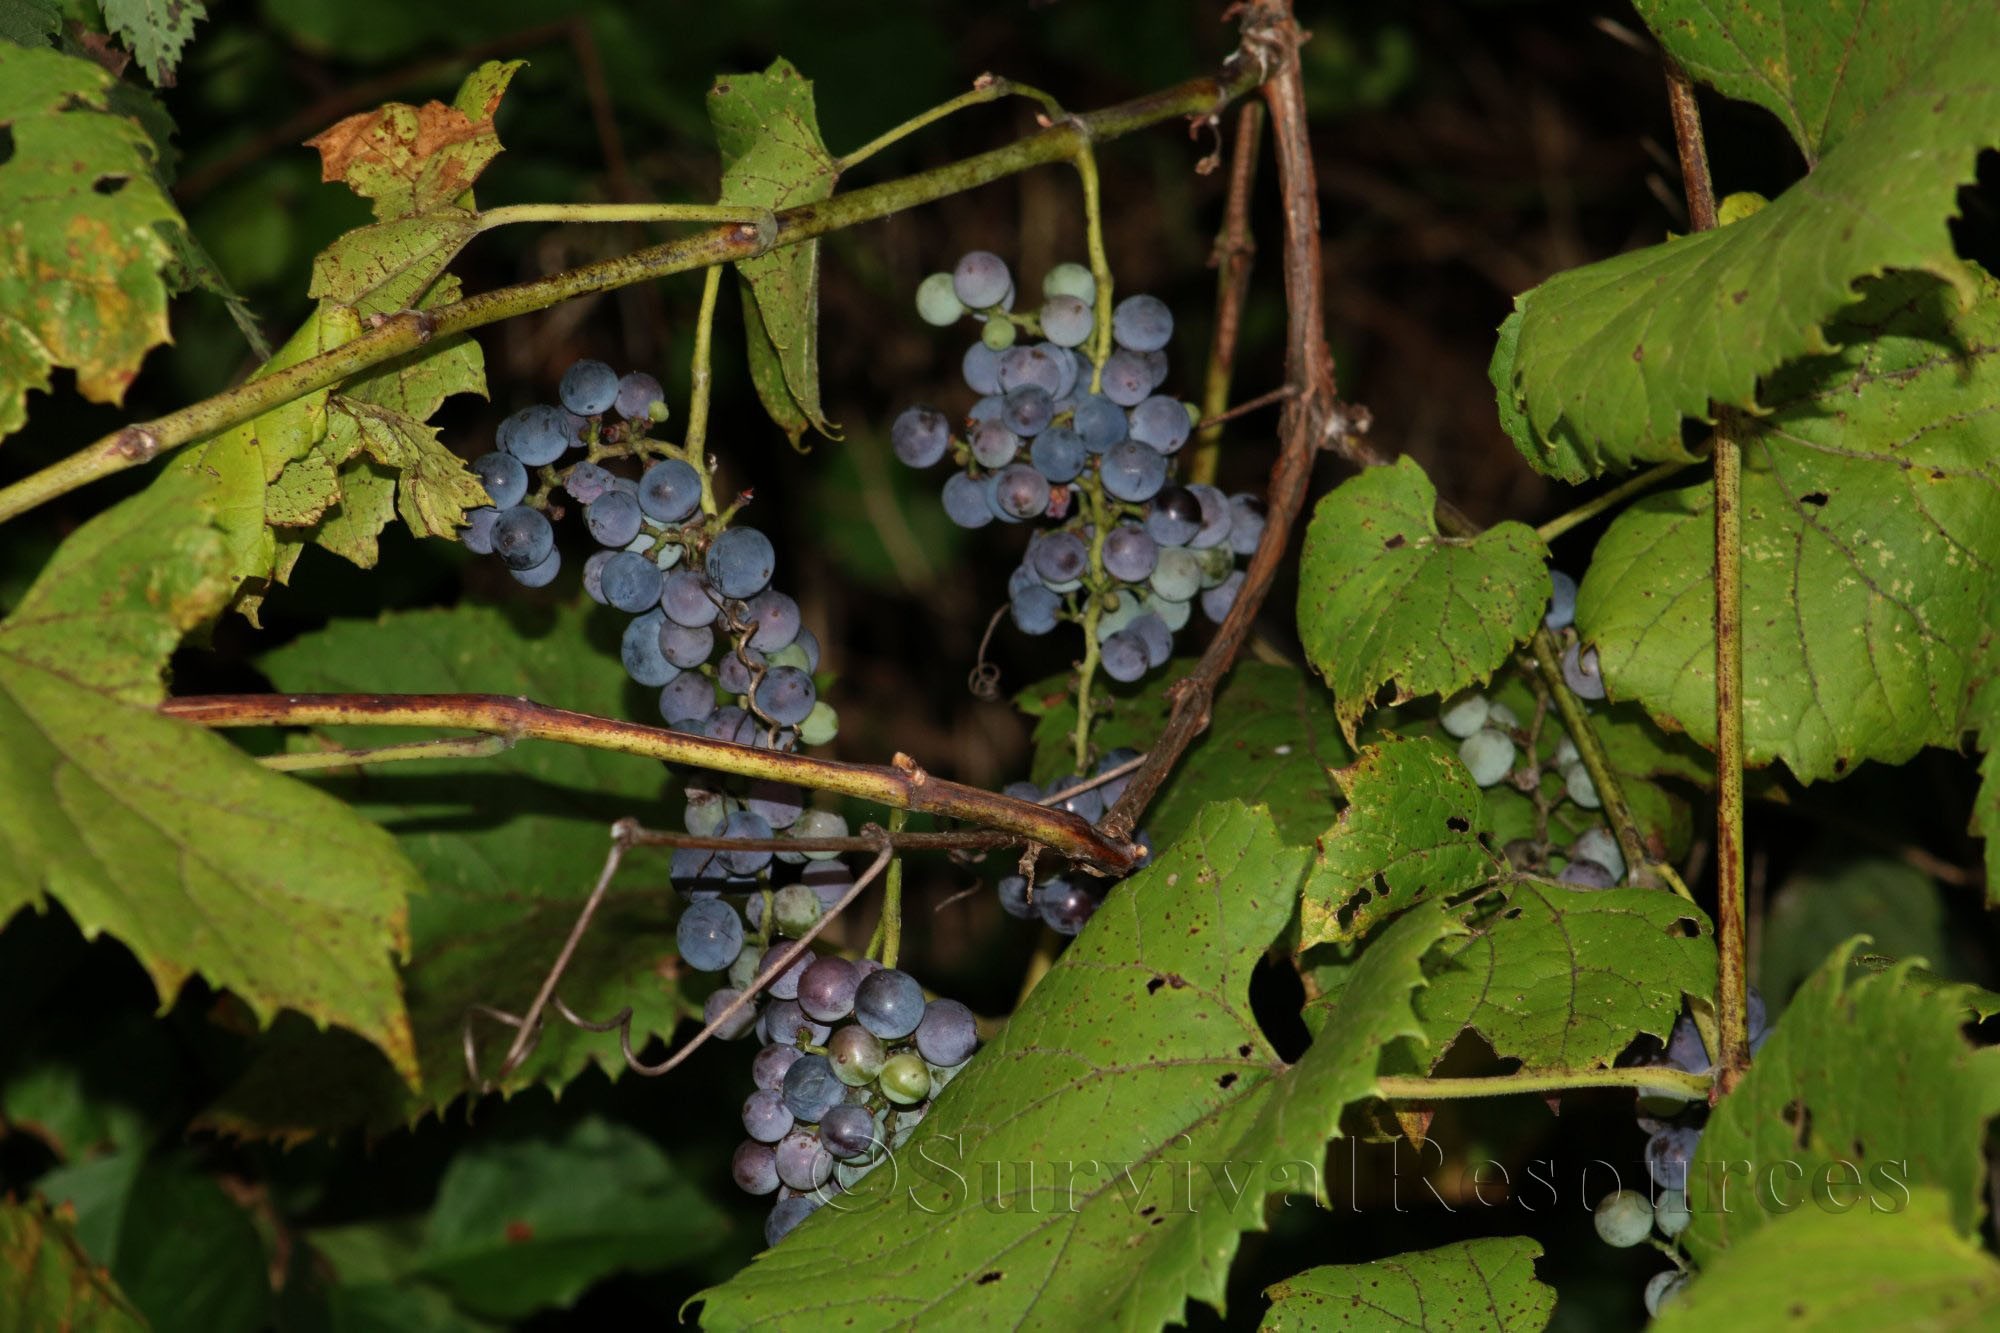 This is photo of the wild grapes on the vine.
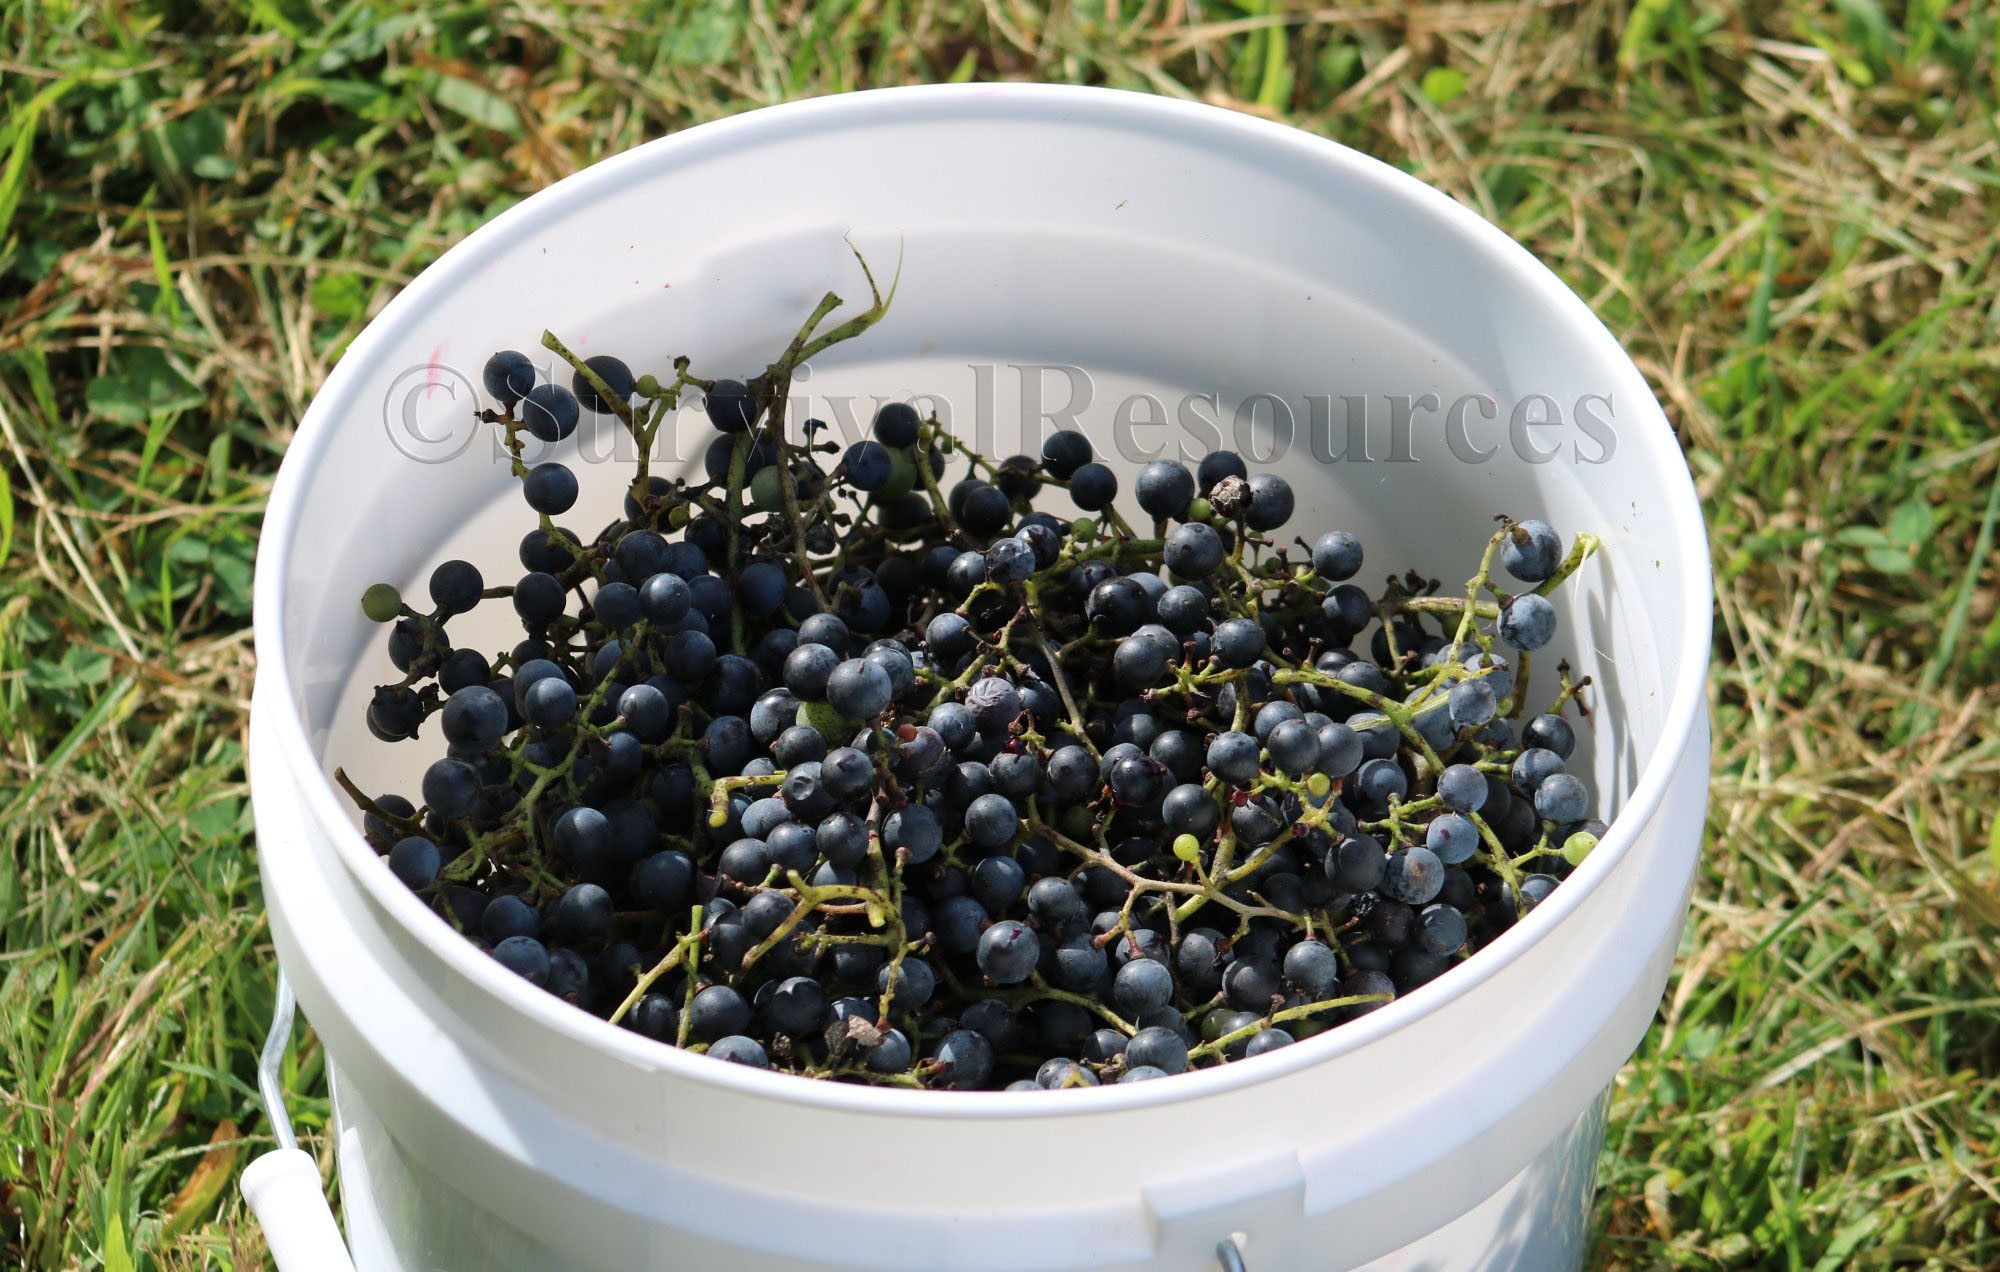 A view of one of the 2.5 gallon buckets we used to gather the grapes.
After collecting the grape bunches we then brought them down to the house and removed the grapes from the stems. This can be a tedious job, but it is easier to do at the house than in the field. Be sure to keep some of the green grapes as they have more pectin in them than the ripe ones.
When we make wild grape jelly we use nothing but the wild grapes, water, and sugar. Many of the recipes we have seen for jelly calls for the use of pectin. Of course you can use pectin, but for wild grape jelly, it really isn't necessary.
Before we go any further, I thought I might first give a small explanation of "Pectin" so you will understand why my wife chooses not to use it for our Wild Grape Jelly. First a definition: Pectin is a soluble gelatinous polysaccharide that is present in ripe fruits and is extracted for use as a setting agent in jams and jellies. All natural fruit contains Pectin, some more than others. By boiling your jelly or jam longer to thicken it, you are breaking down the pectin already in the fruit. In the case of Wild Grapes, they have more natural pectin than cultured grapes (like those you buy in the store). Also, some folks think that adding pectin to jams and jellies prolongs the preservation period. However, this is not true. Pectin merely effects the jelling of the finished product. Again, in the case of Wild Grapes, boiling a little longer allows for the required jelling, so the jelly is not too watery and has the correct consistency when done.
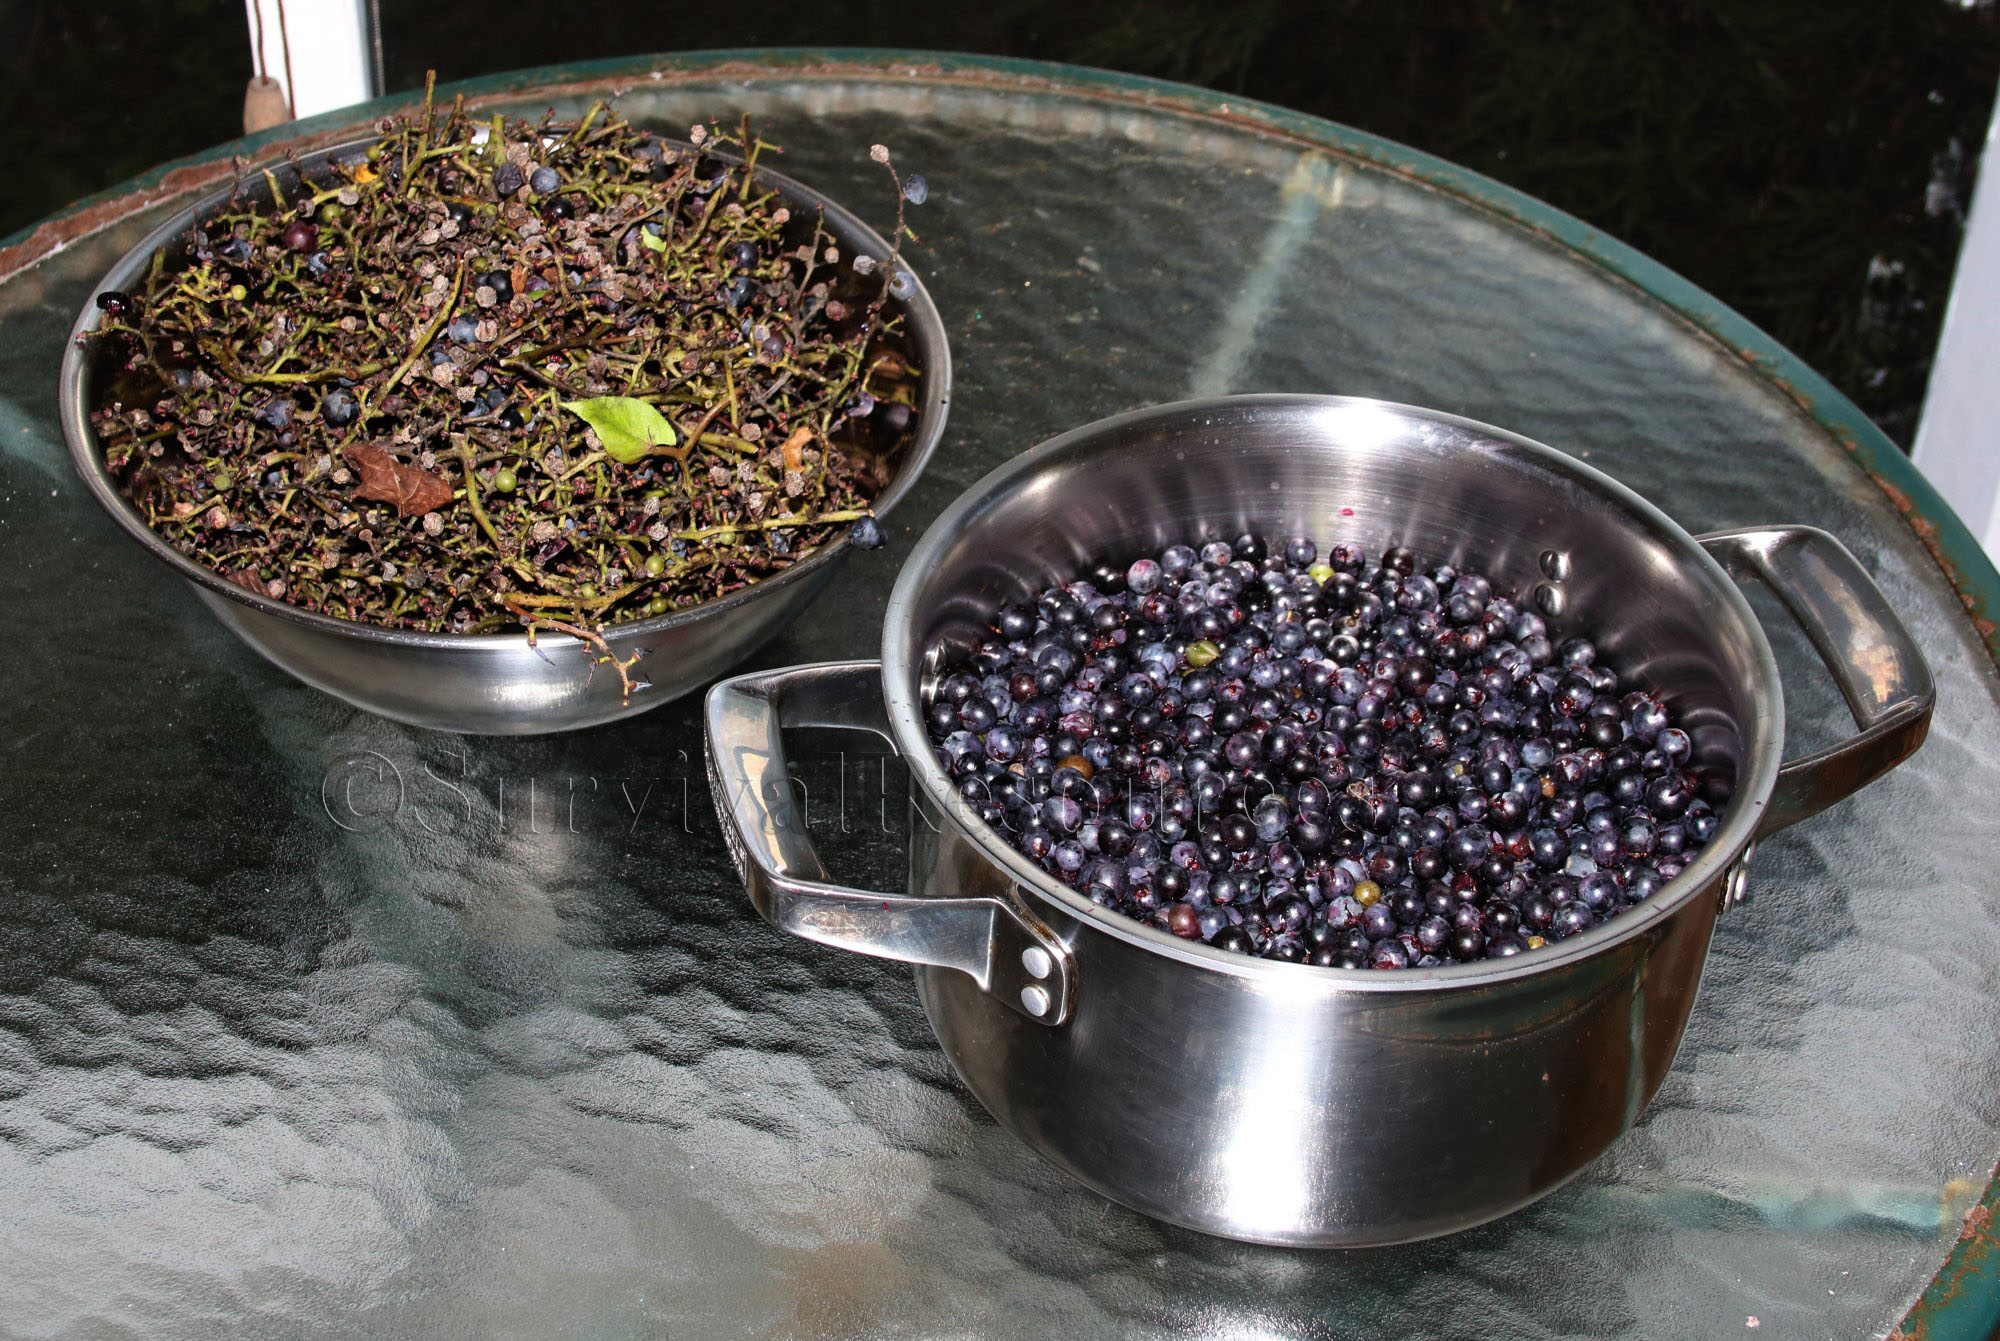 This is a view of the stems on the left and the usable grapes on the right.
Once you have removed all the stems, you can discard them in your compost pile or bin. The grapes are now ready for use. We place the grapes in a large pot. In this case we had so many grapes that we had to do two batches. This article will follow the making on one batch, and of course the second batch would just repeat what you did the first time around.
Once we have the grapes in the pot, we use a potato masher and mash up the grapes real well. We then add water. You don't need a lot of water, and we use about 2 cups of water for 10 cups of mashed berries. We then boil the mixture of mashed berries and water for one half hour. You then set it aside overnight.
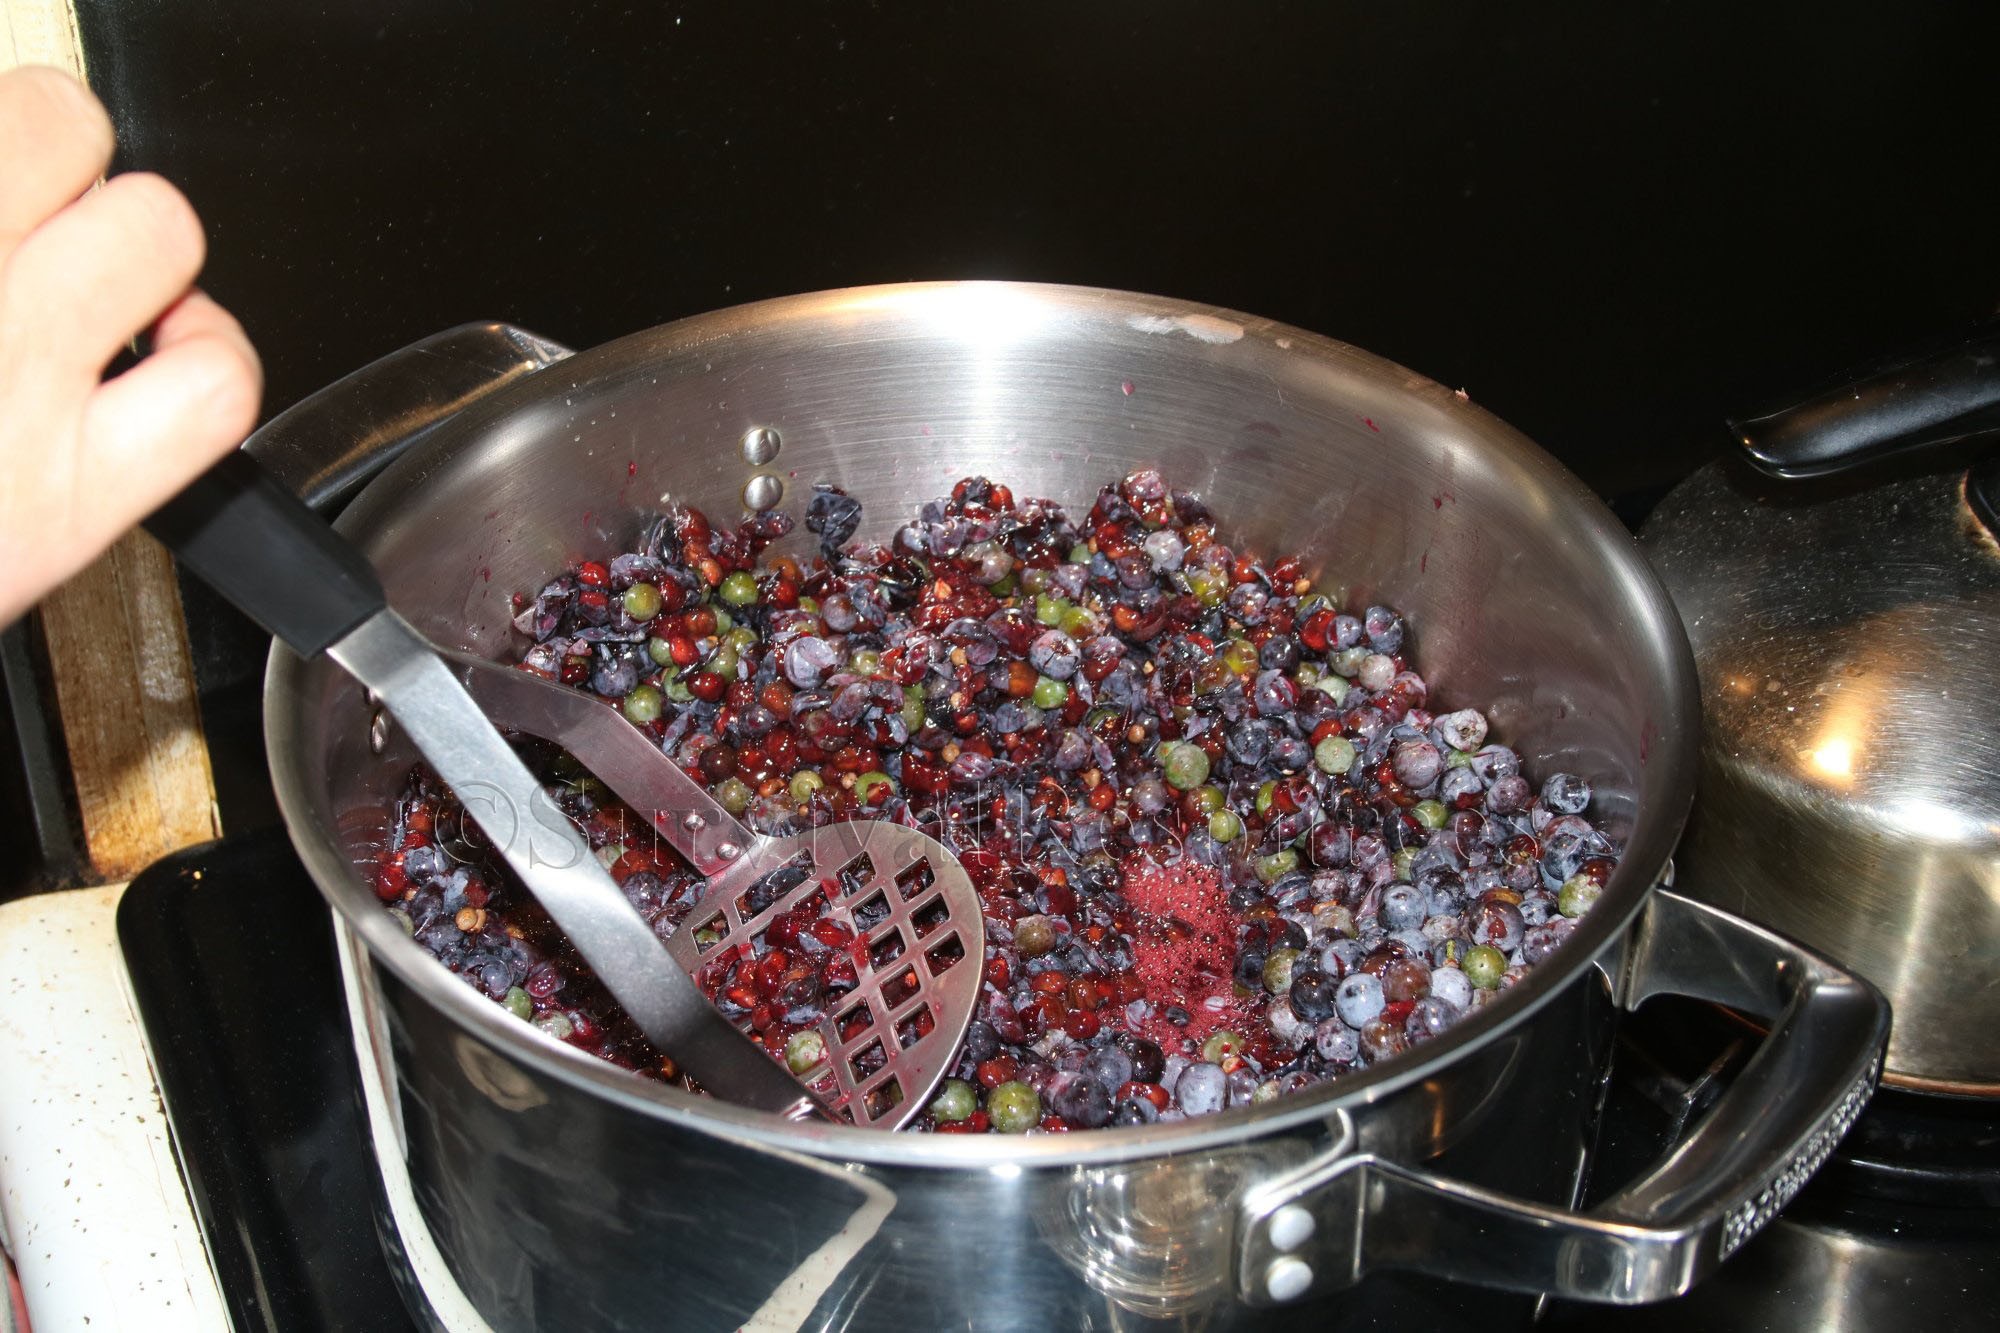 Mashing up the grapes with a potato masher.
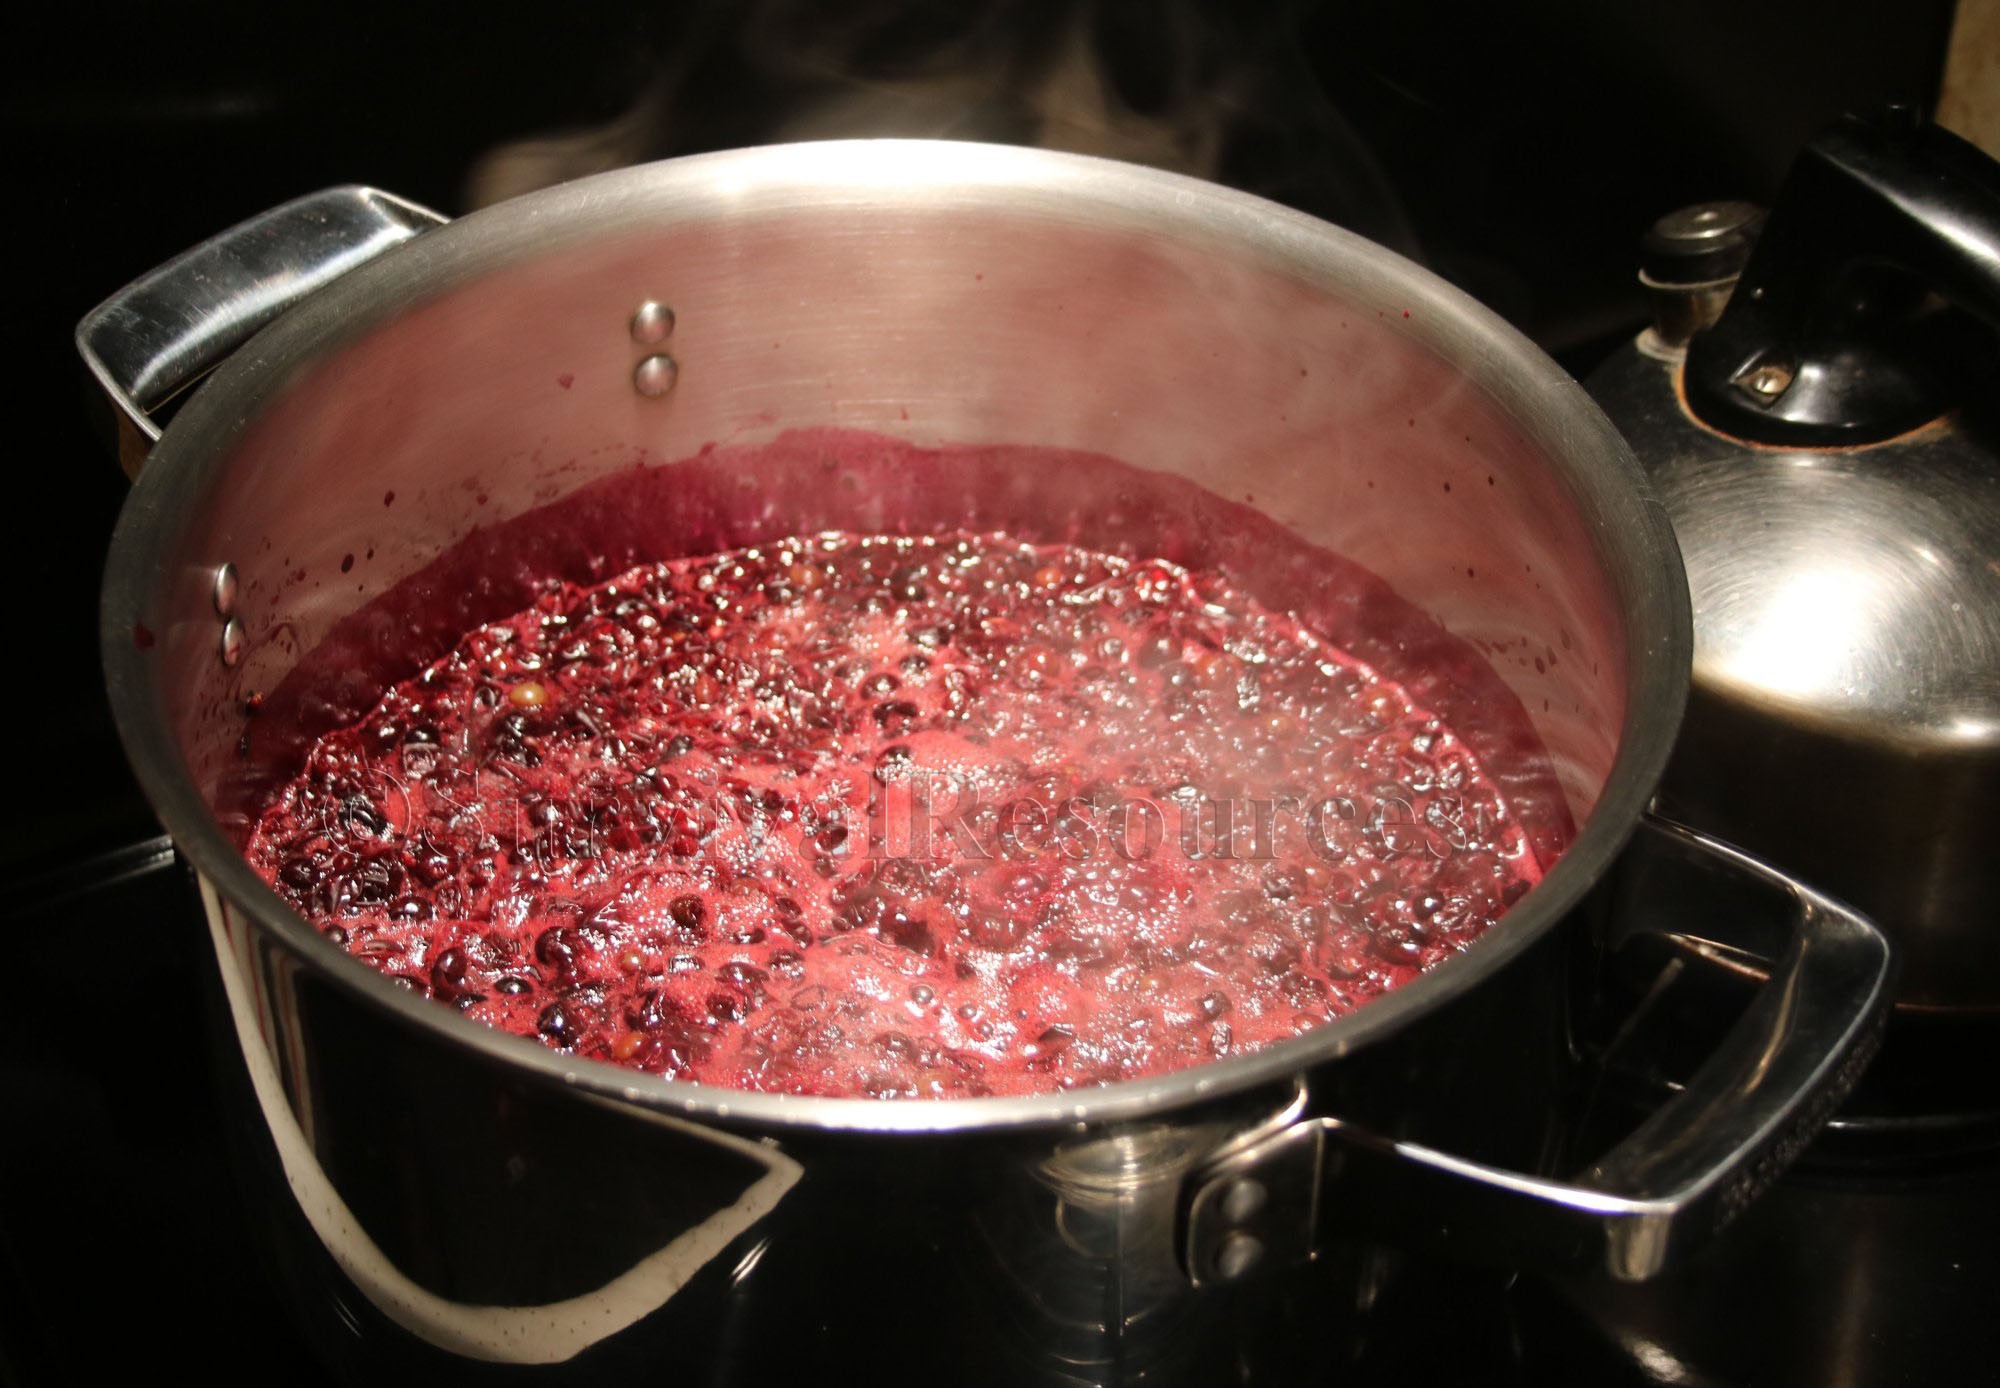 Boiling the mixture of mashed berries and water.
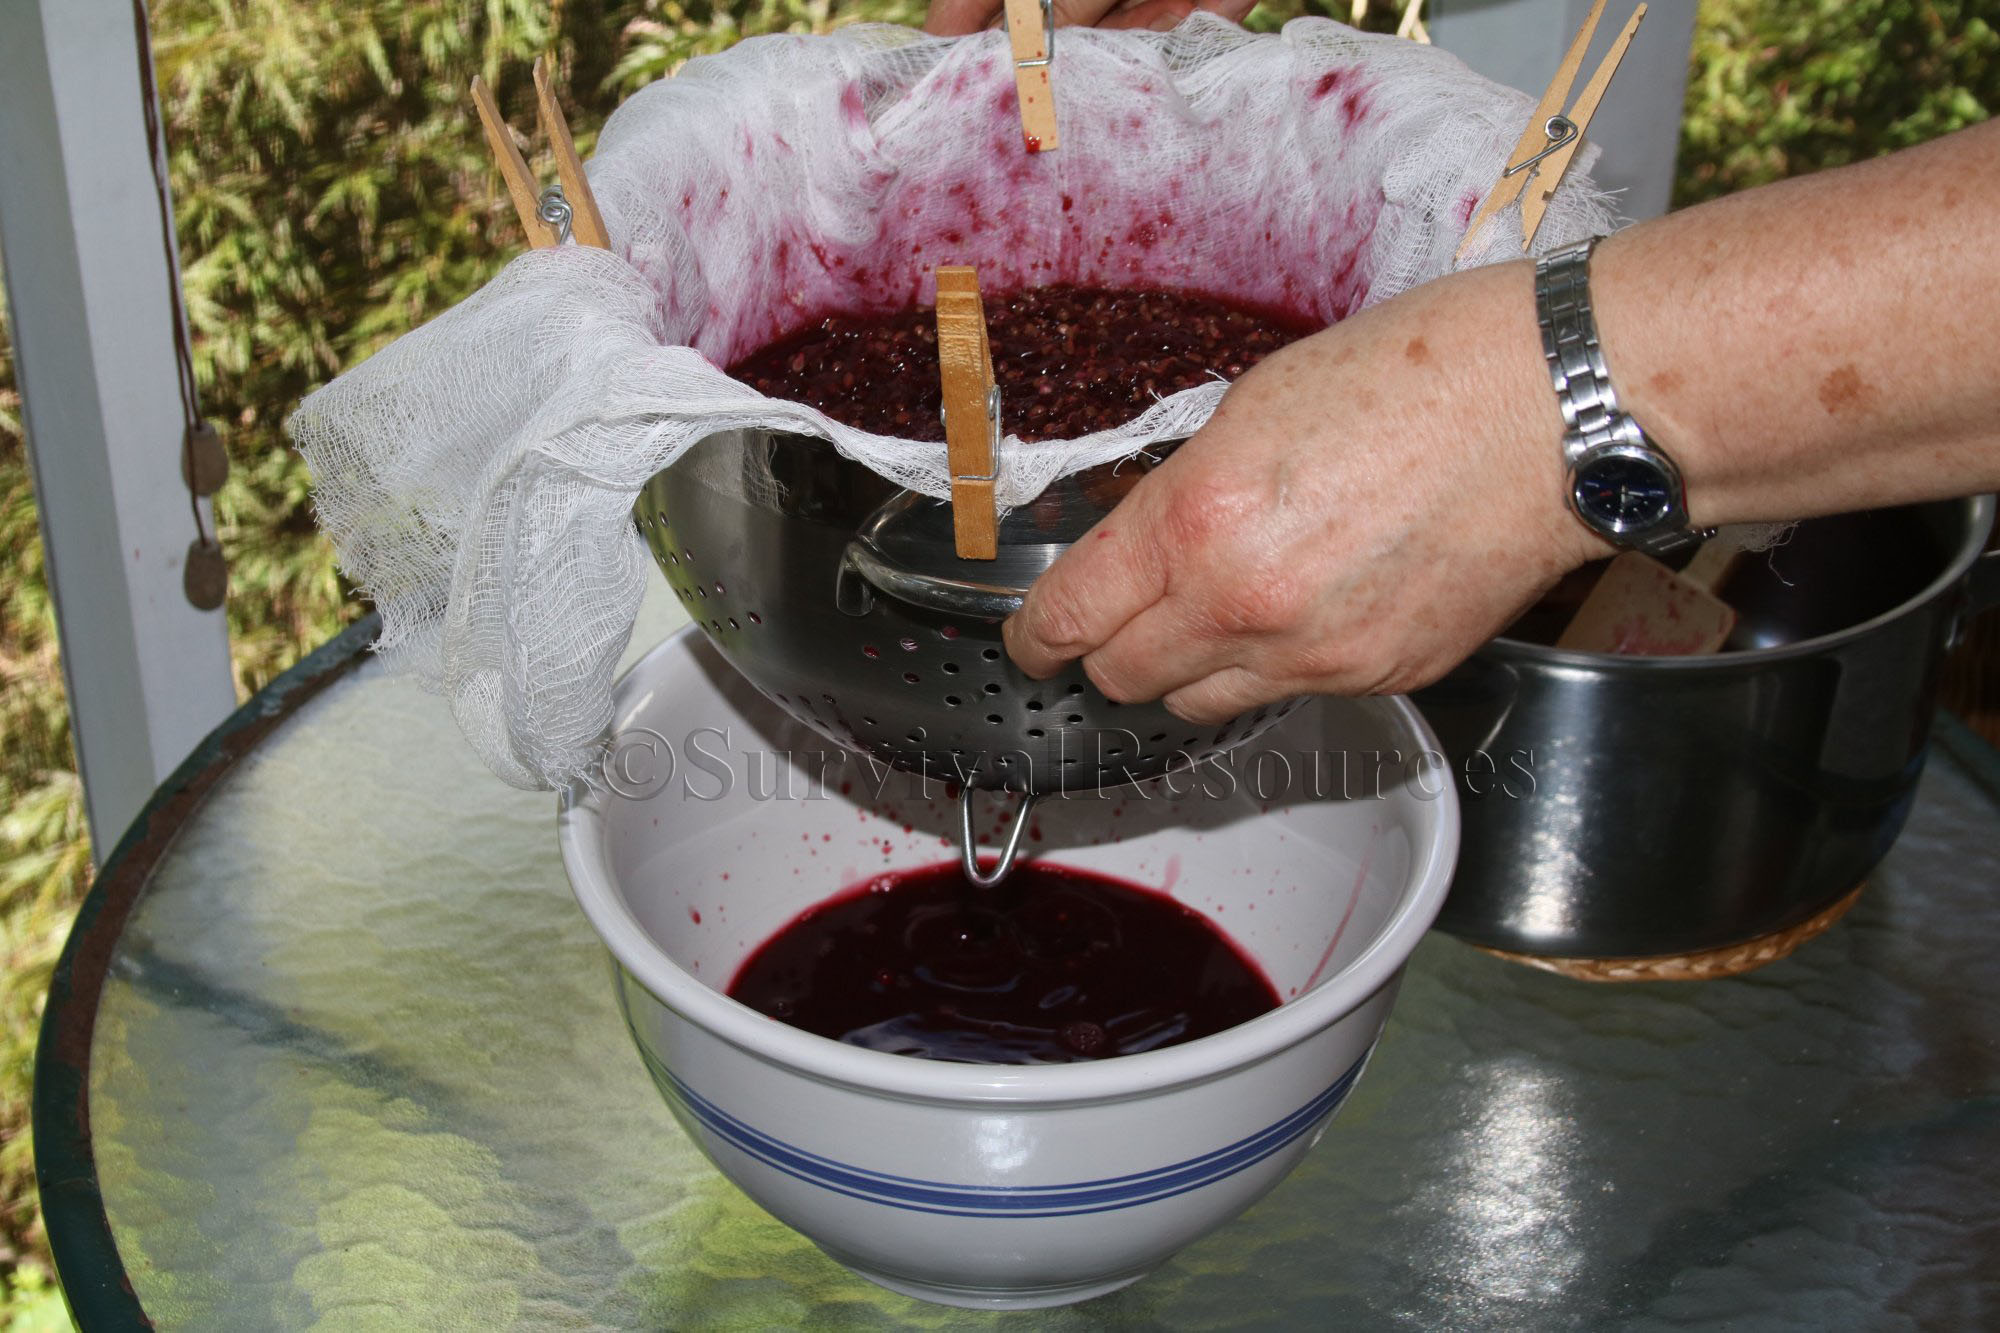
After having let the mixture sit overnight, it is time to squeeze the grapes. We use a large bowl, and a colander lined with cheesecloth. We secure the cheesecloth to the sides of the colander using clothes pins. Instead of cheesecloth, you can also use "jelly cloth" which provides the same function.
Pour the berry mixture into the colander making sure the cheesecloth stays in place. Then lift the colander so that the juice will run into the bowl. Once the juice stops running it is time to squeeze the remaining berries.
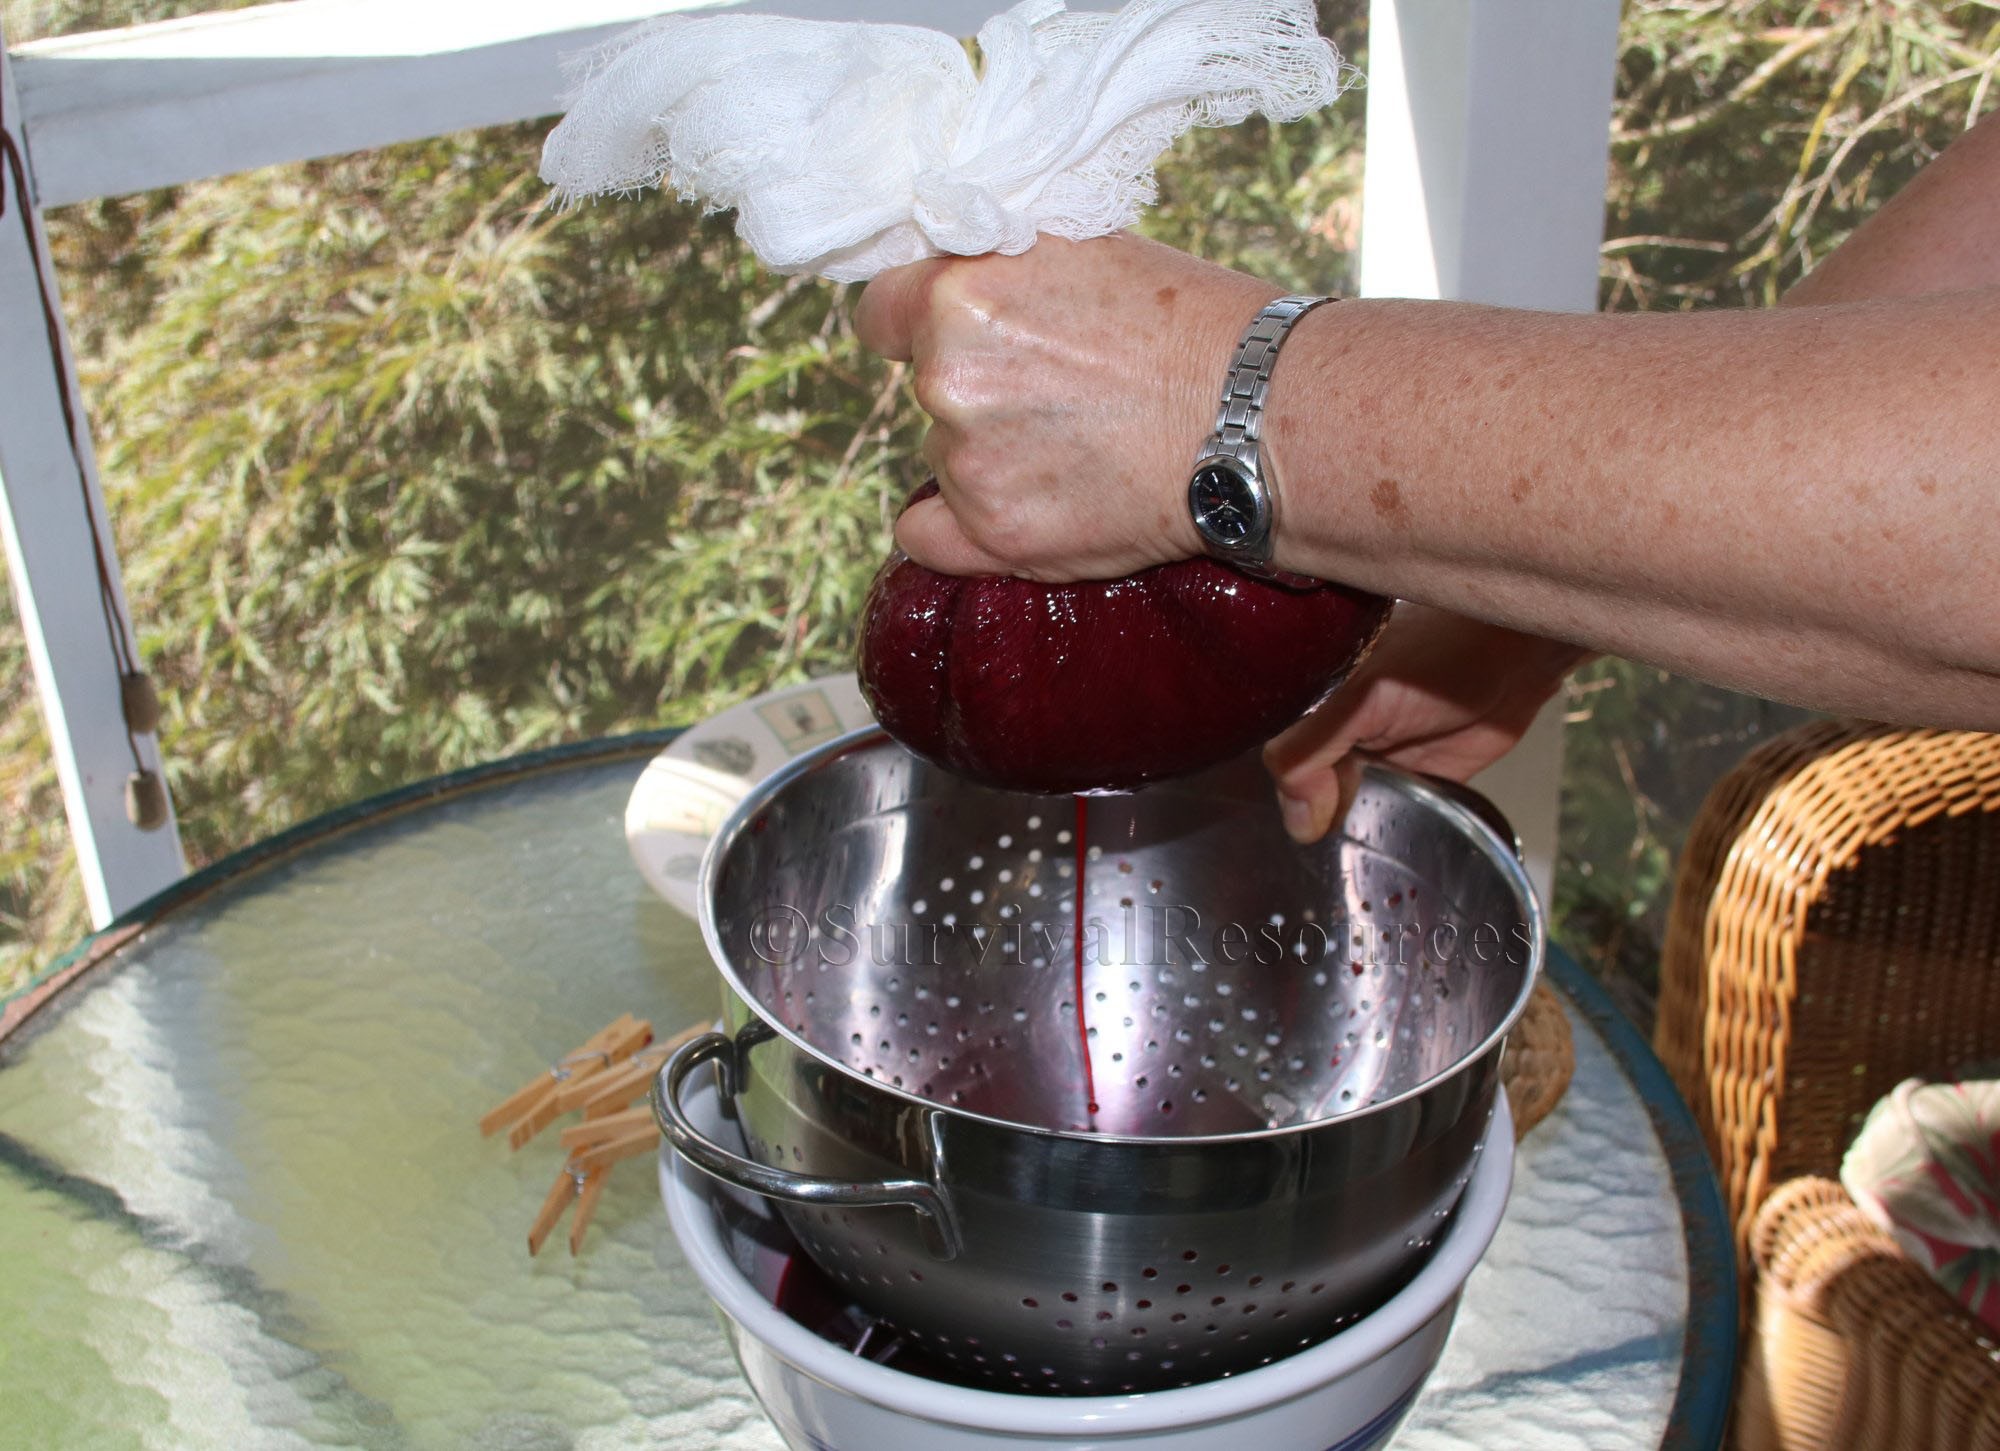
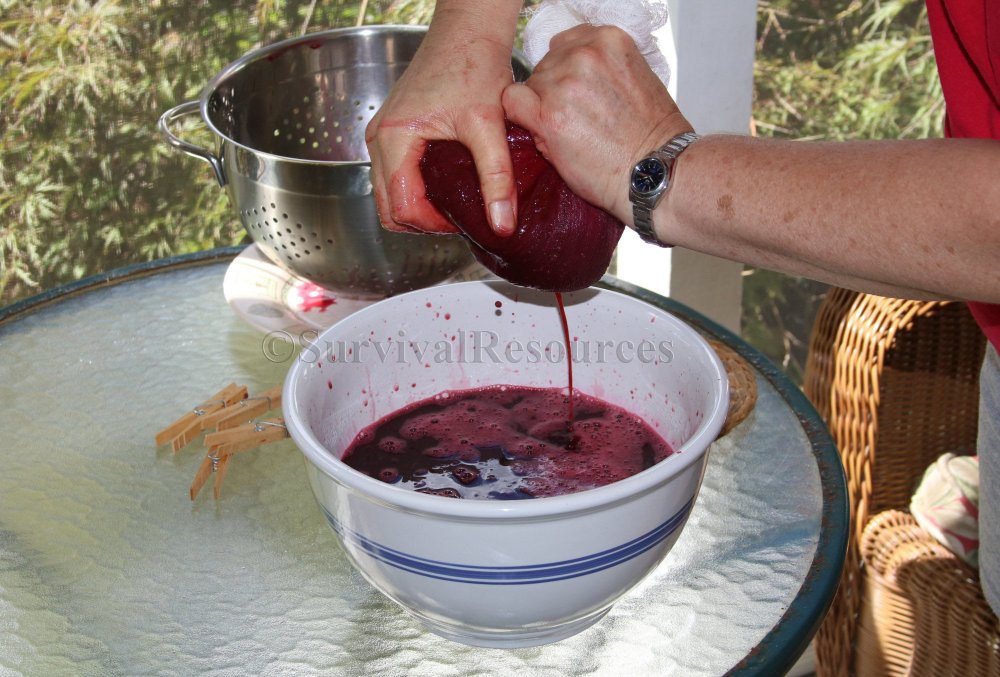
You do this by taking the clothes pins of and gathering the cheesecloth around the remaining berry mixture and twist the gathered cheesecloth around the mixture. At first you can just squeeze the top and juice will run through the colander into the bowl. Then, as the juice slows down, you have to start working the remains by squeezing the sides and working your way around the entire cheesecloth ball of grapes. Take your time and be sure to squeeze out all the available juice. This juice will become your jelly. Once you have obtained as much juice as possible by squeezing the cheesecloth, the remains, which consists of seeds and skin, it can be discarded in your compost pile or bin.
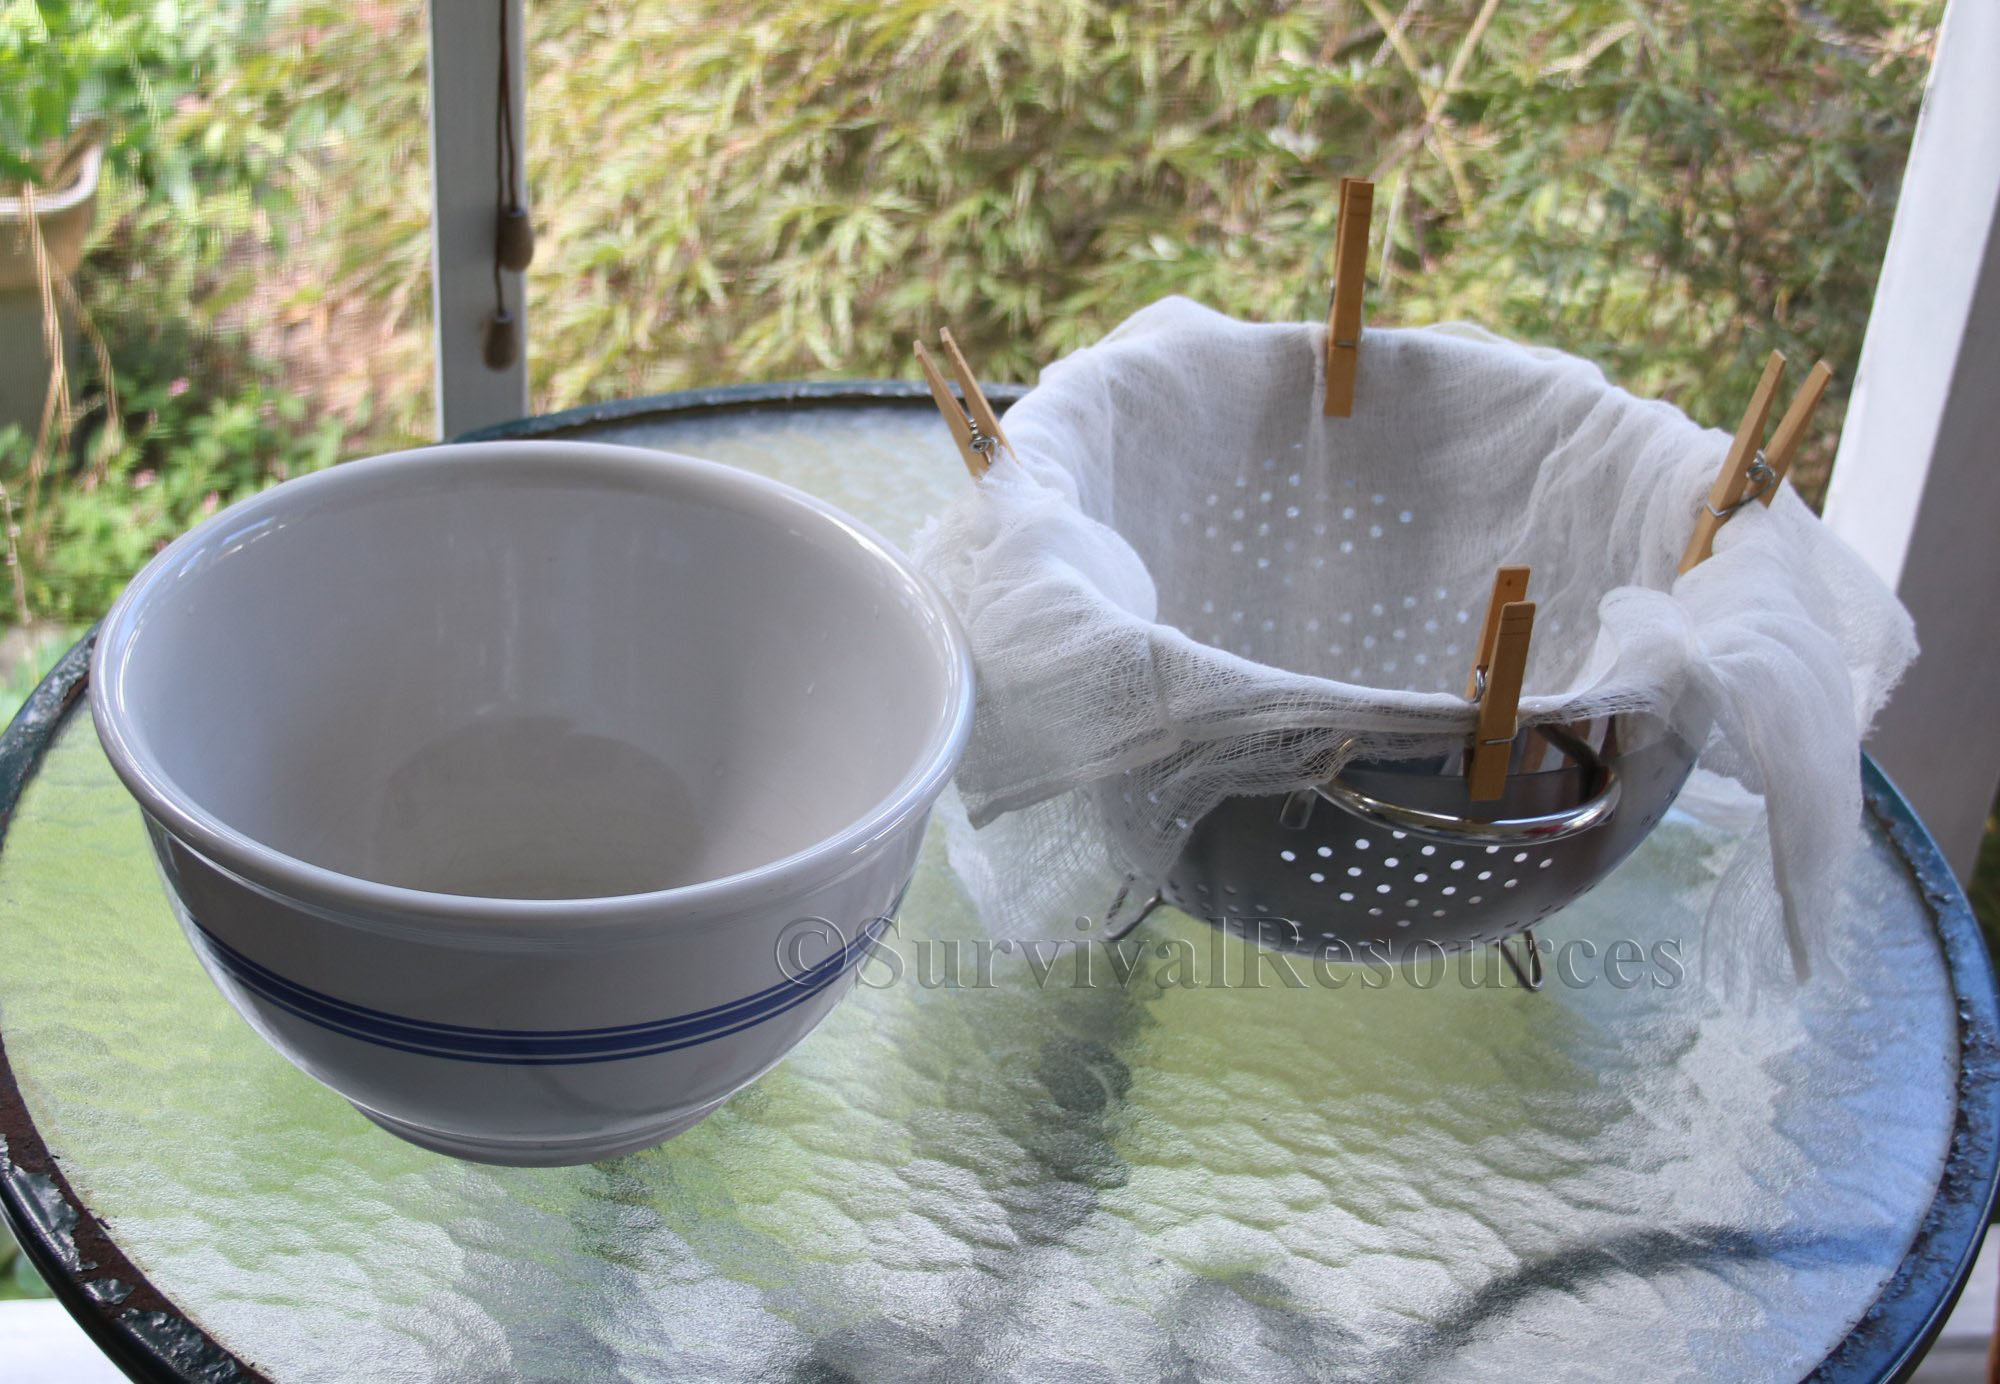 A large bowl, and colander, and cheesecloth used for squeezing the grapes.
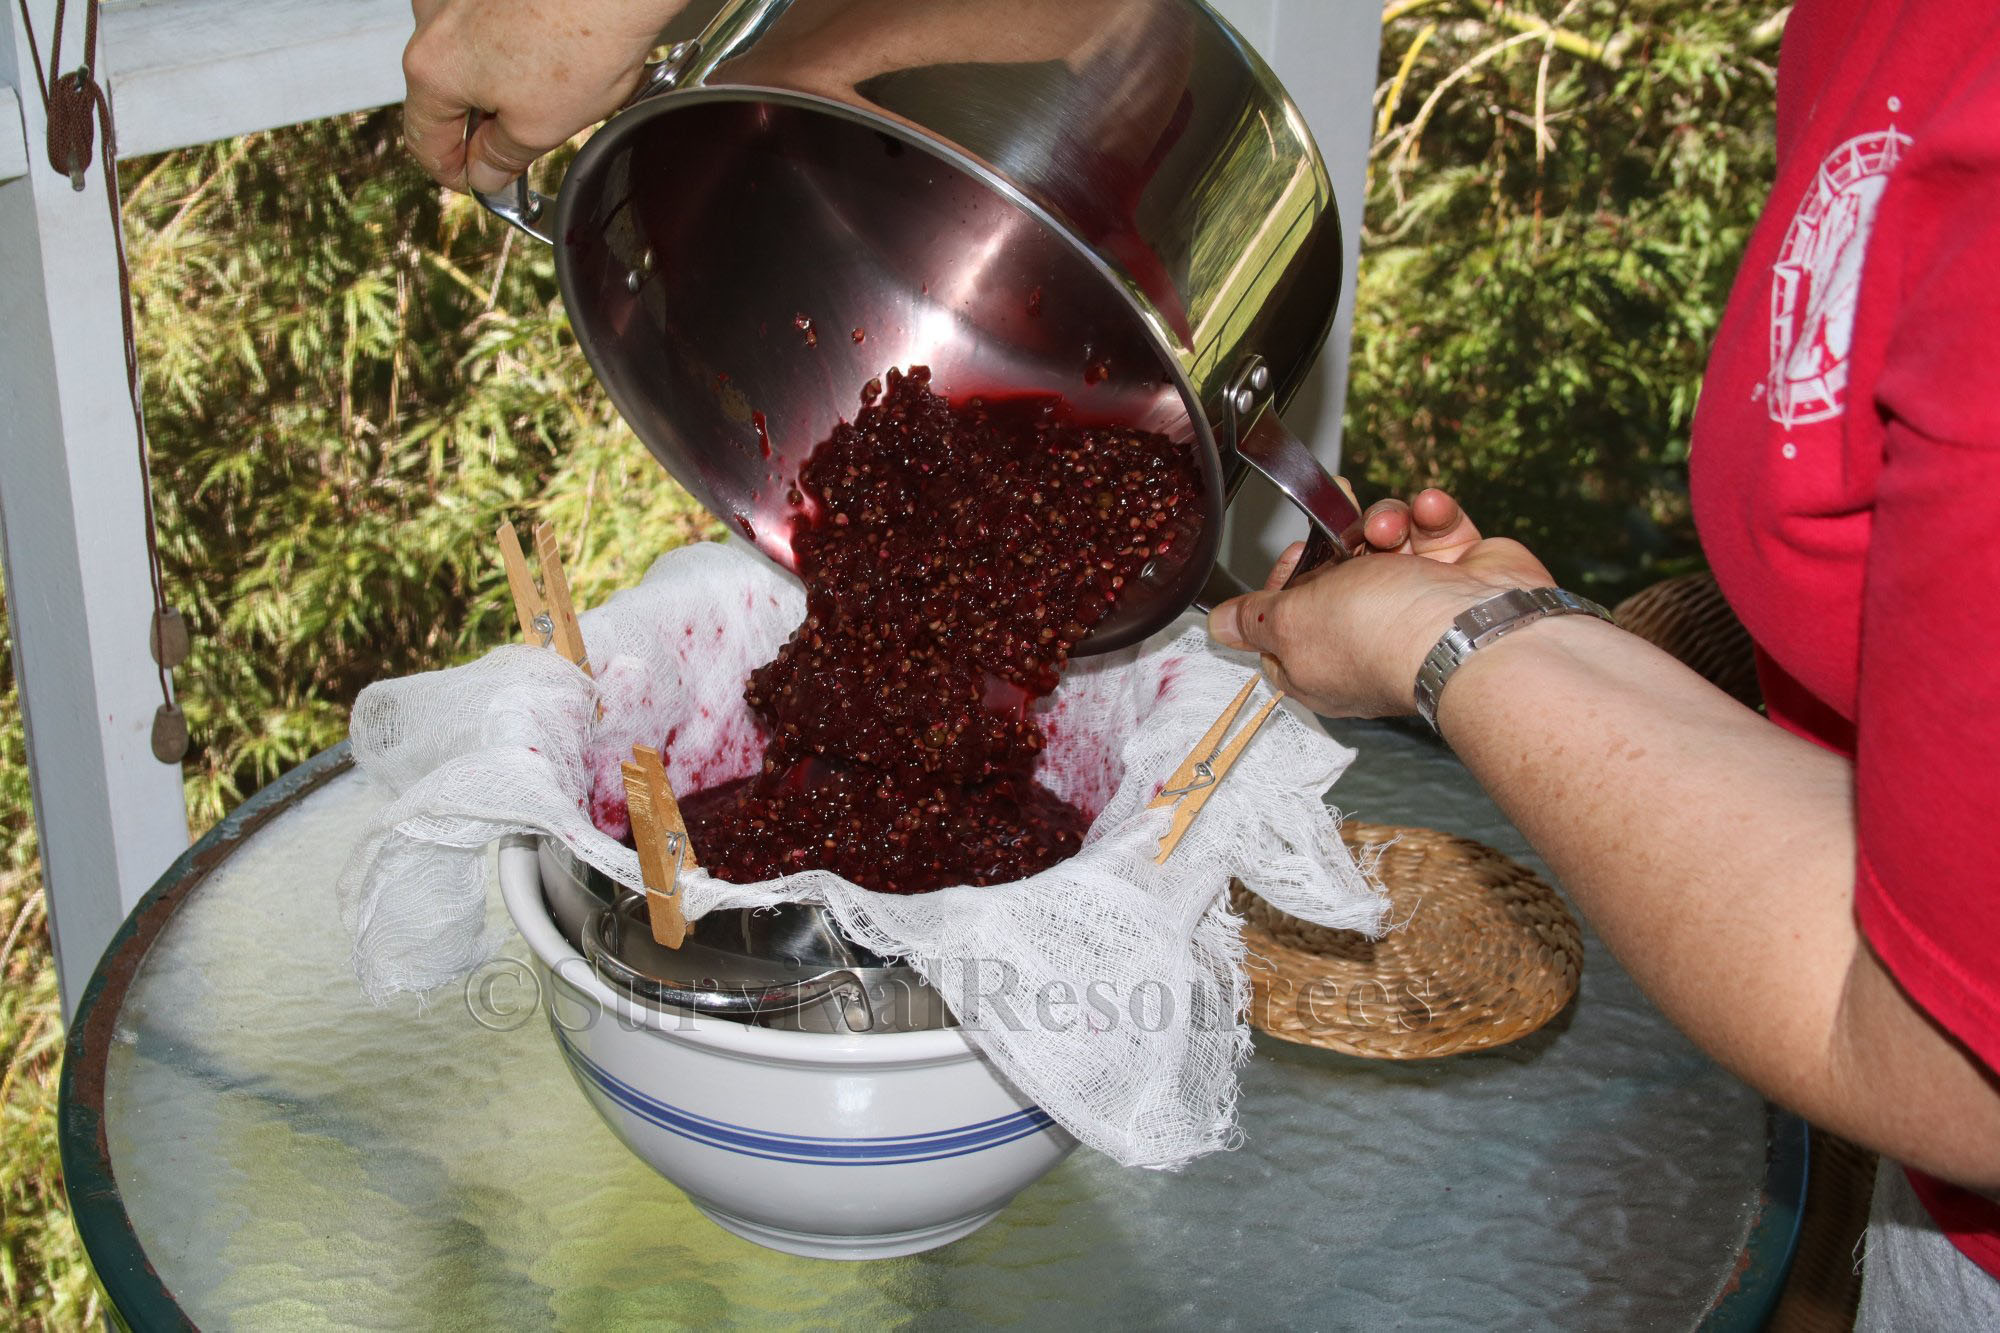 Pouring the berry mixture into the colander lined with cheesecloth.
 Lifting the colander so the juice runs into the bowl.
 Letting the juice run out of the cheesecloth wrapped berries.
 Squeezing the cheesecloth ball all around to get all the juice out.
 A view of the leftover seeds and skin on the left and your jelly juice on the right.
The final step is to make the jelly with the juice you have obtained. First, measure how much juice you have so you know how much sugar to add. Even though this is not an exact recipe, we use 3 cups of sugar for 4 cups of juice. Put it all in a large pot and get it boiling. Use caution here, and watch the pot so it does not boil over.
Keep the mixture at a slow boil until it is jelly. There are several ways to determine when it is done. One way is with a candy thermometer. When the thermometer reaches 220º it should be of the correct consistency for jelly. Denise uses what we call the "freezer method." When she thinks it is about right, she places a small amount of the mixture on a small dish and places it in the freezer until it is completely cold, only a few minutes. She then uses a finger to see if the consistency is as desired. We like it so it doesn't run, and is a little thick, so it is spreadable. But some like it more juicy. The finished product is up to you and preference.
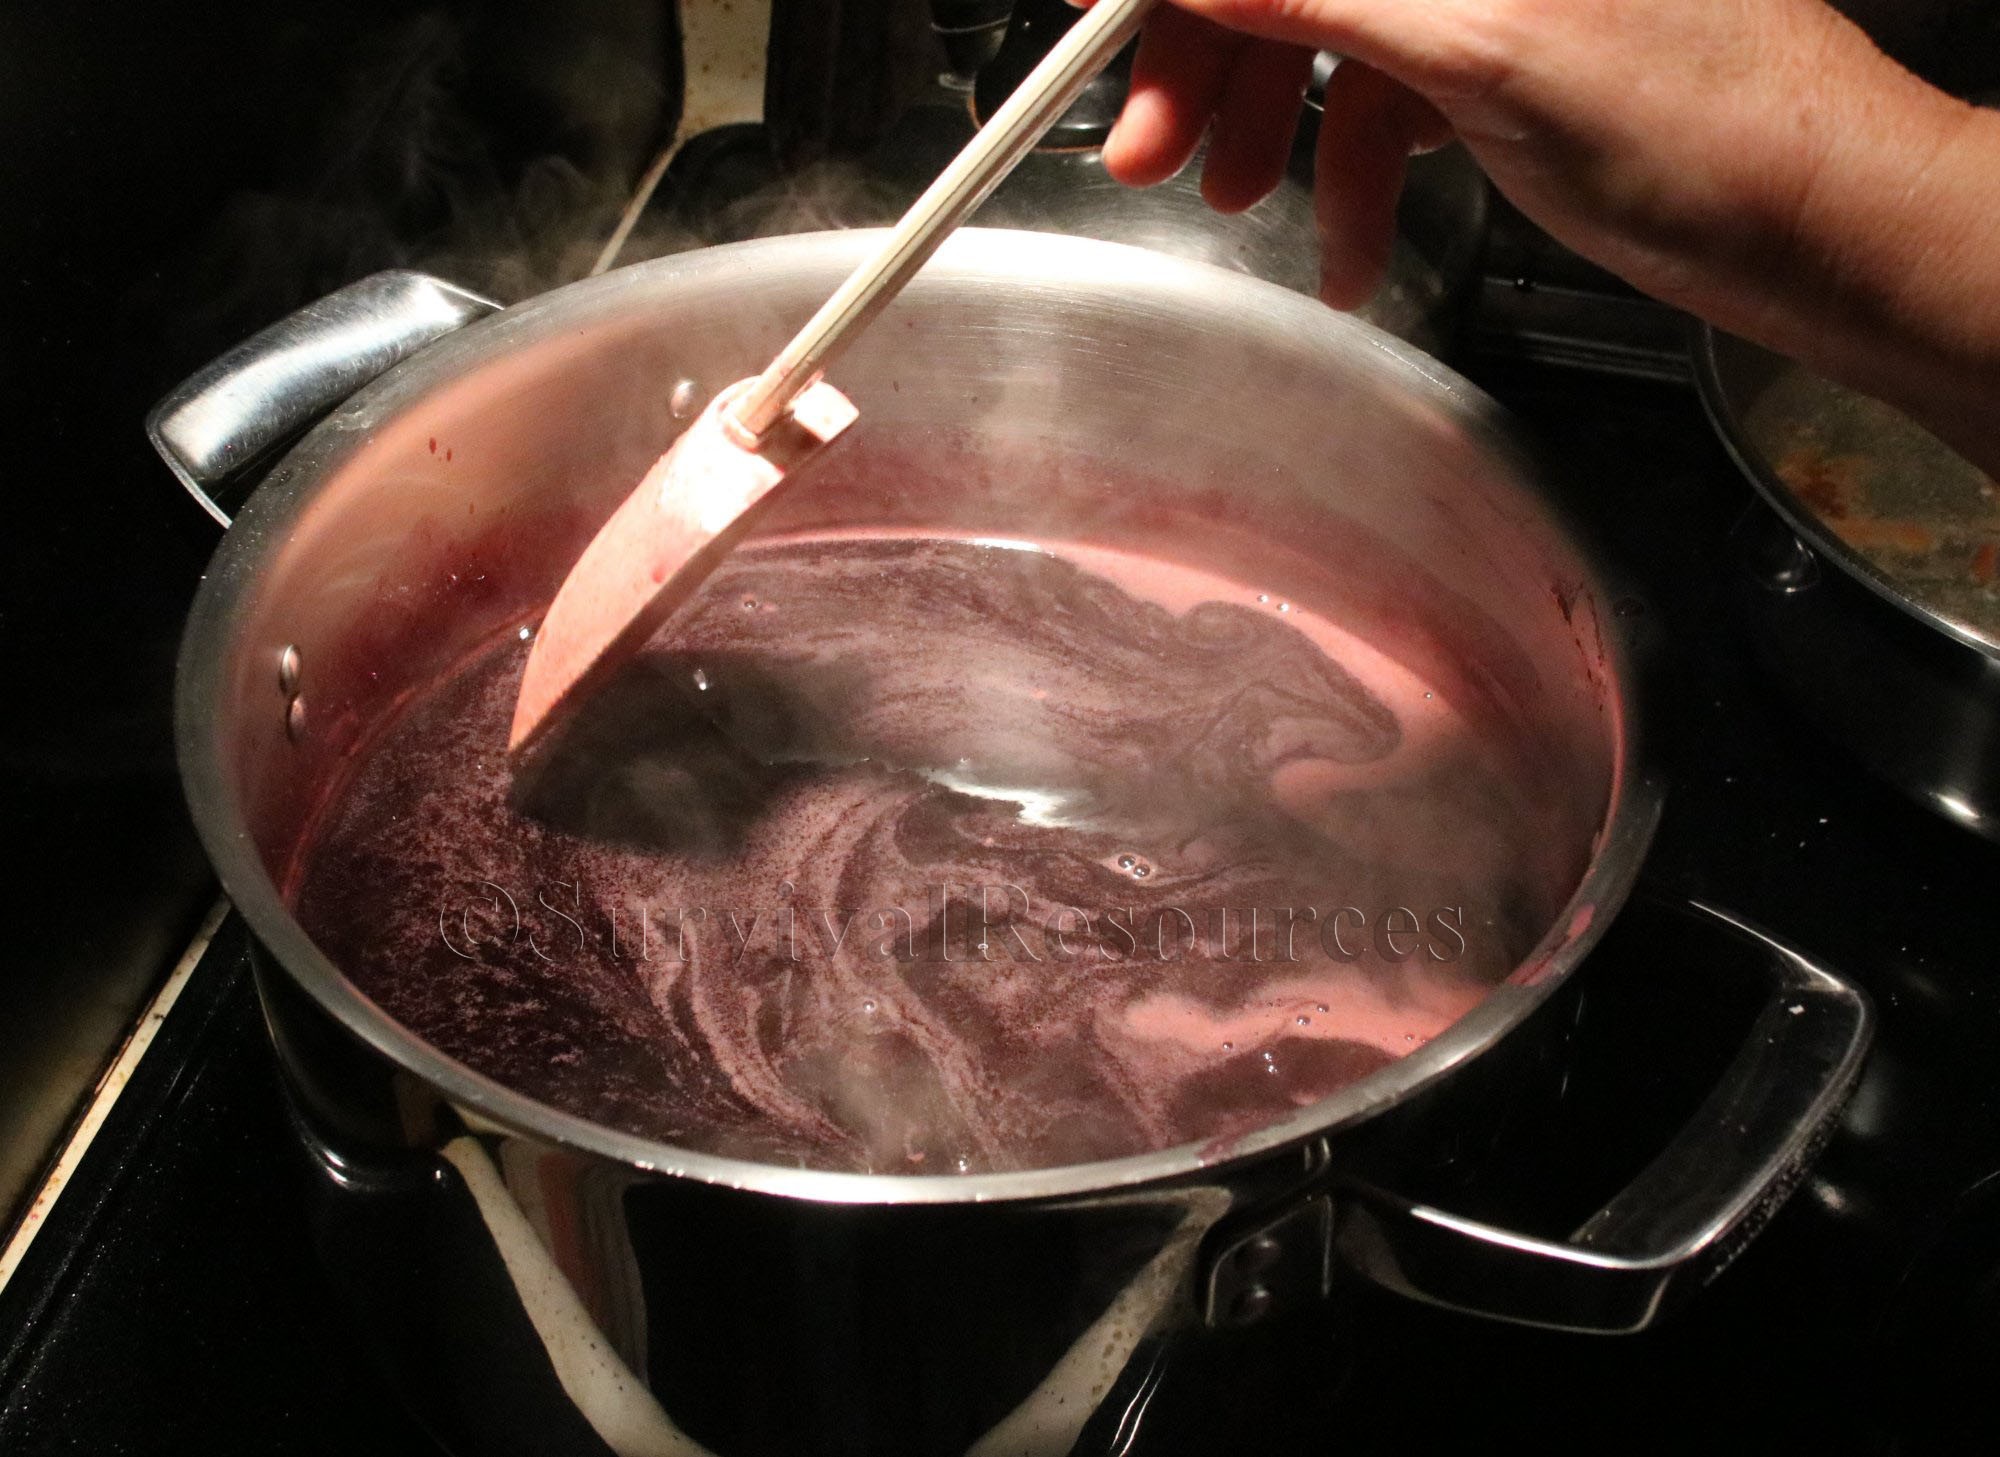 Keeping the juice at a slow boil.
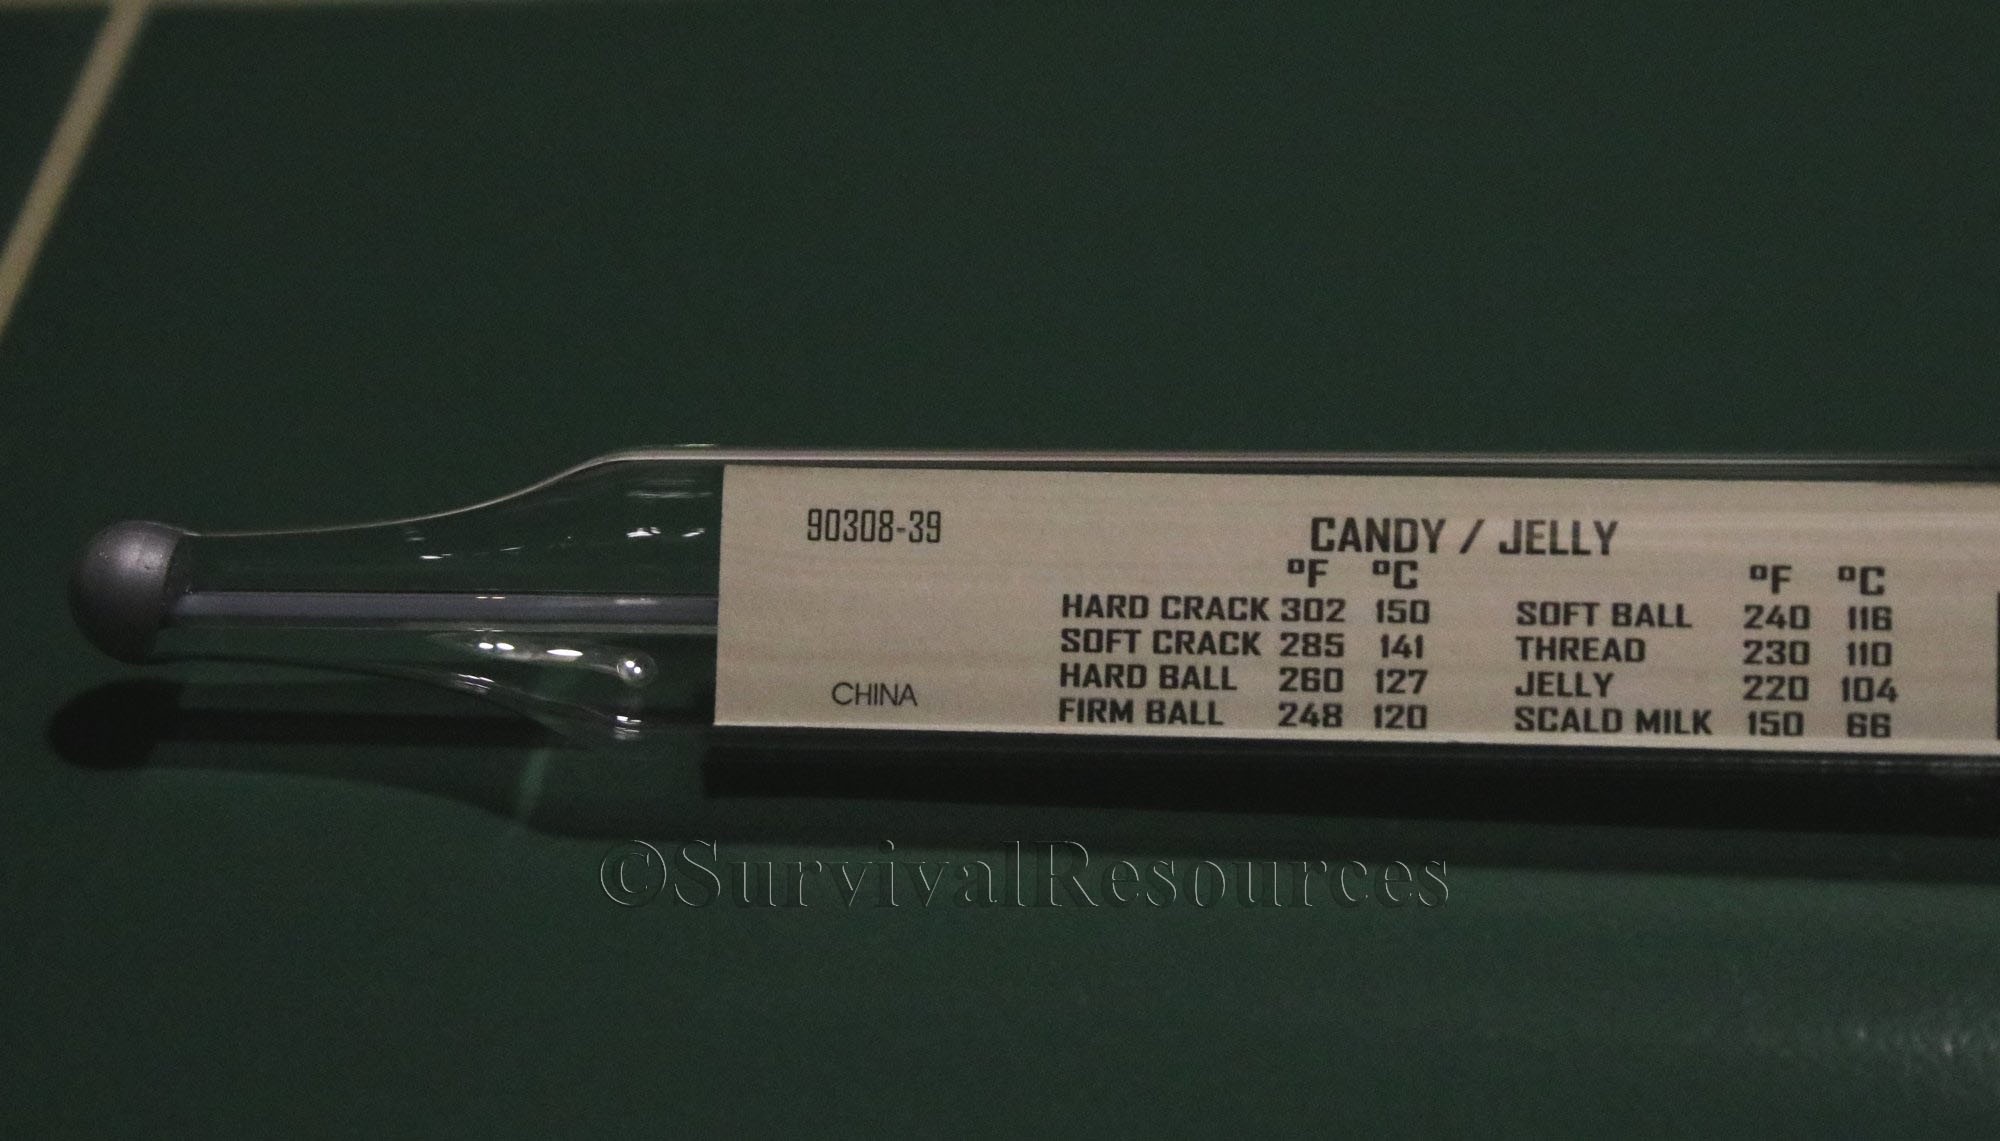 A view of a candy thermometer and you can see for "jelly" it is 220º.
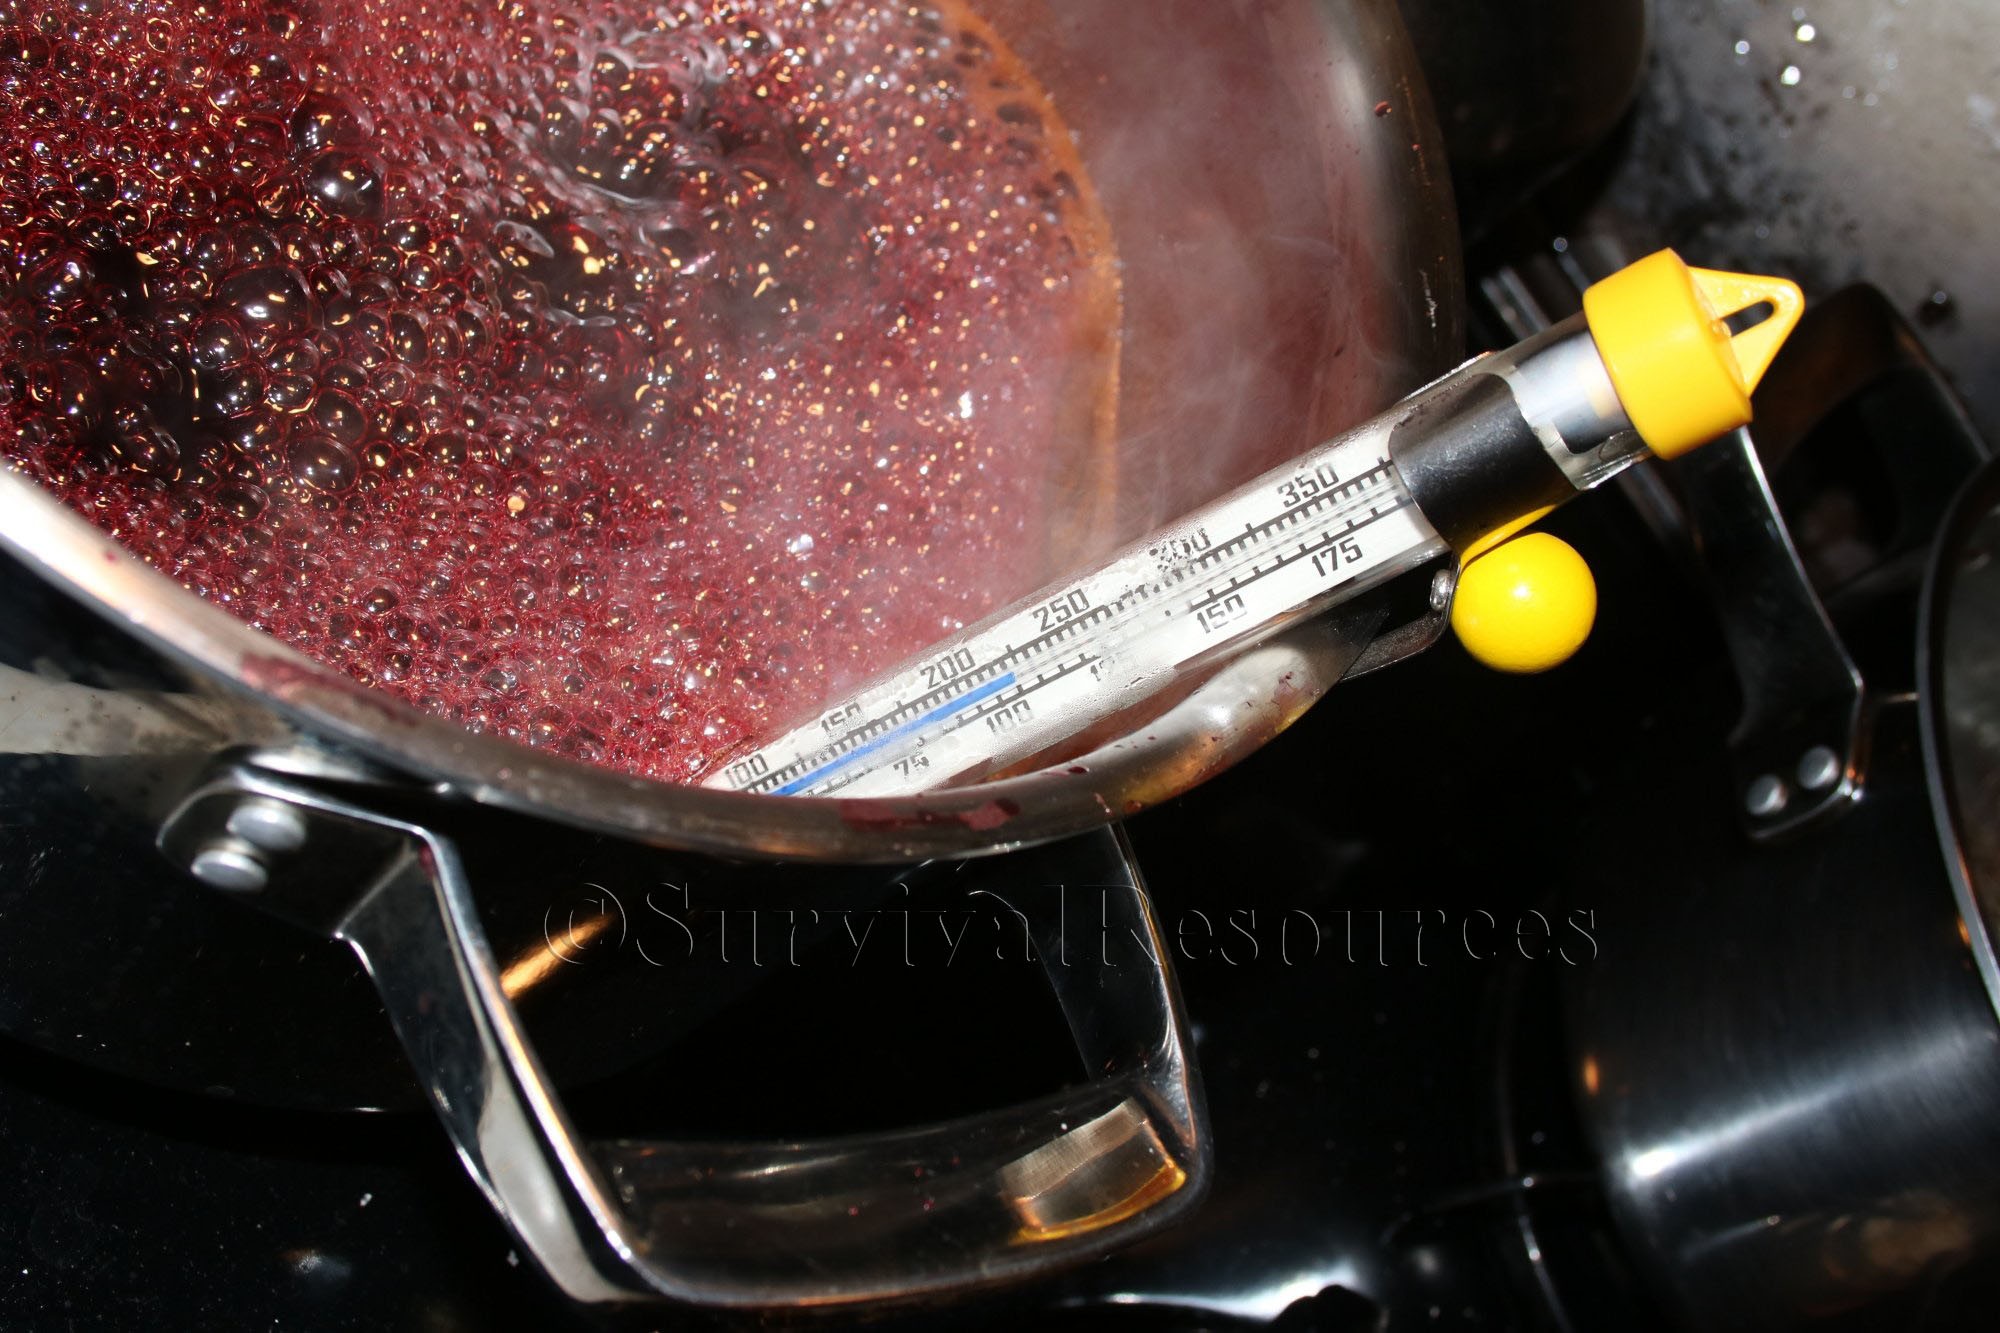 This shows a candy thermometer we placed in the pot just to show how to use it.
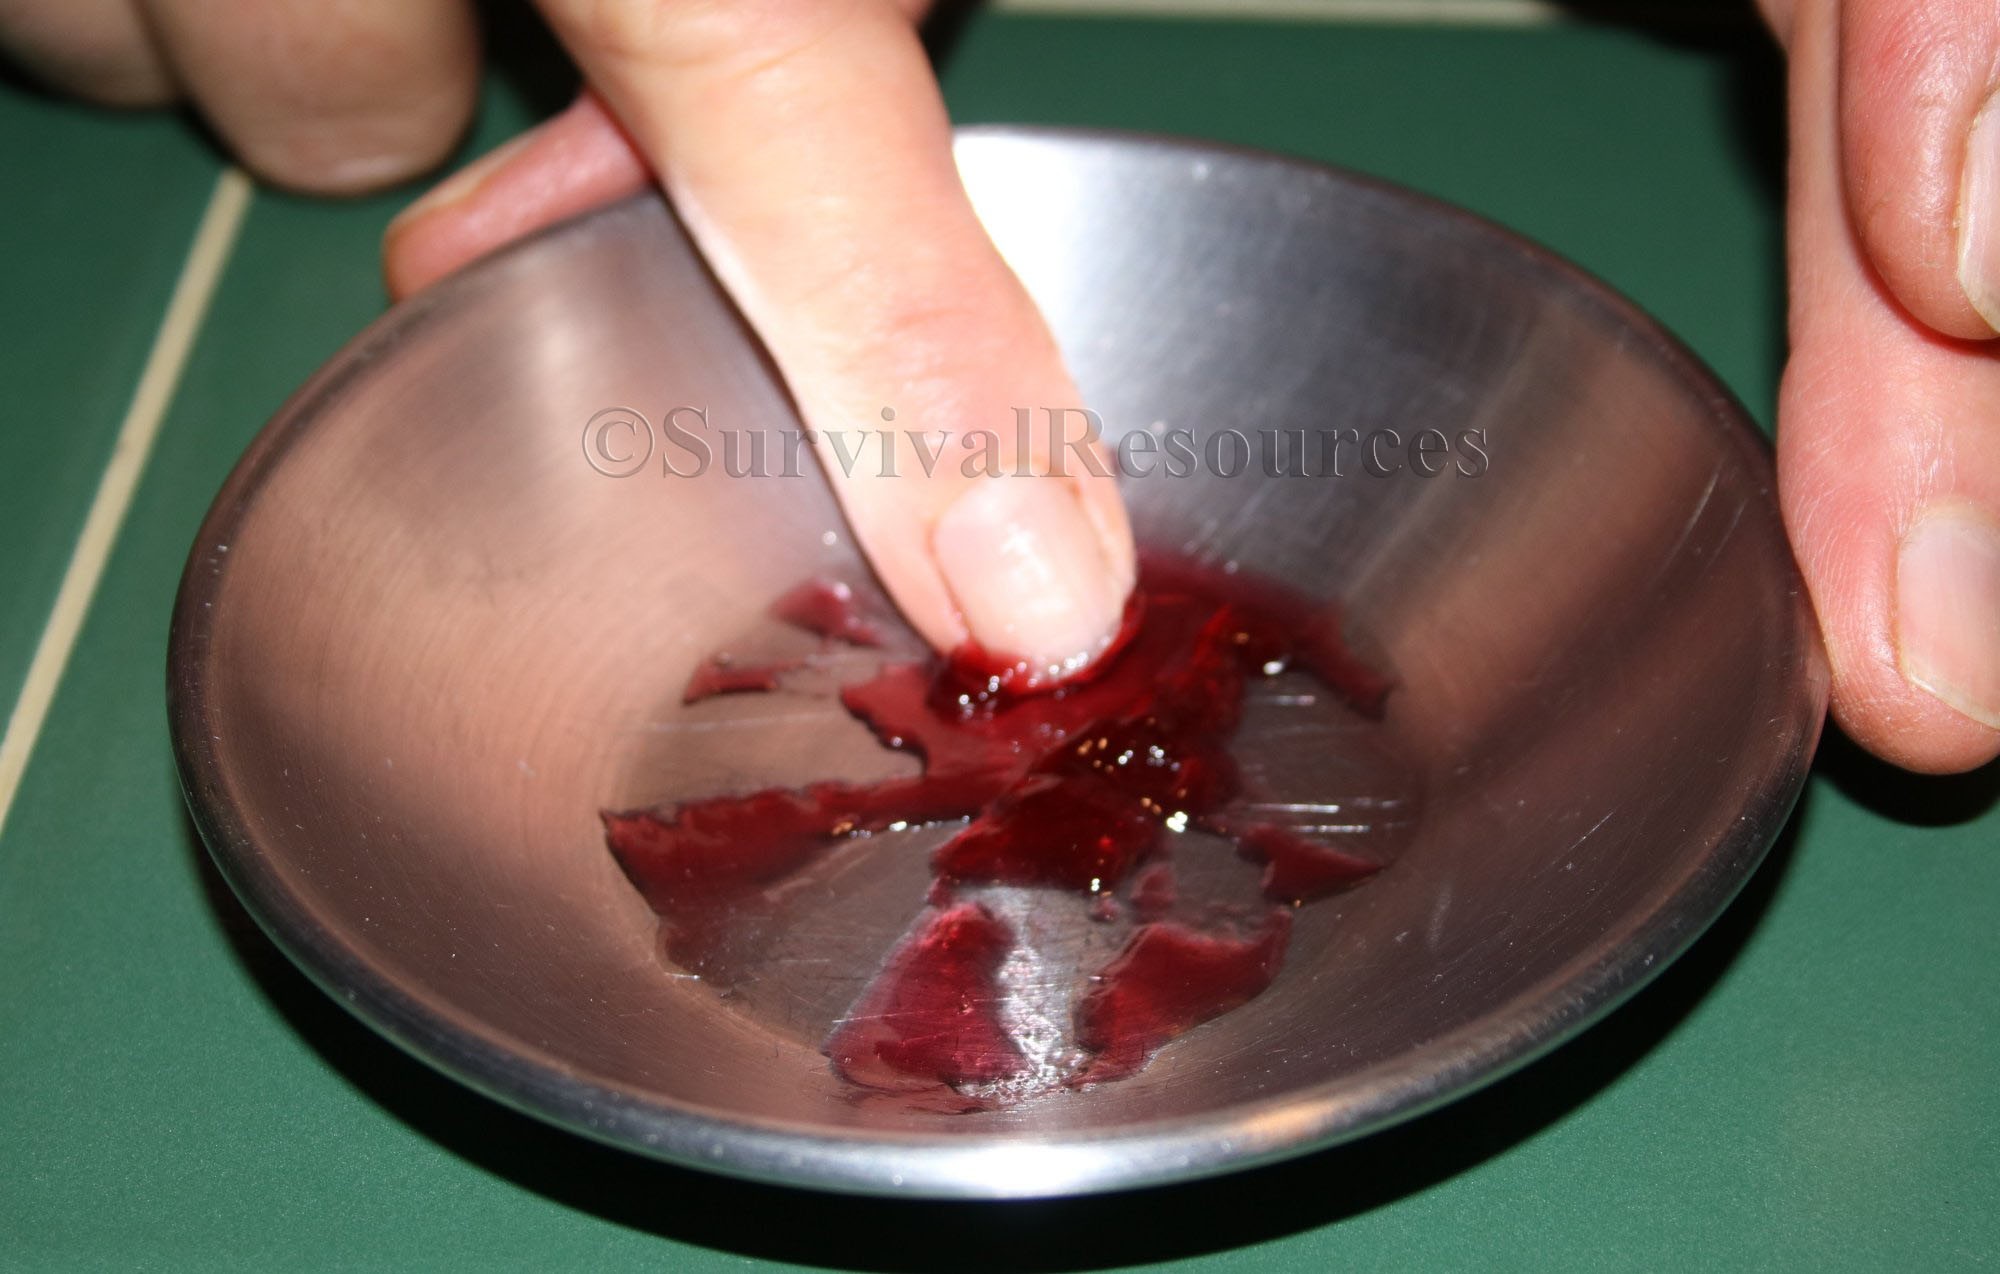 This shows Denise using her finger on the freezer test to determine if the consistency of the jelly is to our liking.
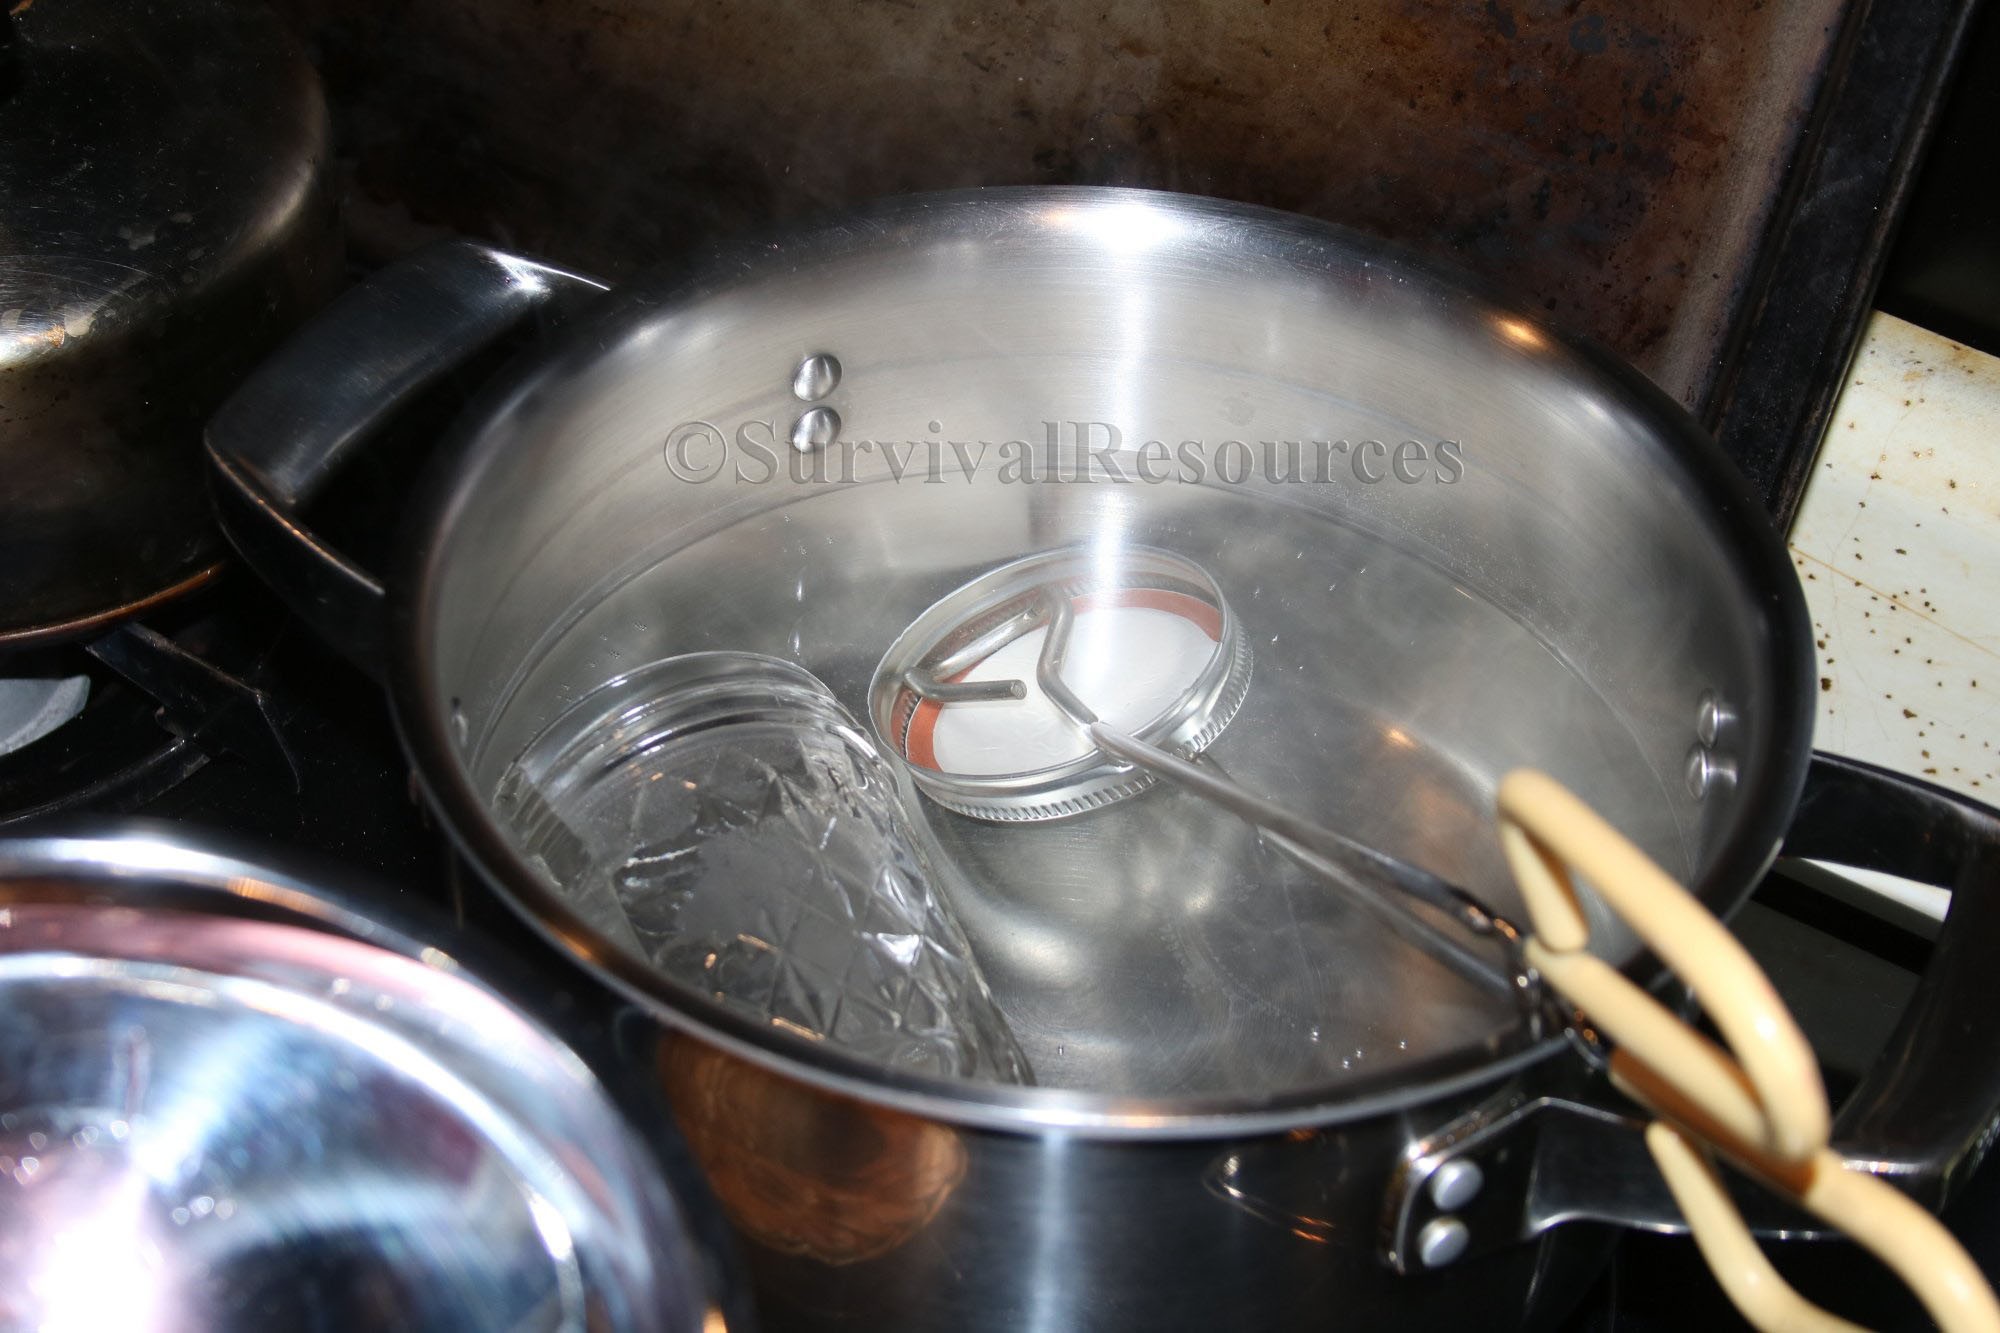
Once the jelly is done it has to be placed in jars. We use "Ball" Quilted Crystal 8 oz. Jelly Jars. Denise places two jars in a separate pot of boiling water. Using tongs, she then takes one jar and places it on a small mat. She then drops a lid and band into the water.
Using a canning funnel, the jelly mixture is poured into the jar. A lid is taken from the boiling water with the tongs and placed on the jar making sure it is set centered. Then a band is taken from the boiling water with the tongs and screwed onto the jar, holding the lid in place. Tighten the lid down tight by hand. Set the jar aside and continue the same process until you run out of jelly.
 Using tongs to take the jelly jar out of the boiling water.
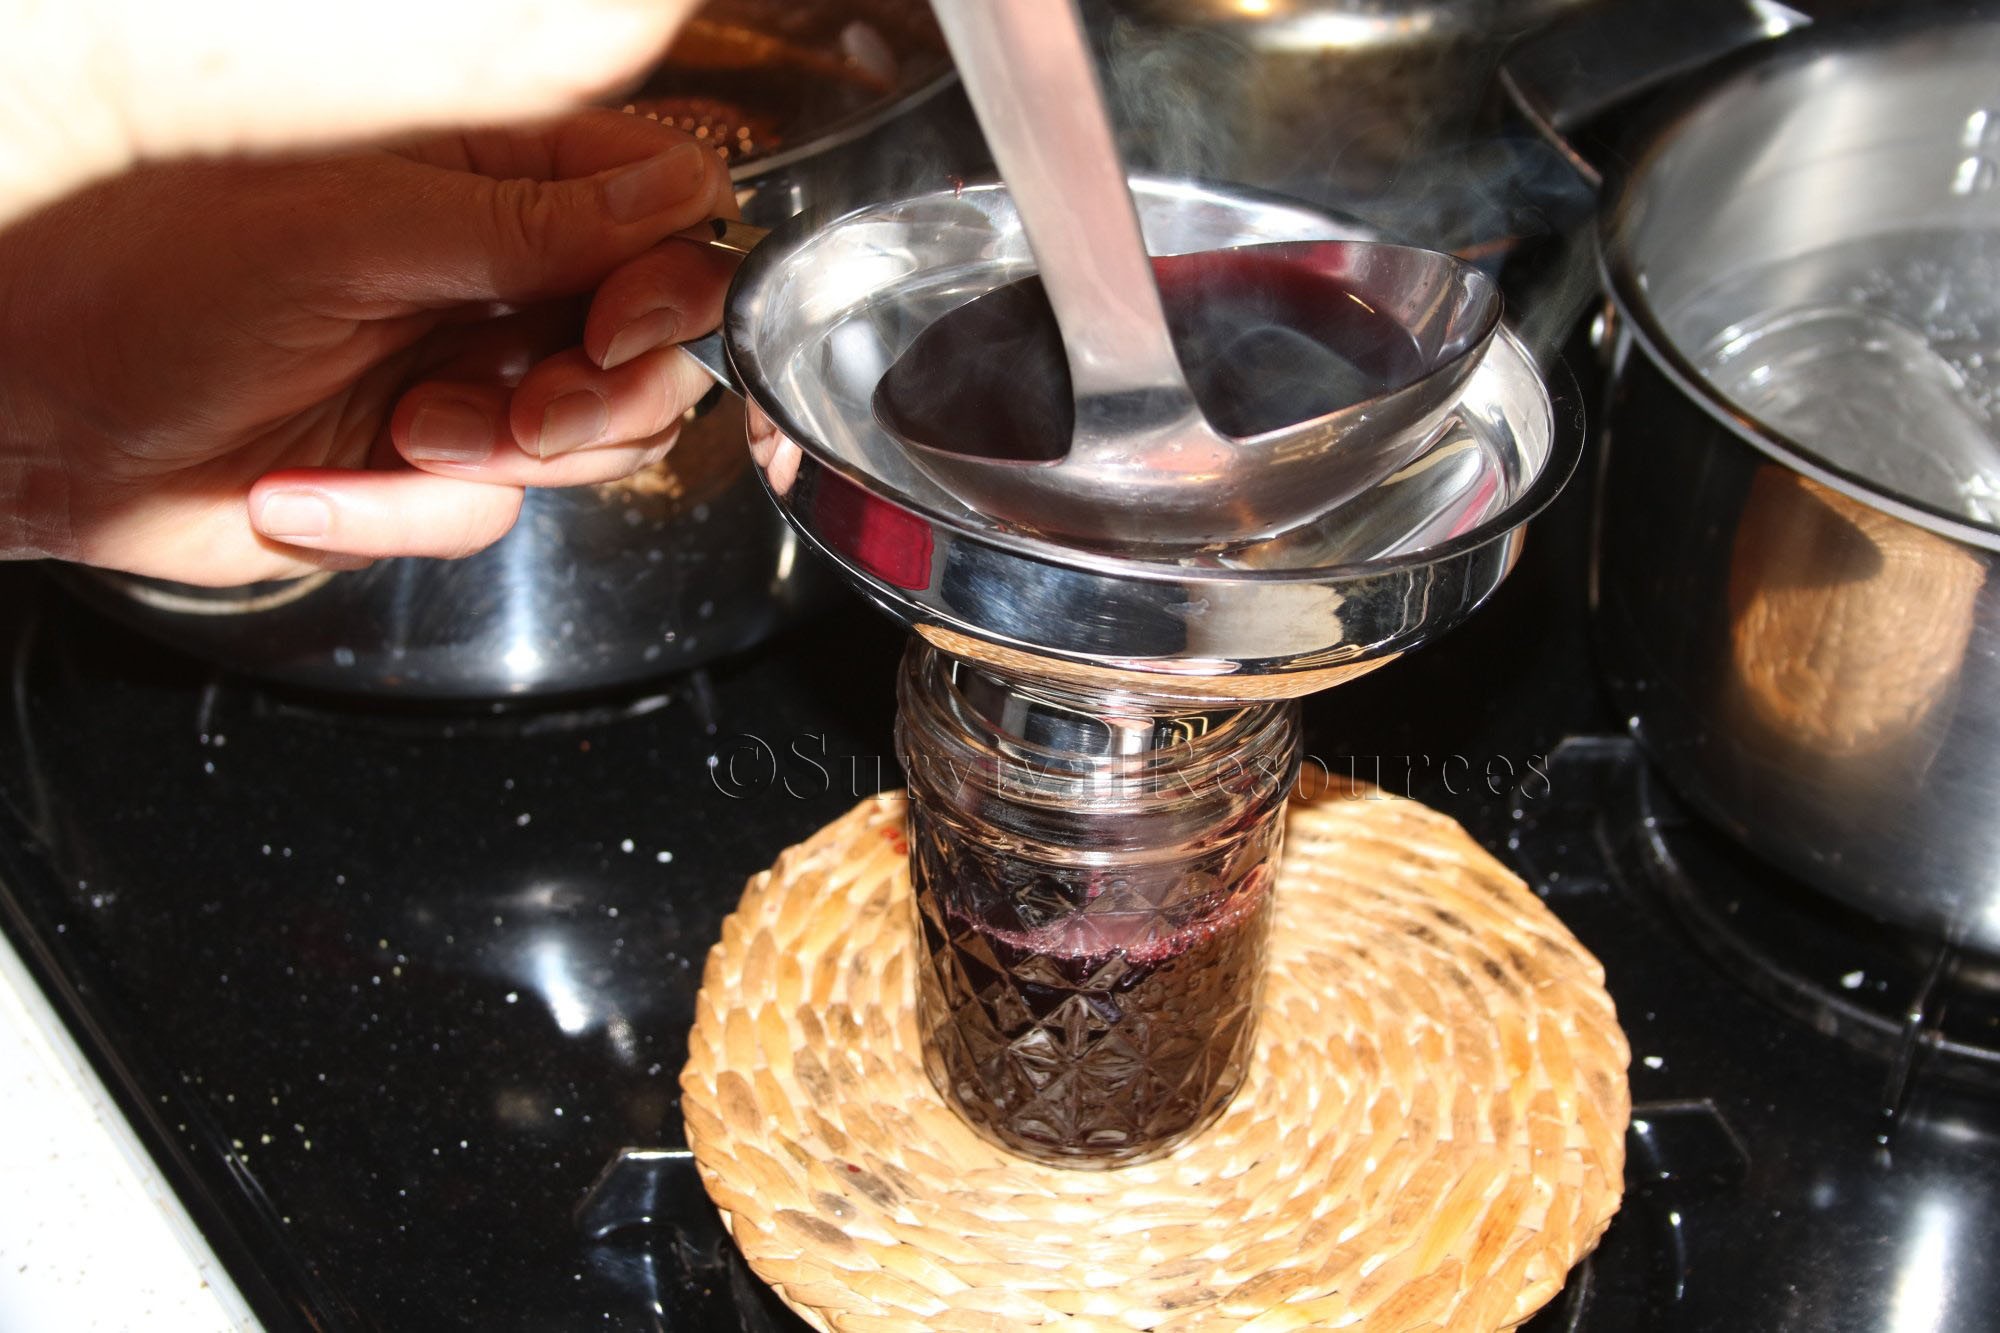 Using a canning funnel to pour the jelly into the jars.
 Using tongs to lift a lid and band out of the boiling water.
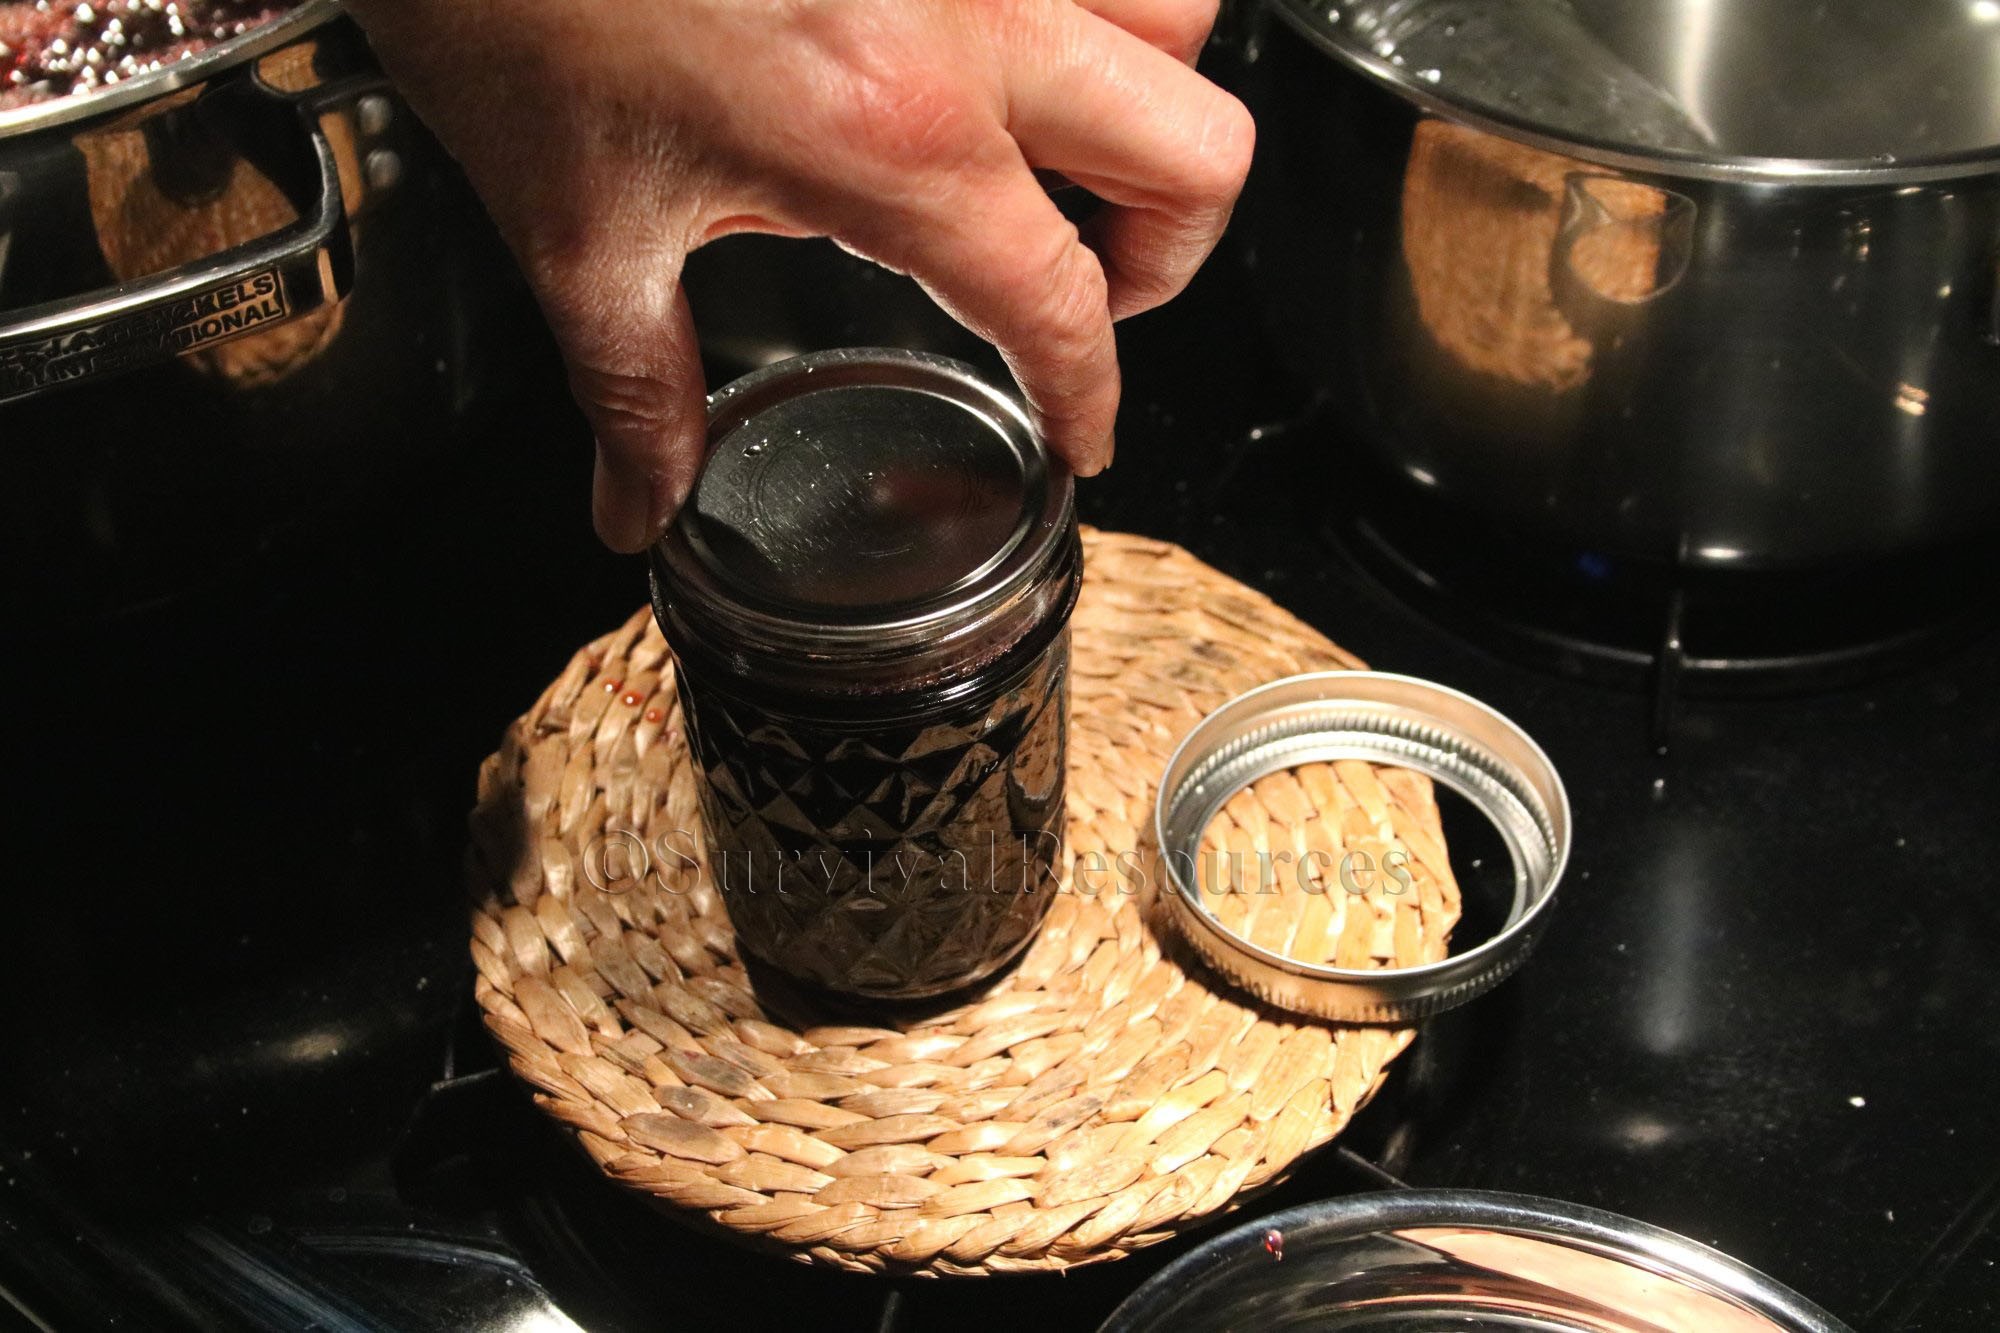 Placing the lid on the jar making sure it is centered.
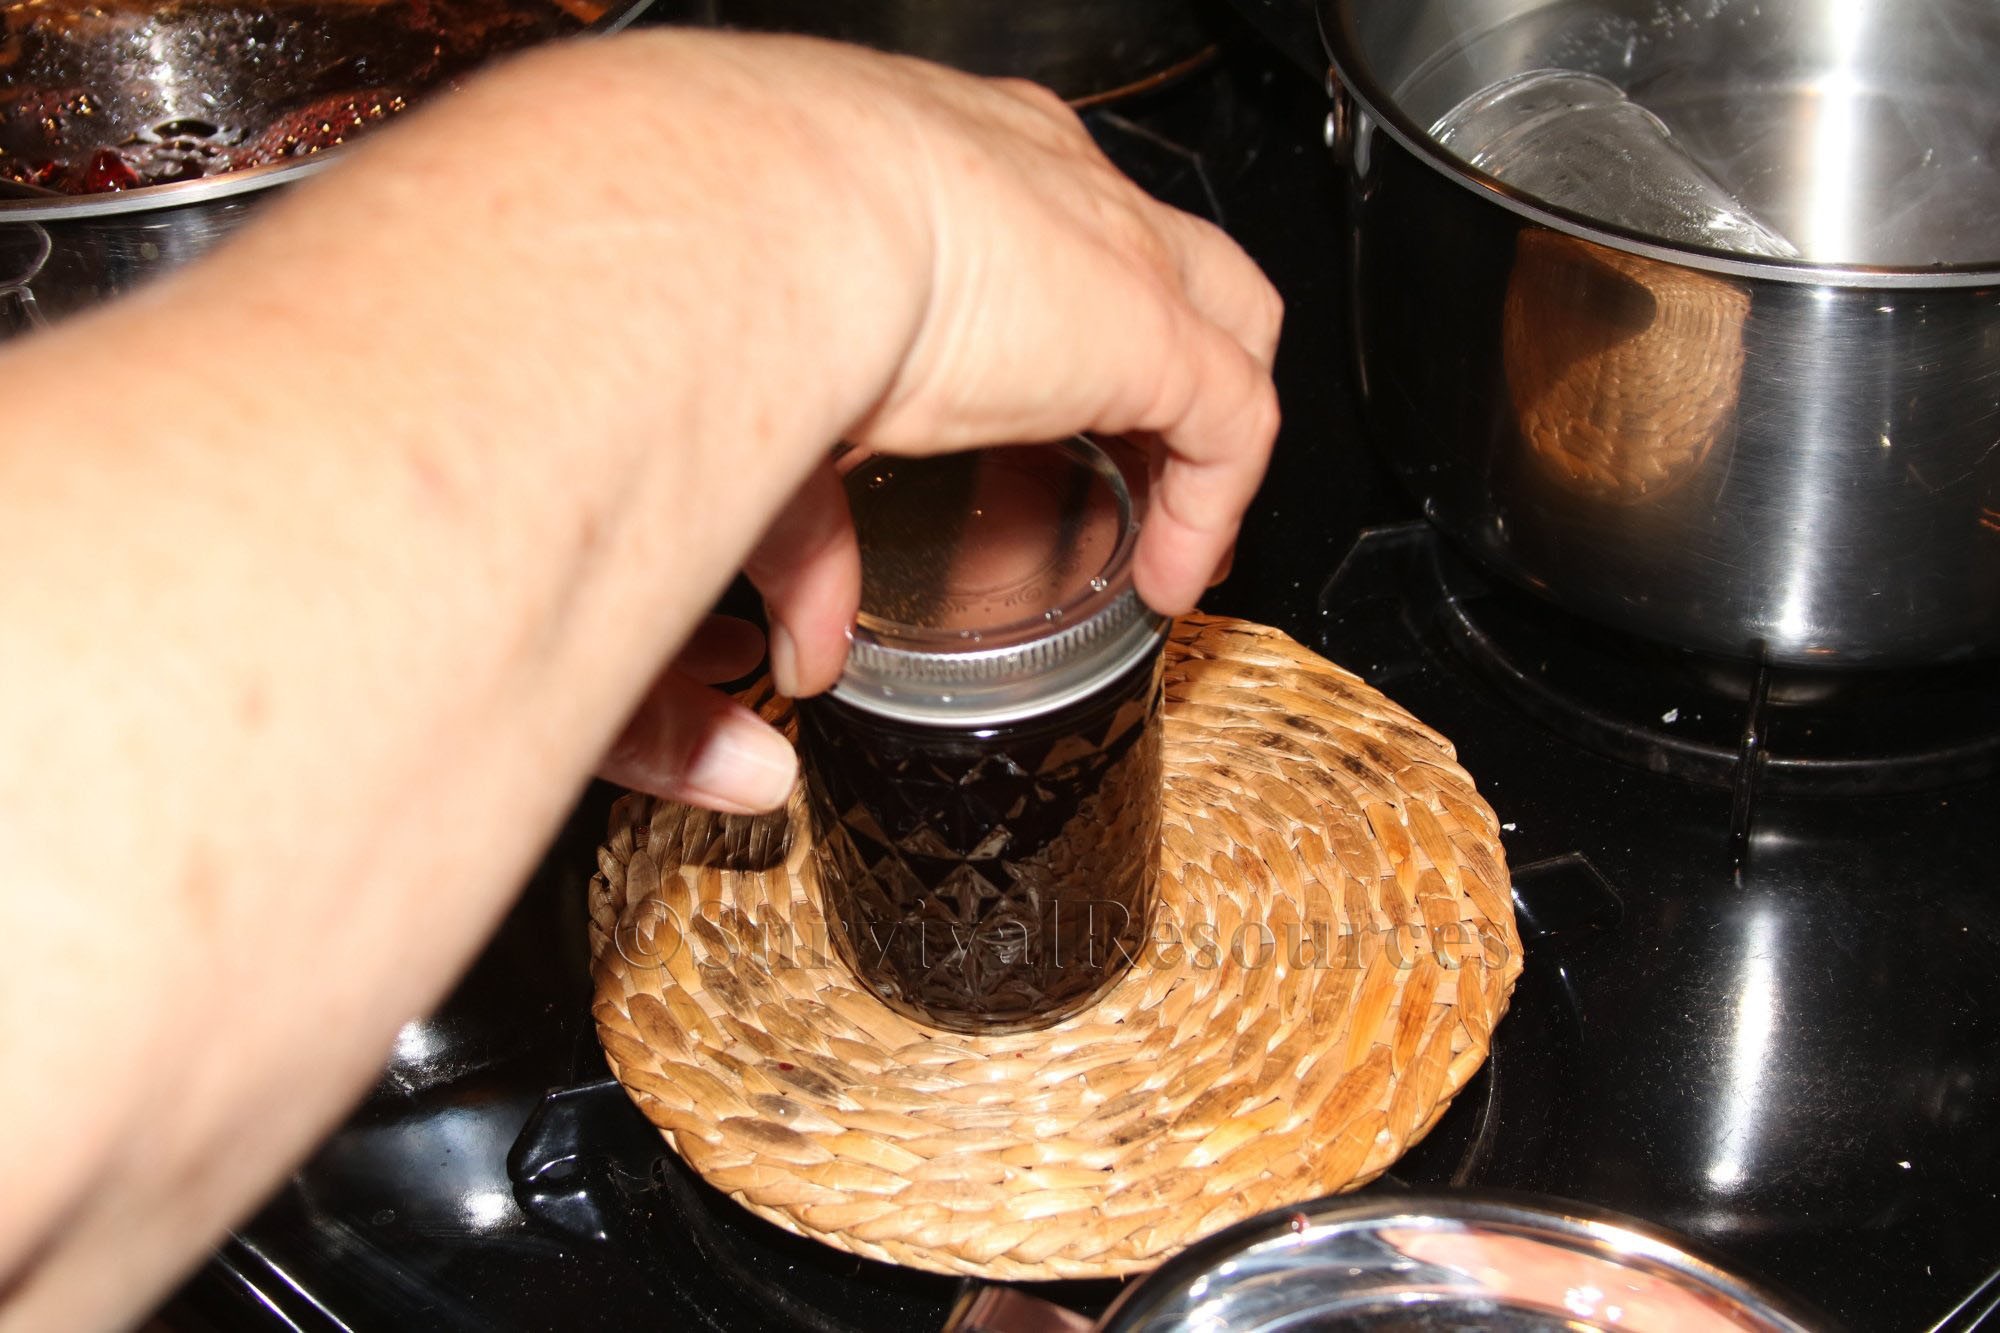 Placing the band on the jar and tightening by hand.
Put the finished jars in a place where they won't be bothered and let them cool. Test to be sure the lids have sealed. You can often hear the "pop" when they seal. Press down on the top center of the jar and if the center moves up and down, the jar is not sealed.
From the two batches we were able to fill sixteen jars for the pantry. The picture below only shows fourteen, but one was already being used when the photo was taken, and another one was given to our neighbor.
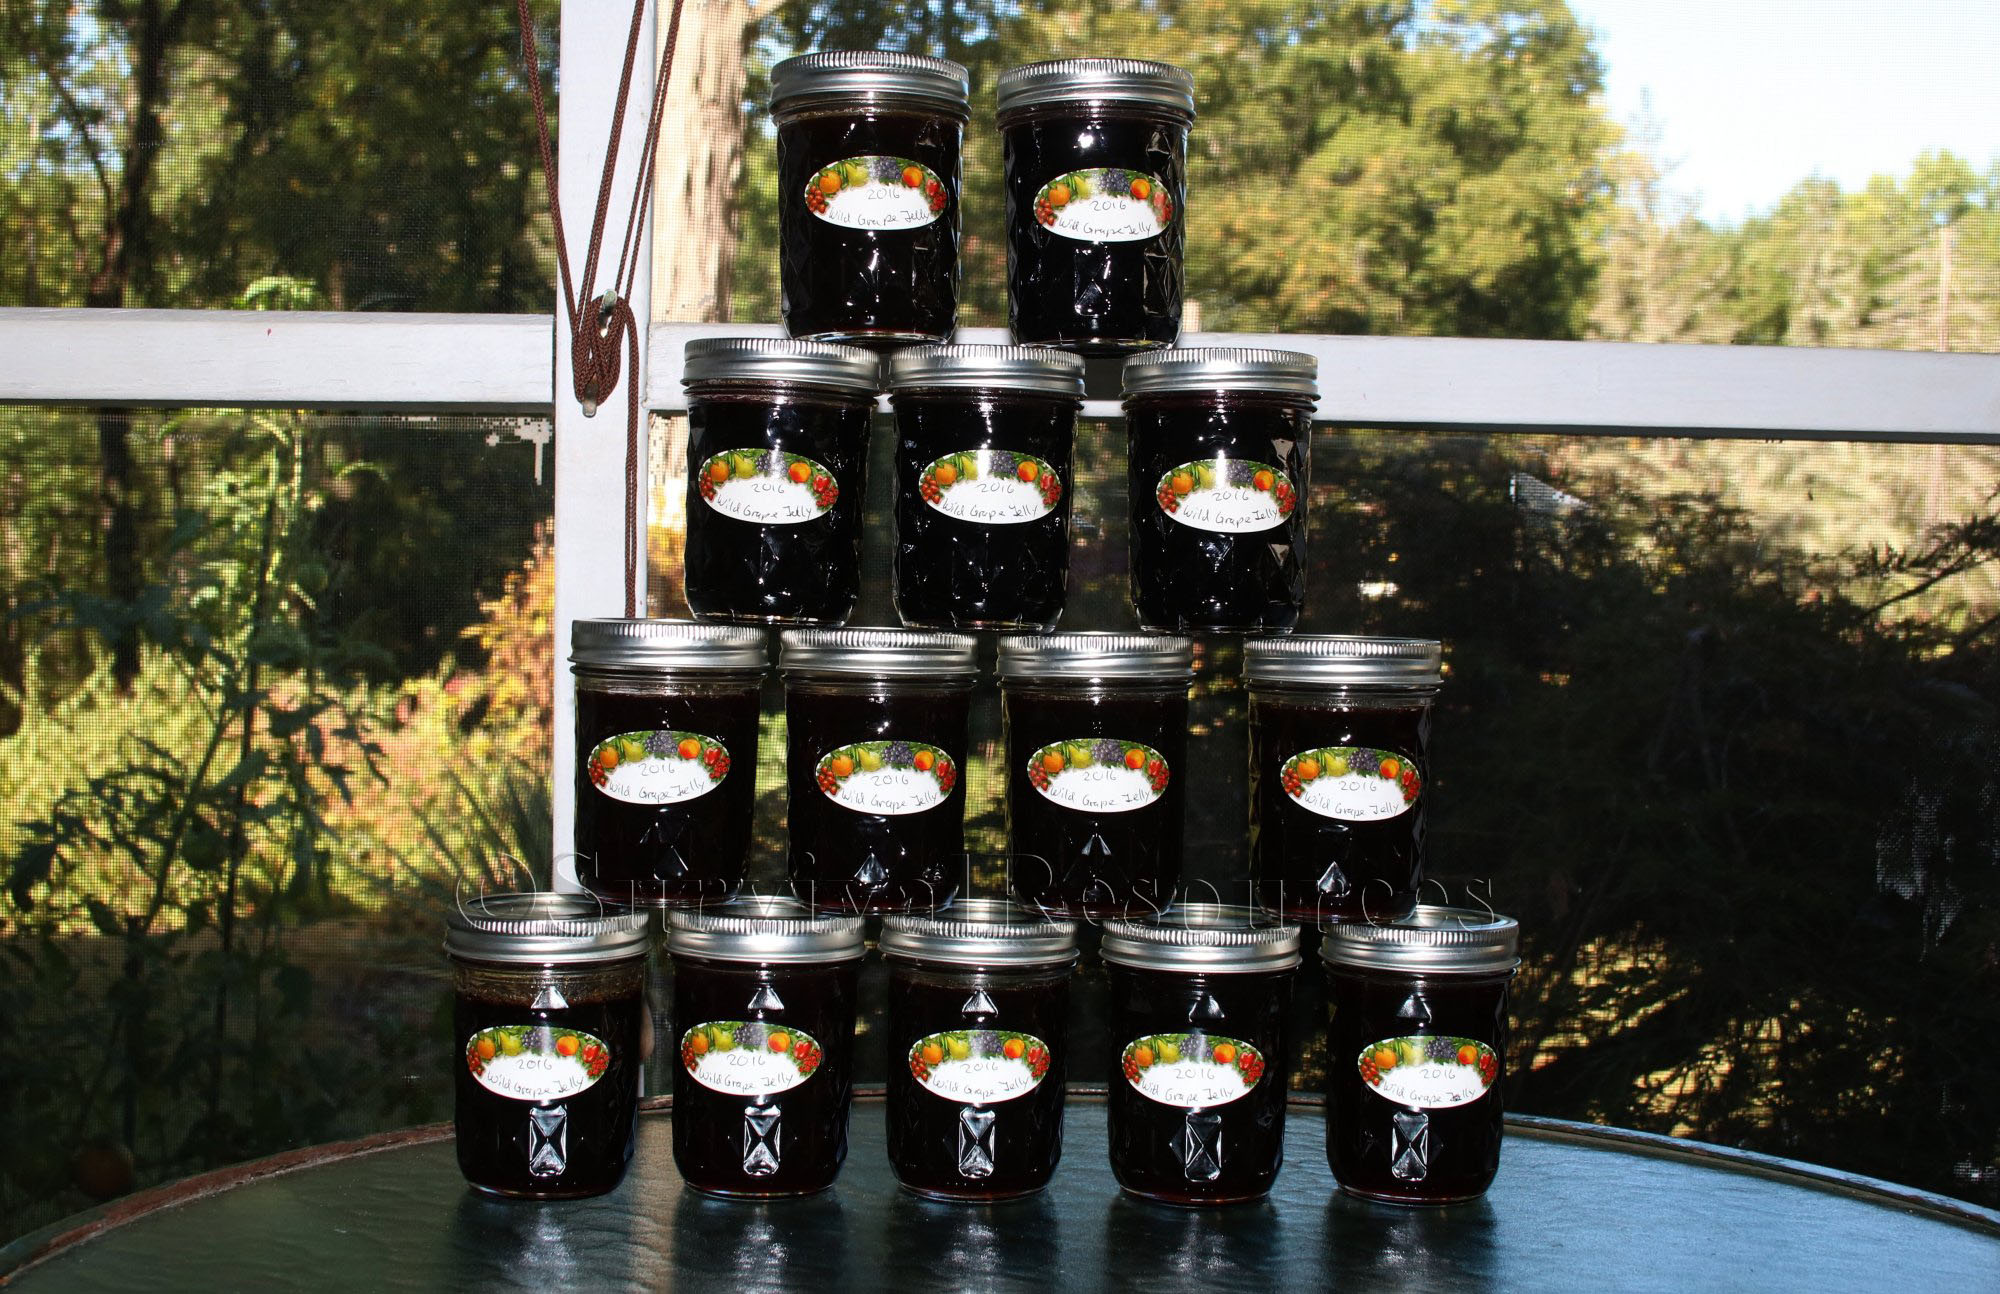 This shows the fourteen remaining jars for our pantry.
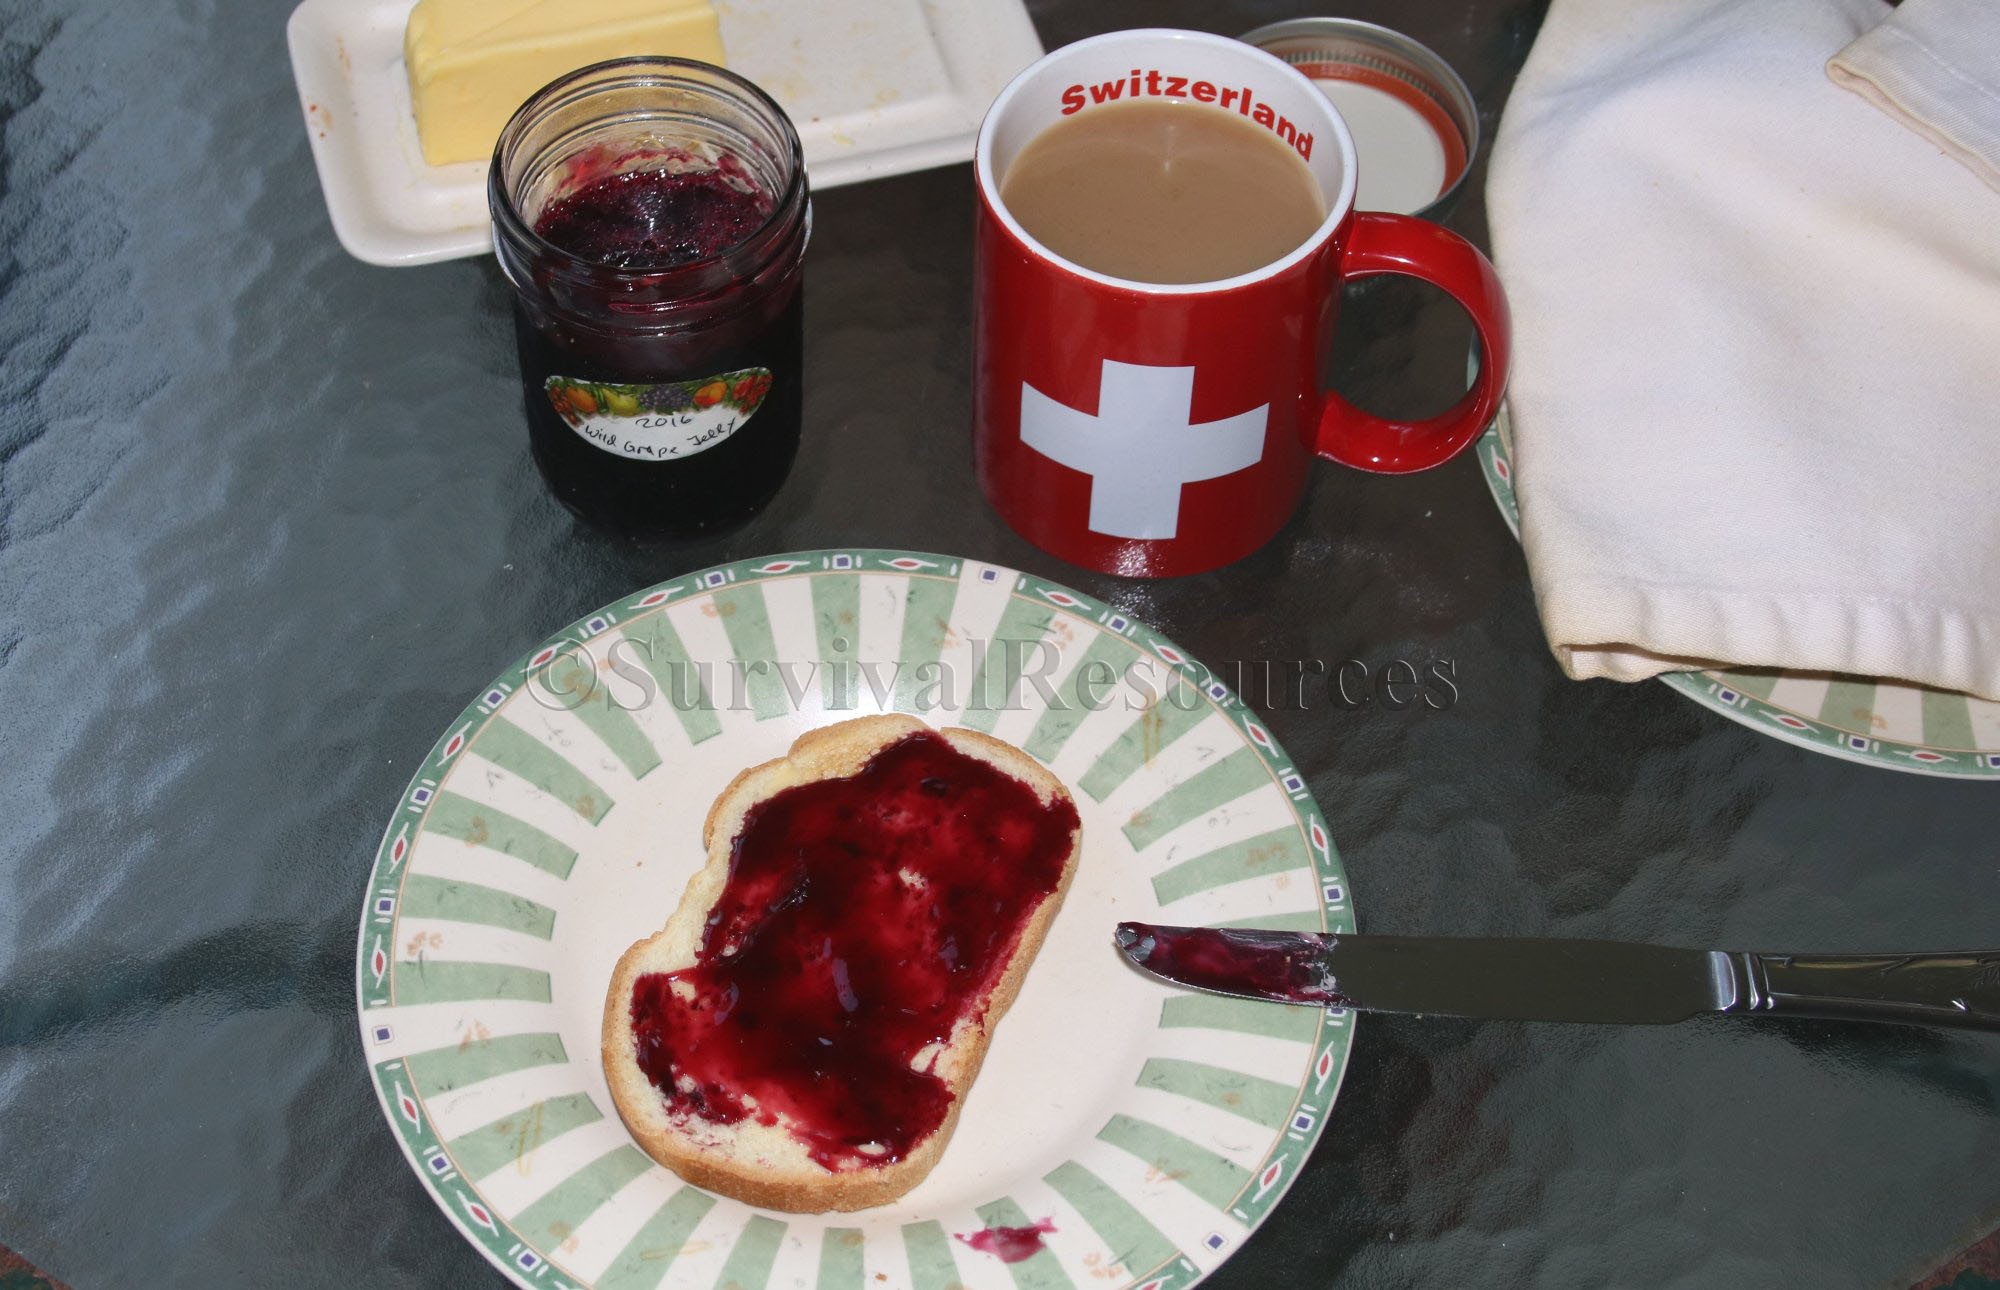 Of course, the finished product had to be tested, and it was good!
That is how we make Wild Grape Jelly. I'm sure there are tons of recipes out there and some can be easy and some can become complicated. We try to keep it simple.
We hope you enjoyed this article and will help support our efforts by checking out our products. As always, Be Prepared To Survive!
Copyright © 2016 by John D. McCann