
- New Products
- Exclusive Gear
- Bushcraft Gear
- Containers
- Cooking
- Fire
- First Aid
- Food Gathering
- Knives & Tools
- Knife Collectors Corner
- Light
- Logo Gear
- Misc. Items
- Navigation
- Packs, Pouches & Bags
- Personal Care
- Repair Gear
- Shelter & Protection
- Signaling
- Urban Survival
- Water
- Writing Gear
- John's Books
- Bargain Bin

Coal Burning A Spoon
I am often asked how to make a spoon using a coal from a fire. Therefore I thought I would provide a short tutorial on the process.
First, get a good fire going and make some good coals.
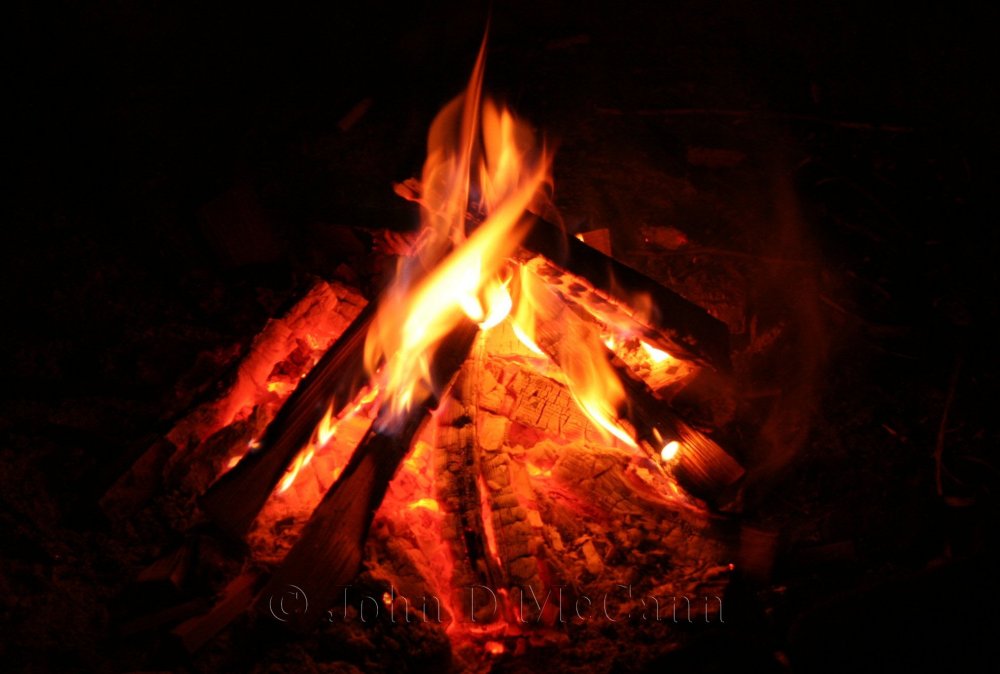 This fire will produce many coals that can be used for coal burning items.
Next, pick a nice piece of wood you want to turn into a spoon. I like to use a round piece of wood that is approximately the size of the spoon I want to make. I then split the piece in half, normally by batoning. This provides me with a piece that is half round which requires less carving when I'm done because you want the bowl half round when your done.
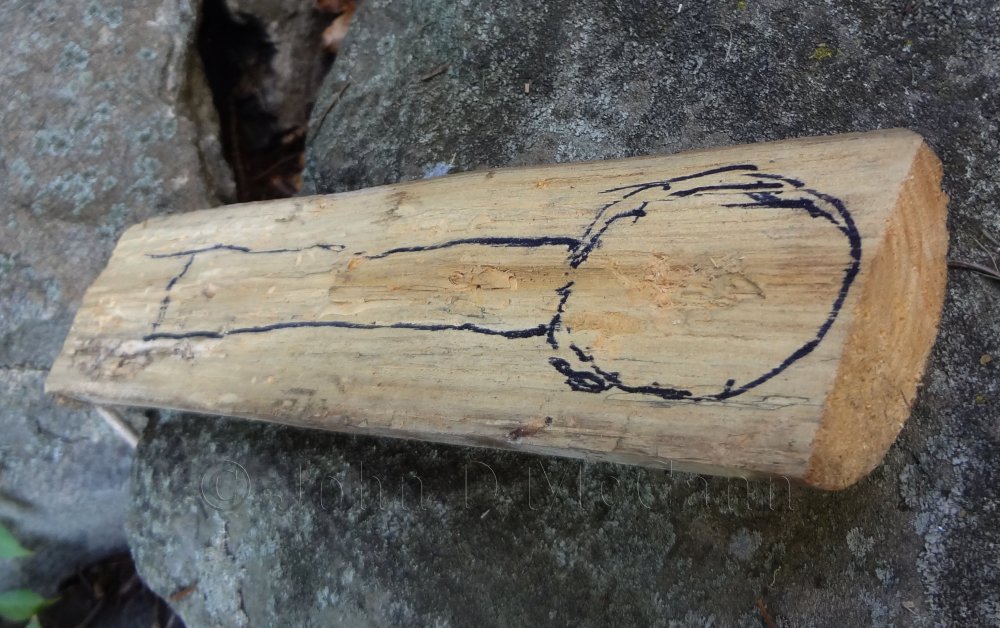 A round piece of wood was split so it is already rounded under the bowl. The basic shape has been drawn
on the flat portion.
Check it for cracks, etc. before you start. Get the initial shape fashioned, but don't get too fancy here. You can draw a bowl shape where you want it, and can even draw a handle. Leave room here, as it is difficult to keep the coal burning exactly where you want it. It is easier to trim around the burned bowl after the depression is burned.
I also like to make two cuts with a saw behind the bowl. I make these at an angle, again so when I have to do the finished carving around the bowl, the curve is already started. These saw cuts, which I normally do with the saw on a Victorinox "Farmer", really help when you start to carve the handle when you are finished coal burning the bowl. You can now carefully carve the handle towards the bowl without hitting the bowl. I have seen many students make a great bowl, and then cut part of it off trying to carve the handle. Just something I have found handy to do.
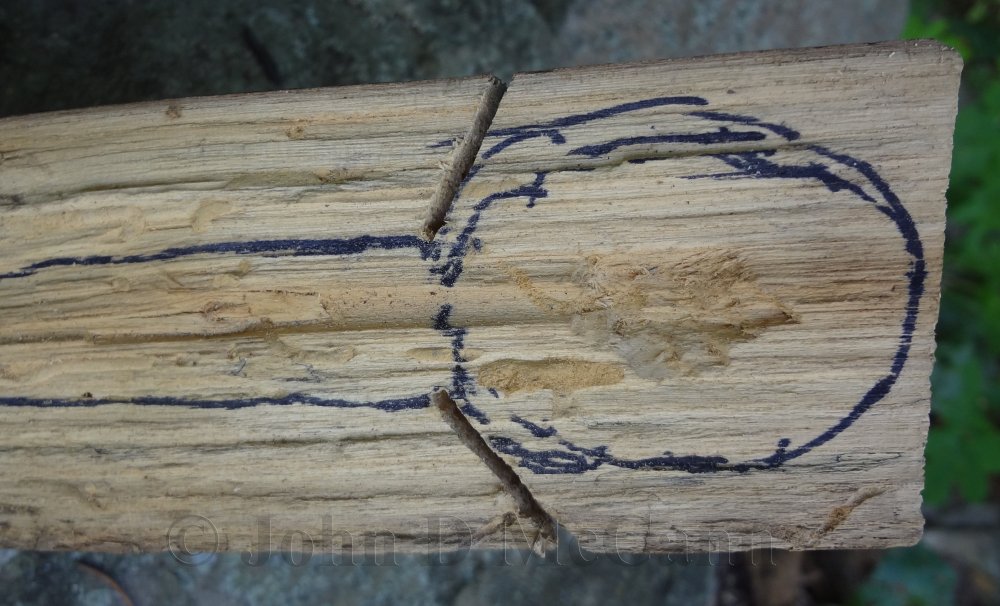 A view of the slits sawed behind the bowl at an angle. You can also see that a small depression has
been cut in the future bowl for a coal to lay in.
You will need a straw or tube to blow through. At our school we use reed or elderberry (we push the pith out of the elderberry to make it hollow). Any small tube will work.
Now you make a set of tongs (there are many varieties) so you can lift a coal out of the fire... a set of pliers can also work here.
Once you are ready to begin, I recommend cutting a small depression in the area you want the bowl burned, with a small knife (I have also used a bow, drill & spindle to make this starter depression). This initial depression makes it easier to hold the coal in the area you want to burn.
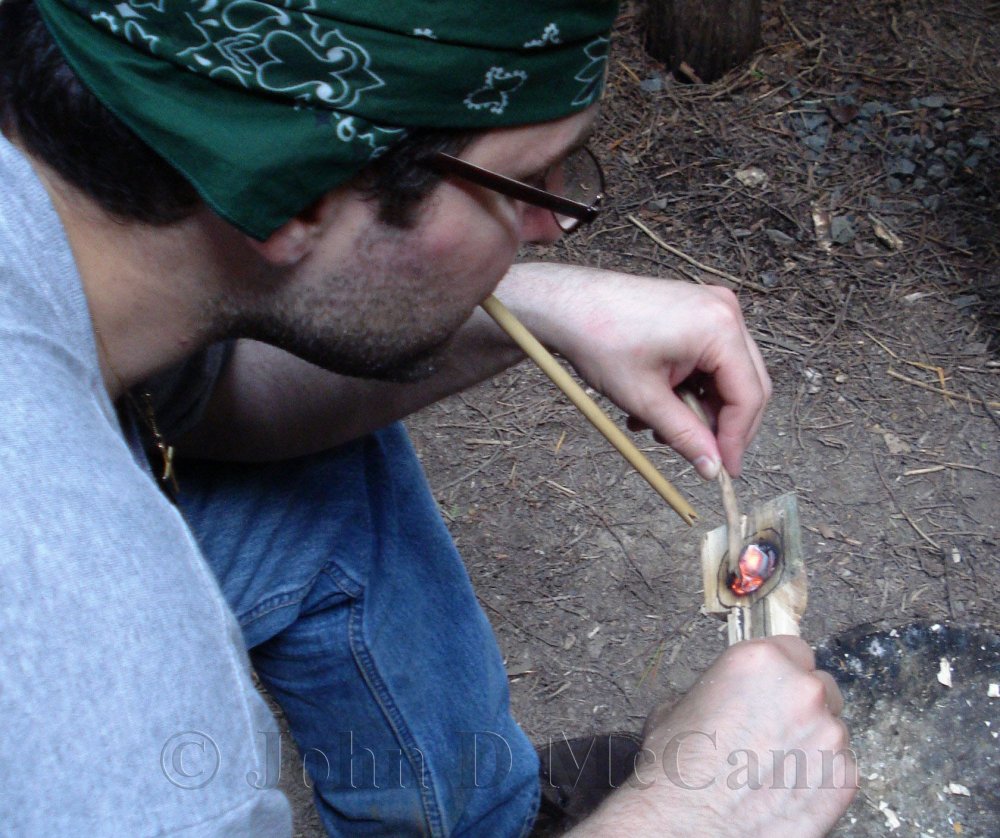
Now... get a small stick. This will be used to hold the coal down into the depression while you blow on it with your straw. If you don't hold it with this small stick, you will blow the coal out of the depression. The stick also allows you to keep pressure on the coal so it burns down into the depression.
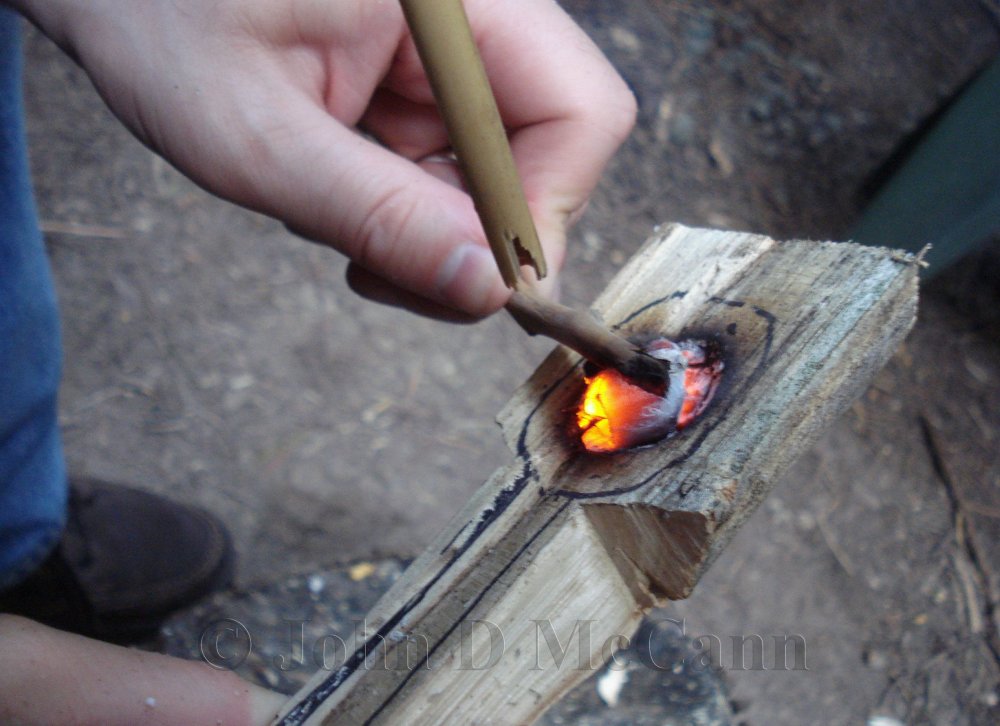 This shows the use of a small stick holding the coal while blowing.
Now get a coal from the fire (pull it out of the other coals to the side with a stick before trying to pick it up) If it isn't the size you want, break a smaller piece off. Using tongs or the pliers from a multi-tool, place it in the initial depression you cut and hold it there with the small stick. Start blowing on the coal, trying to blow the air under the coal... not over it. This is where it seems like you need three hands. It is slow starting at first... but don't get discouraged! The inside will eventually become engulfed in flame and now... it will burn very quickly. As the inside of the bowl becomes charred all the way around... you will need to scrape the inside with a small knife. You can either finish it up... or burn some more. It is your spoon so you make it your way!
 One of our students working on a spoon .
Once the depression for the bowl has burned sufficiently deep, you can often stop holding the coal with a small stick, as the coal will set in the depression by itself while blowing.
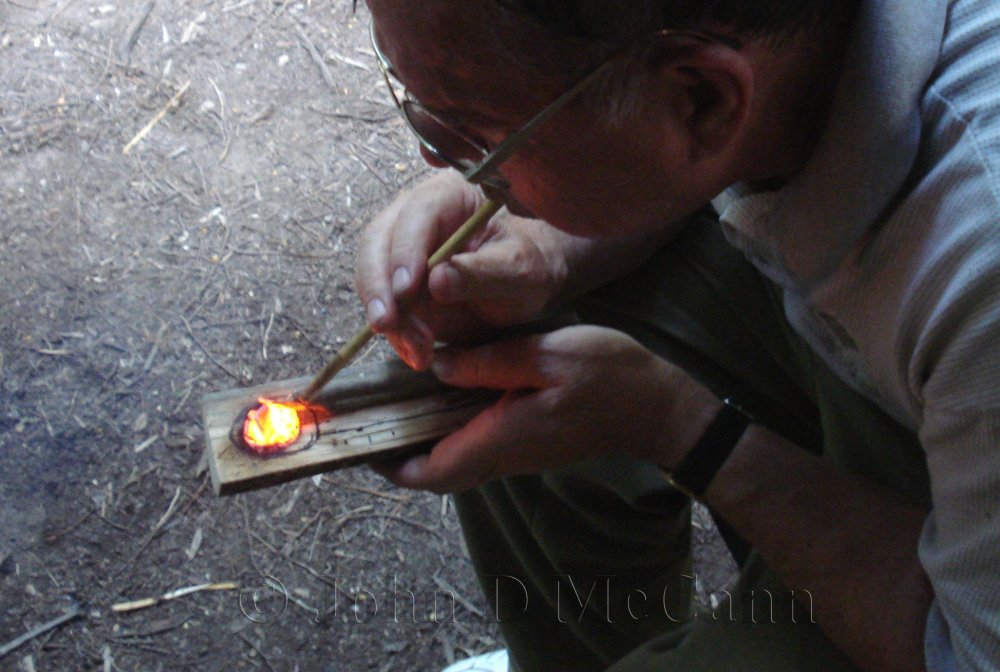 A student blowing a coal without having to hold it with a stick.
Once you are finished with the burning and scraping with a knife you can further finish it up with sanding. In order to sand in the field, you will need some sand. If you are near a creek or anywhere with sand, it will do fine. Get a large stick and round the end. Place the end in water and get it good and soaked. Then place the wet end in the sand and use it to sand the bowl of the spoon. You will need to continue this process by wetting the end and adding sand. It won't work like real sandpaper, but it will work.
When the bowl is finished to your satisfaction, you can then carve the remainder of the spoon. Be careful here, you don't want to ruin all your work by slipping.
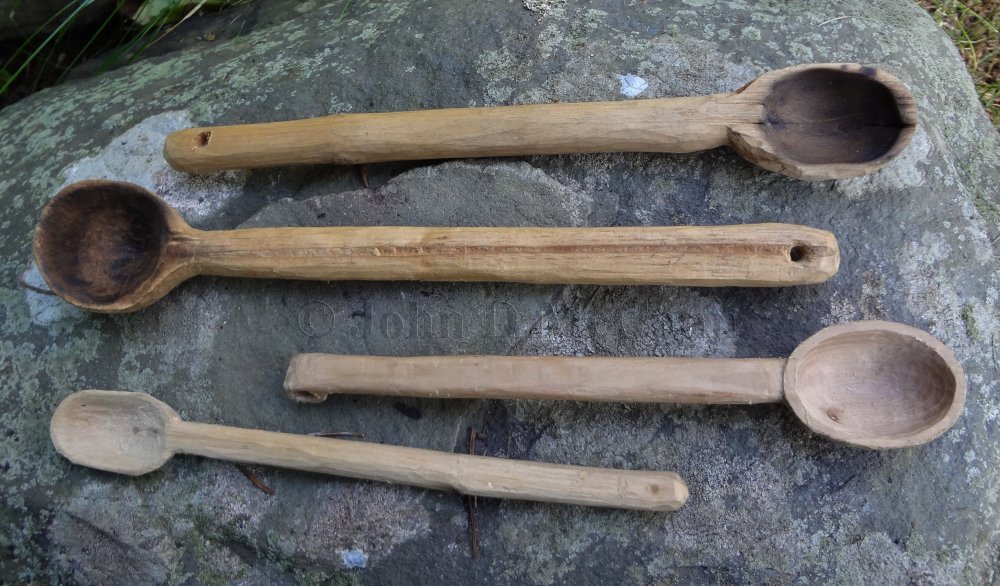 Various spoons made by my wife and me in the field. The top two are coal burned, not sanded, only scraped.
The bottom two are carved, not coal burned.
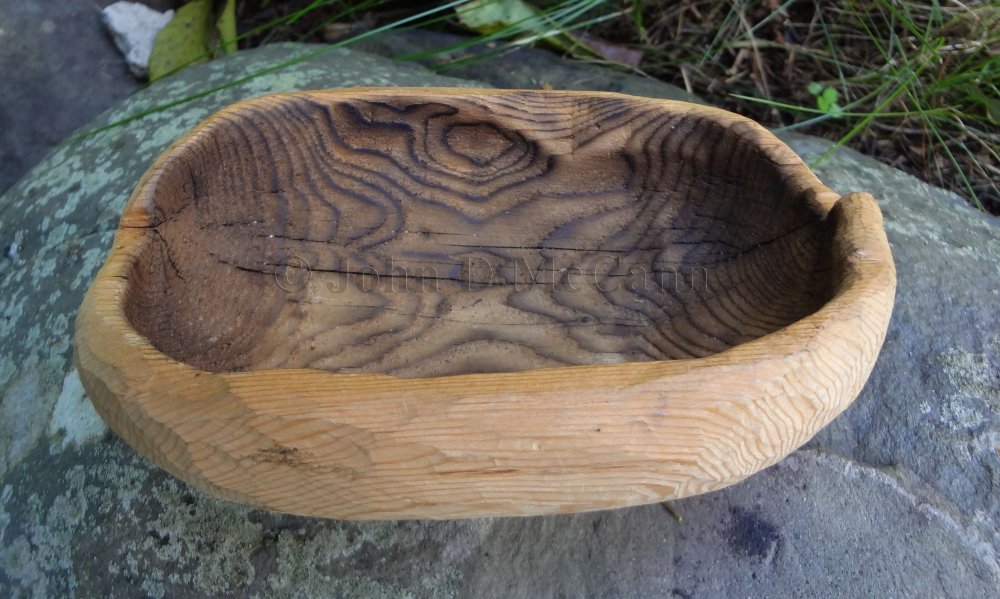 This same process can also be used to make bowls. Just a larger piece of wood and a lot more work.
This one was made by my wife, Denise.
Well, basically, that is the process for coal burning a spoon. I hope this short tutorial will help those who have never made a spoon with the coal burning method. Happy Spoon, or bowl, making!
We hope you enjoyed this article and will help support our efforts by checking out our products. As always, Be Prepared To Survive!
Copyright © 2013 by John D. McCann