
- New Products
- Exclusive Gear
- Bushcraft Gear
- Containers
- Cooking
- Fire
- First Aid
- Food Gathering
- Knives & Tools
- Knife Collectors Corner
- Light
- Logo Gear
- Misc. Items
- Navigation
- Packs, Pouches & Bags
- Personal Care
- Repair Gear
- Shelter & Protection
- Signaling
- Urban Survival
- Water
- Writing Gear
- John's Books
- Bargain Bin

Practical Exercises for Compass Accuracy
Using a compass to navigate seems pretty straight forward. However, being able to stay on a straight line, without lateral drift, takes practice. The more you practice the more accurate you will become. I have used the following two exercises when teaching navigation. I recommend practicing first in an open field, until accuracy becomes the norm, then move to a wooded area where maintaining accuracy becomes more difficult.
First I recommend that you make a marker stick to use for these exercises. We use wooden popsicle sticks. We paint one size blaze orange. You place the stick in the ground between your feet before starting the exercise with the orange side facing you. That way you cannot see the stick going out on the exercise, but can locate it once you have completed the exercise to see how accurate you were by how close you came to your stick. When having more than one person doing the exercise, number them and assign a number to each person so they can identify their stick.
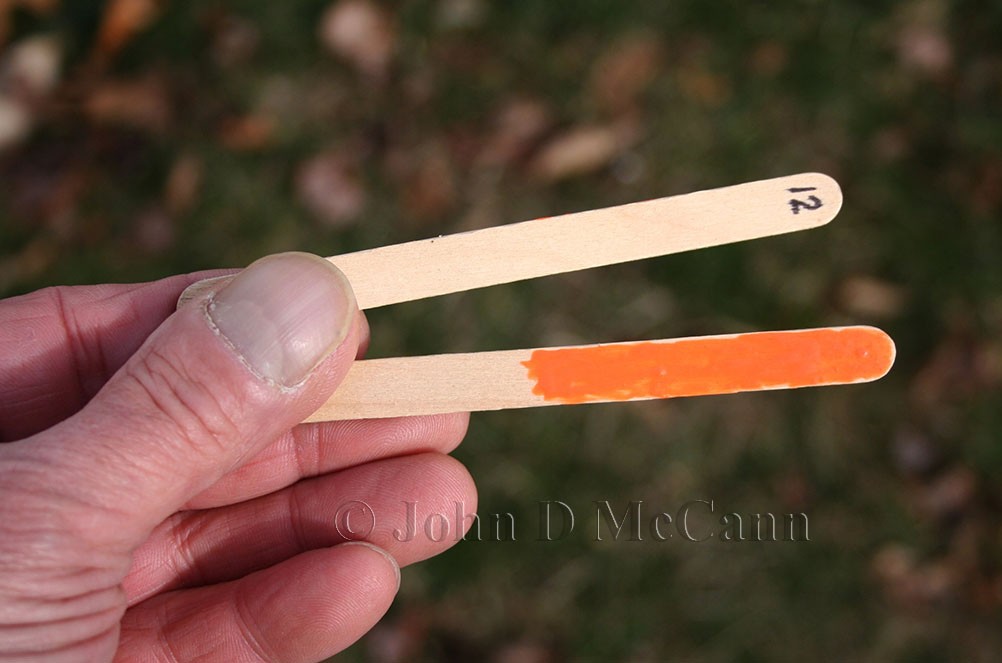 This shows both the front and back and of the popsicle sticks used to mark your starting position.
 This is a group of students I was teaching in California and you can see the popsicle sticks between their feet.
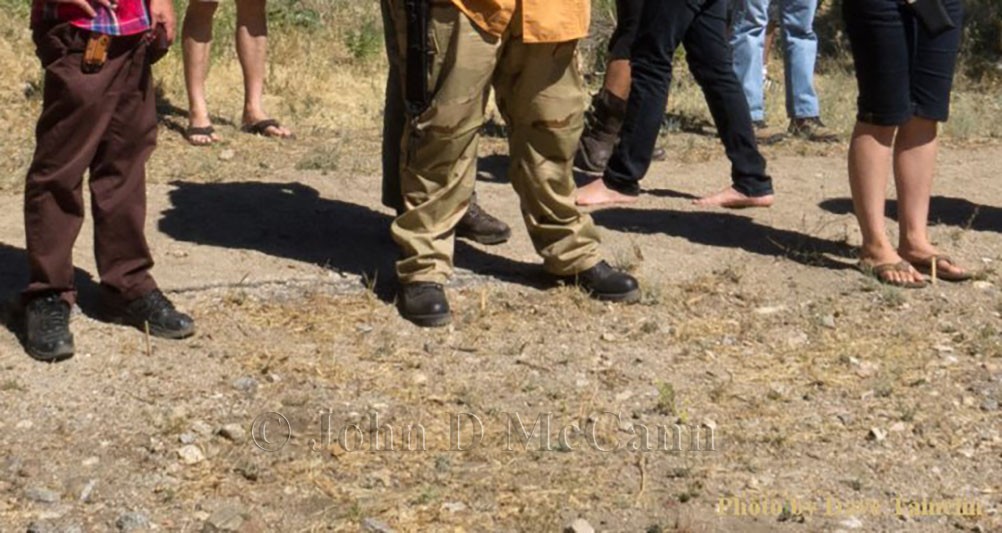 This is a closer view of the sticks between the students feet.
Exercise 1
Place a marker, as described above, between your feet. If you are doing this exercise yourself, assign yourself a bearing, one that will get you heading in a direction ahead of your stick. It doesn't have to be straight, as an angle makes it more interesting. Once you have the bearing set on your compass, box the needle, and proceed forward and count your paces until you have traveled 100 paces. Now stop, turn around, and using a back bearing, travel another 100 paces and you should end up on your stick. It will take some practice, believe me. See Exercise 1 Diagram below.
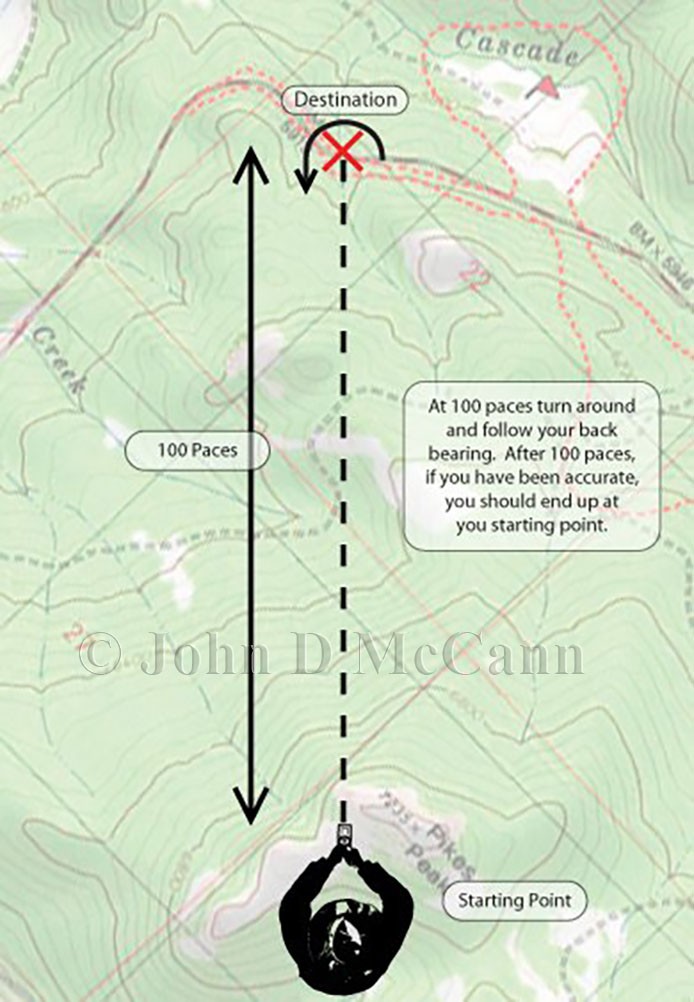 A diagram showing how Exercise 1 works.
Exercise 2
Start the same way you did in Exercise One. However, make sure that the bearing you use gets you heading out at an angle to the left. Travel 100 paces following your bearing and stop. Then add 120 degrees to your bearing number. Now follow that bearing for another 100 paces and stop. Now add another 120 degrees to your bearing and follow that for another 100 paces. You should end up on your beginning stick. See Exercise 2 Diagram. Once you get this exercise down, start off to the right instead of the left. At each 100 pace distance, subtract 120 degrees from you last bearing and this will take you on the same course, but in the opposite direction. See Exercise Diagram 2 below.
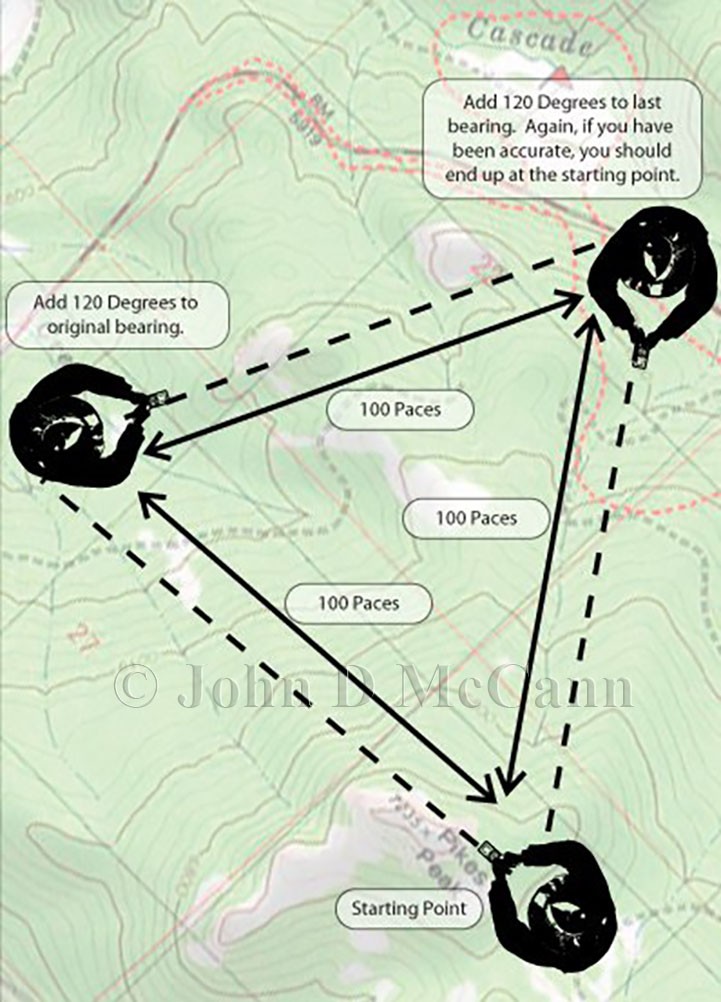 A diagram showing how Exercise 2 works.
These exercises are basic but build confidence. You will learn as you perform these exercise that staying on a straight line is not as easy as it would seem. You must pay attention and avoid lateral drift. The more you work with a compass, the more comfortable you will become with it, and hence, the more accurate. Try some of these exercises going up and down hill or through tall grass. Again, more difficult than you would think.
We hope you enjoyed this article and will help support our efforts by checking out our products. As always, Be Prepared To Survive!
Copyright © 2016 by John D. McCann