
- New Products
- Exclusive Gear
- Bushcraft Gear
- Containers
- Cooking
- Fire
- First Aid
- Food Gathering
- Knives & Tools
- Knife Collectors Corner
- Light
- Logo Gear
- Misc. Items
- Navigation
- Packs, Pouches & Bags
- Personal Care
- Repair Gear
- Shelter & Protection
- Signaling
- Urban Survival
- Water
- Writing Gear
- John's Books
- Bargain Bin

Quick Deploying Rain Catchment
In regard to Emergency Preparedness, I am always trying to think of ways to collect water, whether it be for drinking, or to supplement water for a garden. Many people in the country, like myself, use rain barrels to collect water. However, there are other individuals who live in an apartment or condominium, and don't have the luxury of connecting into a gutter and down spout system, due to regulations or lease agreements. However, it would be handy to be able to collect some rain water.
Giving this some thought I was reminded how many times while camping up in the Adirondack Park that I used a tarp to collect and channel rain water to bottles and pots. This got me to thinking, which at times can be dangerous, and I figured if someone had just a small piece of ground, they could setup some type of pole system that would allow them to quickly deploy a tarp to collect and channel water to a five gallon bucket. The poles could stay up, but the tarp could be deployed or removed in moment.
The following is the result of my experiment. I used four fence T-posts, one 8 foot x 10 foot tarp, one five gallon bucket, some small diameter cordage, and one rock. Once the posts were set, and loops were tied onto the tarp, I was able to deploy the system in less than a minute, and take it down just as fast. It should be noted that a similar configuration could be developed that would allow someone who had a balcony to do the same type of thing. You can also experiment with different sized tarps and different post heights.
The following is a video I did showing how I set up the Quick Deploying Rain Catchment system and how much water was collected in both medium and heavy rain.
The following is an article that articulates exactly what I did with still photos showing the process.
I used T-posts for the four uprights because they have tabs that stick out and up, on all but the bottom section. On the bottom, there are a couple of tabs that stick out and down, and I used this as an advantage to keep the tarp taut. When placing the posts in the ground, make sure that the tabs are facing inward!
The rear two T-posts are just slightly wider than the width of the 8 foot width of the tarp, whereby with the loops attached, the tarp could be attached taut at the upper tabs on each side.
The front two T-posts are placed 10 feet ahead of the rear posts (or whatever the length of your tarp is), and are inset on each side. The amount of inset is determined by how much dip you want in the front of the tarp. In my case the front T-posts ended up being 4-1/2 feet apart which allowed the center of the dipped tarp to still set above a five gallon bucket. Loops on front corners are also placed on the top tabs of T-posts. It should be noted that the tarp has five grommets on the end, and the center one will set over the five gallon bucket. A line with a loop at the end is measured and attached to the other two grommets which are the second one in on each side, so that one on each side can be pulled down to a tab that sticks out but faces down. This ensures that the tarp stays taut and keeps the wind from blowing it around.
Here are some pictures, showing what I did.
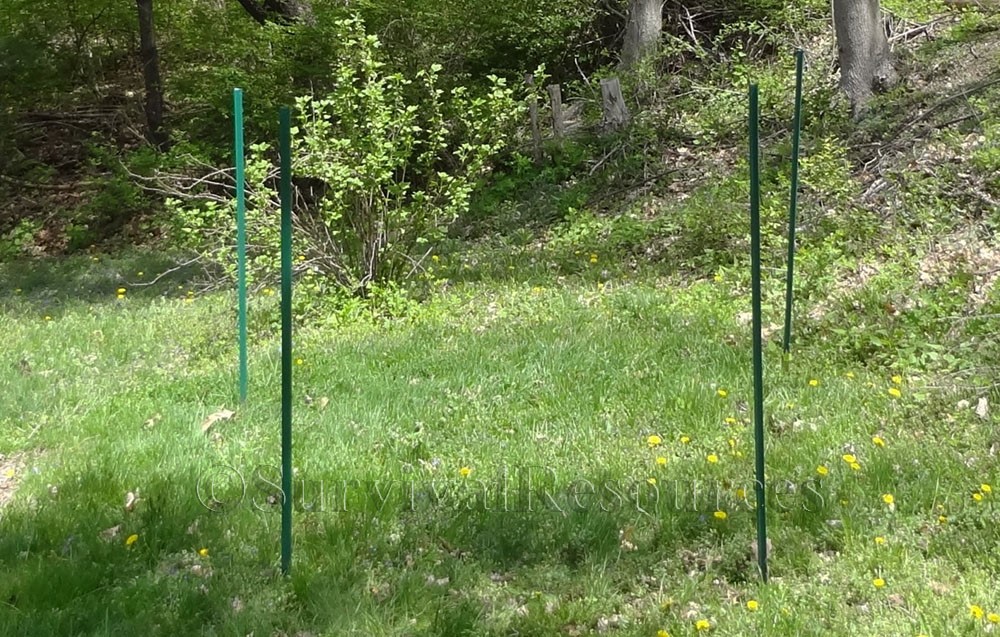 Four T-posts are set with the front two in slightly further than the two rear ones.
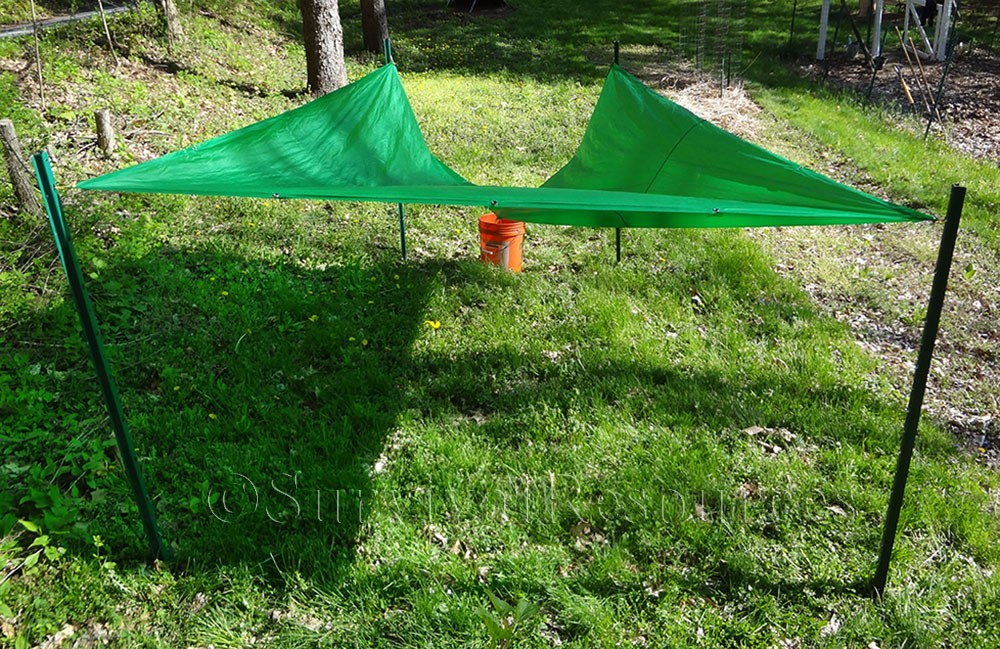 This is view from the rear once the tarp has been deployed.
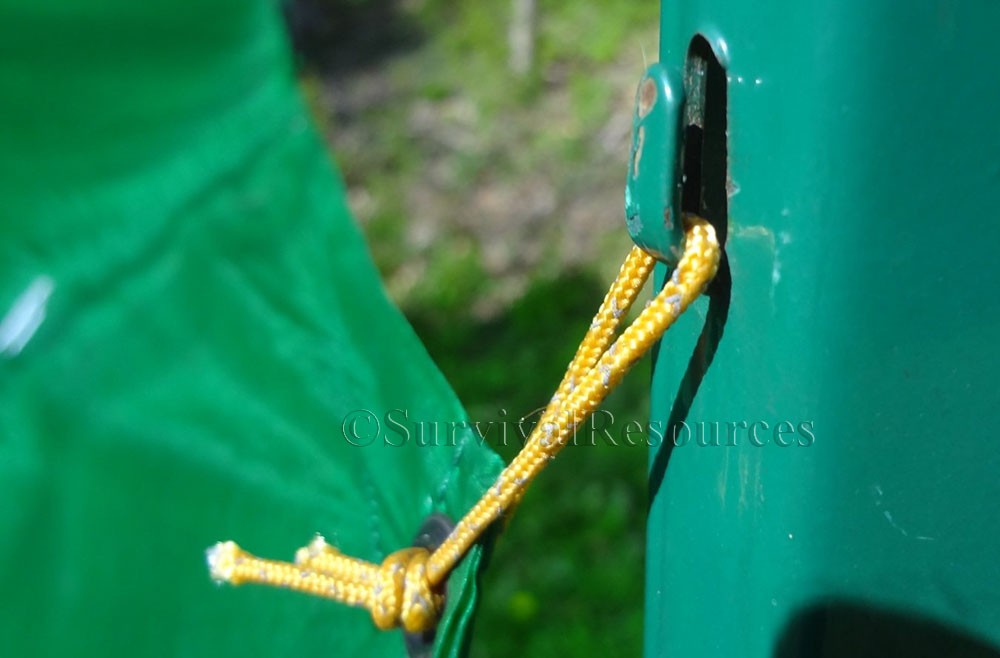
 This is a close-up view of the loops holding the rear of the tarp.
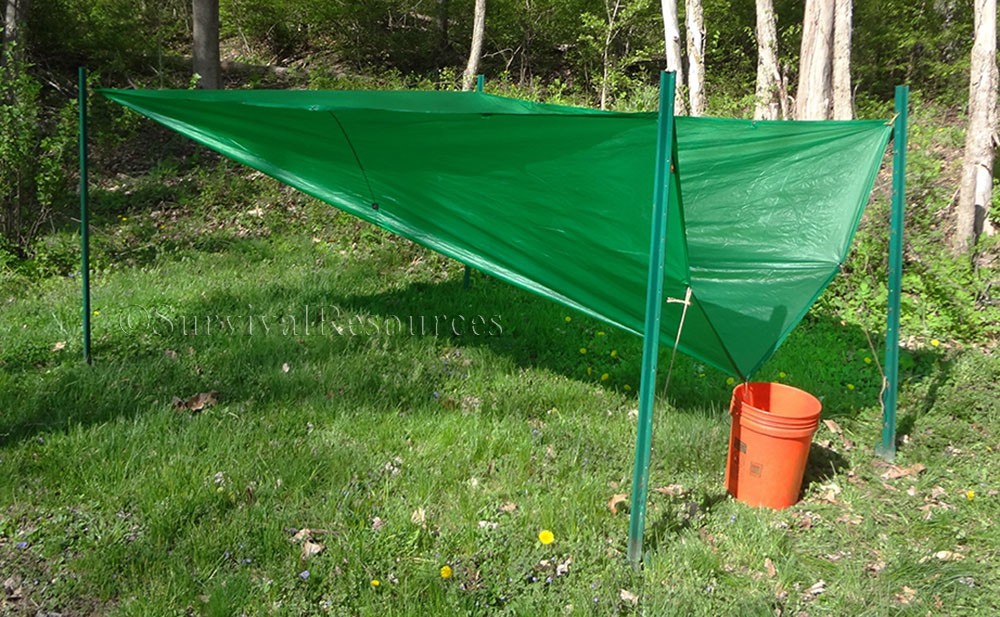 This is side view once the tarp has been deployed.
 This is a view from the front when fully deployed.
 This is a close-up view of the upper front loops.
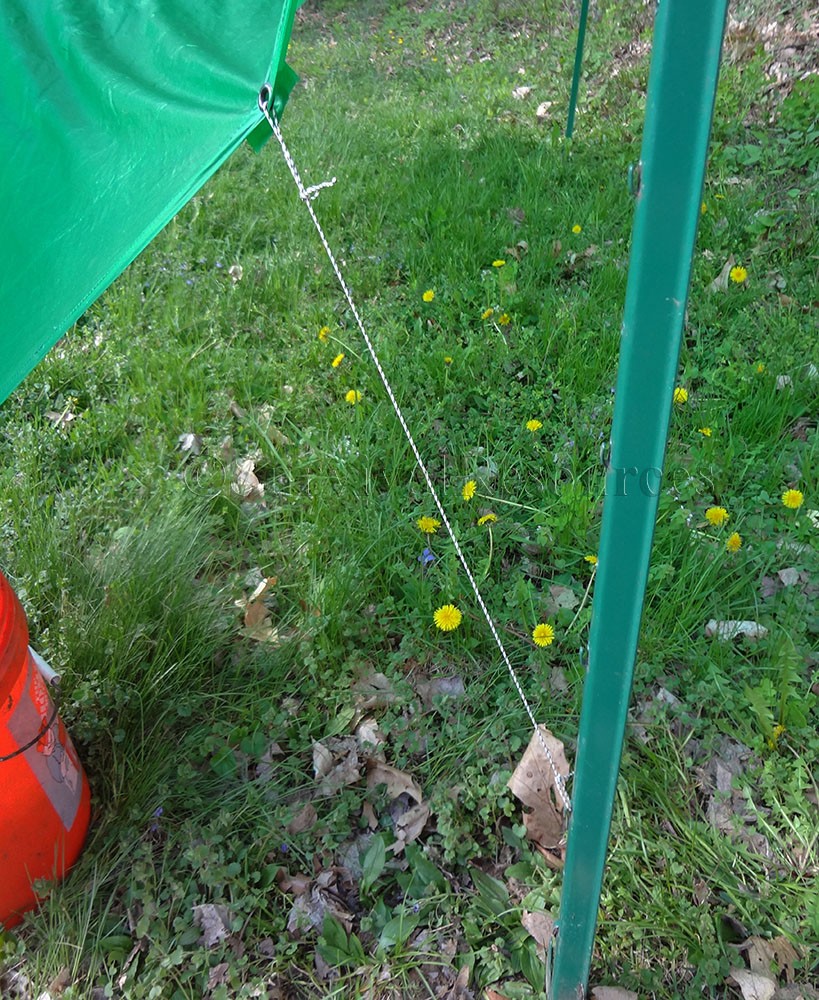 A view of the front pull-down cords to keep the tarp taut.
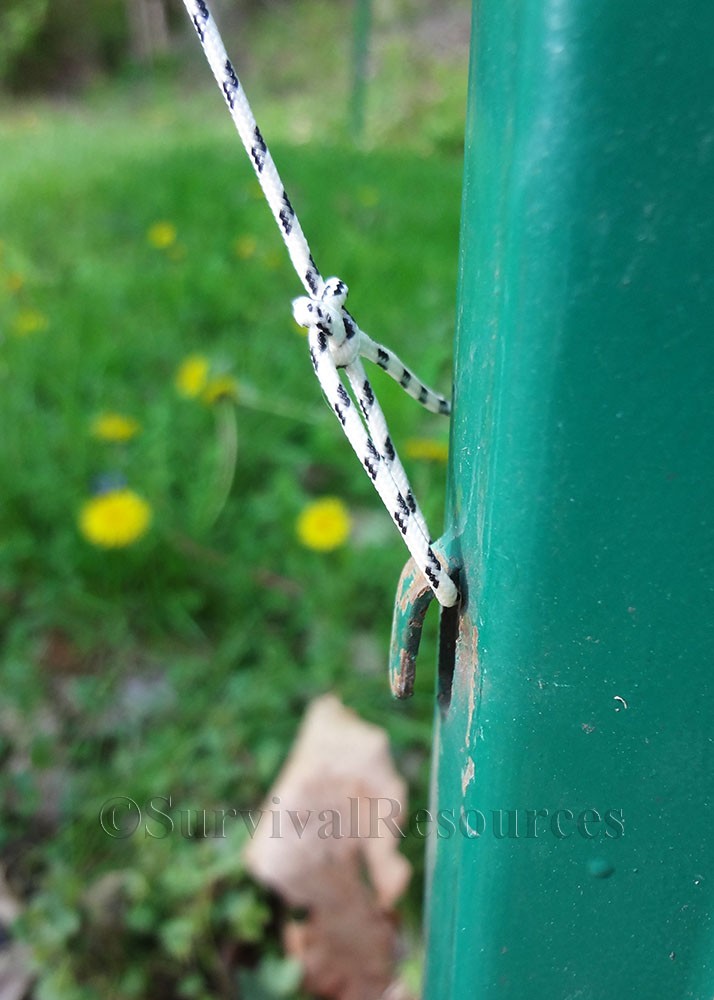 A close-up of the front pull-down cord loops.
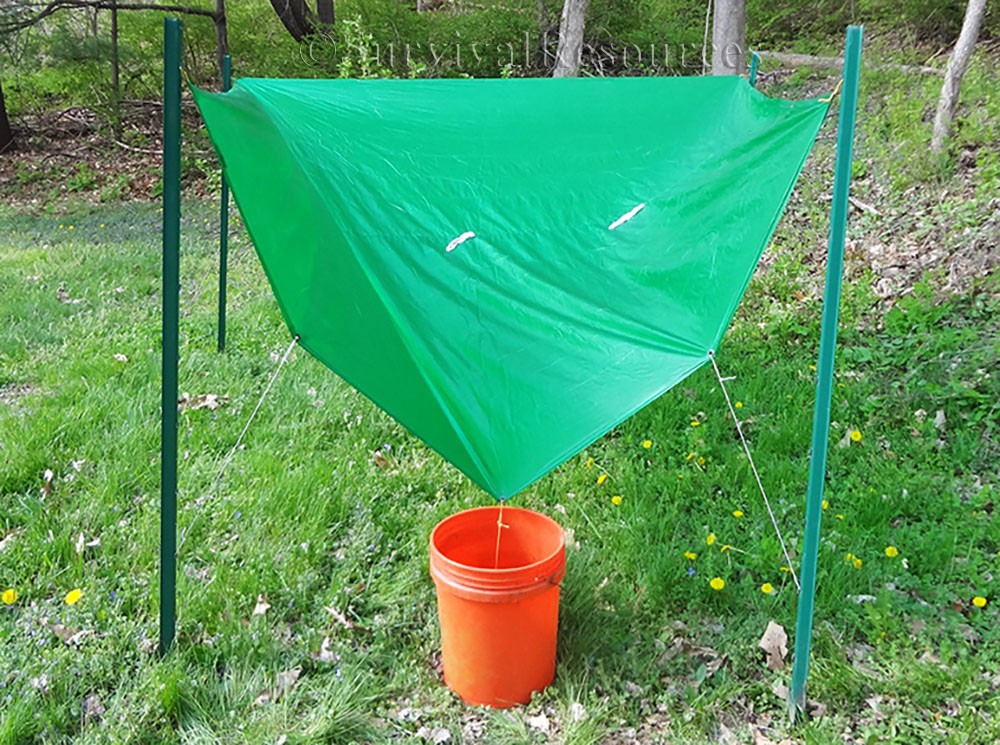
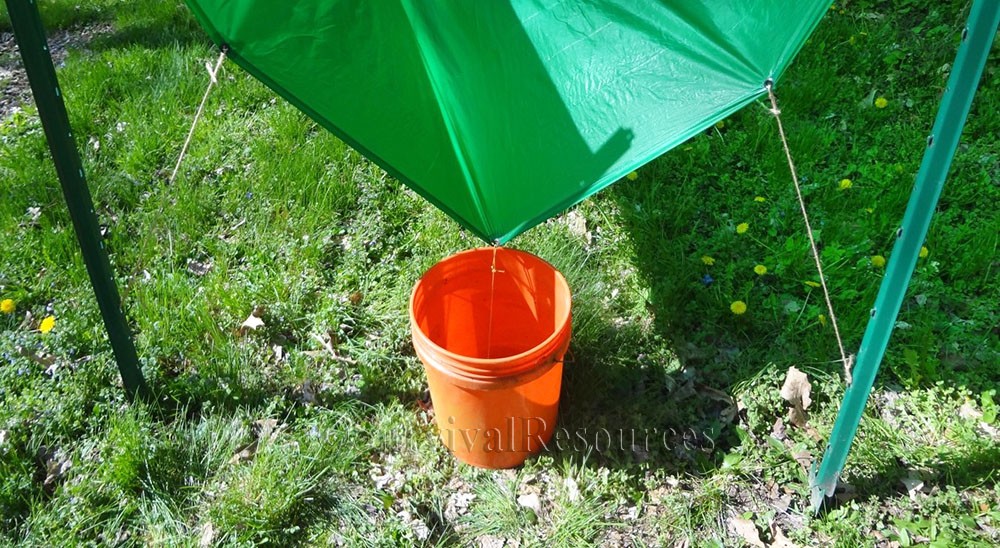 This shows the positioning of the bucket at the front of the tarp.
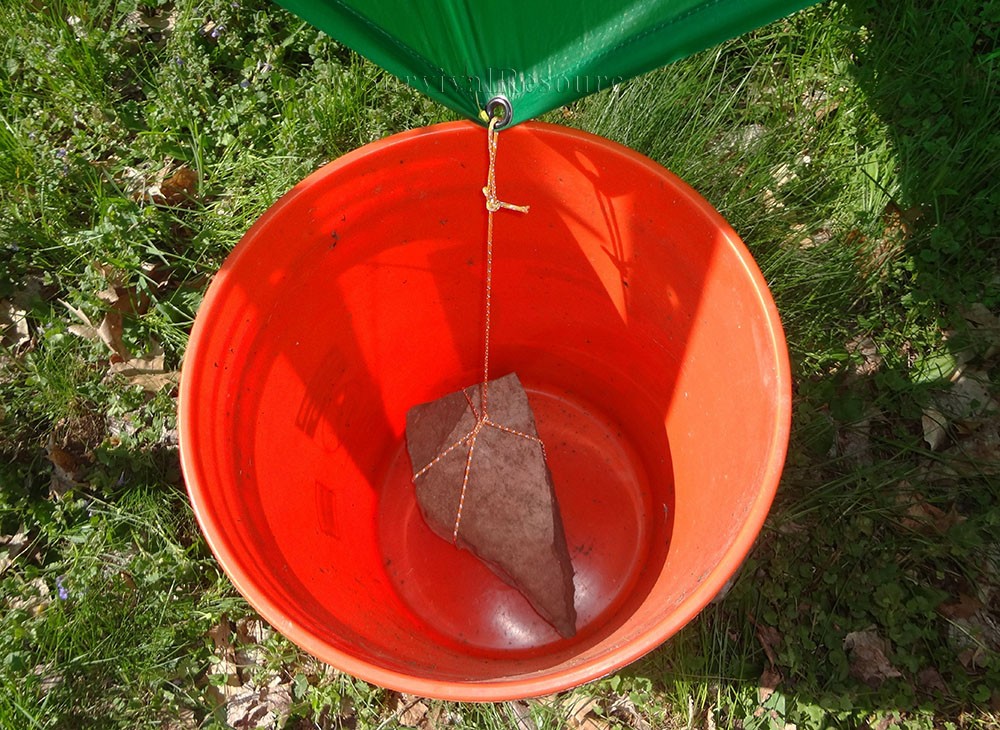 This a close-up of the bucket to catch the water. The cord attached to the rock is to keep the
water flowing into the bucket, and to ensure the bucket doesn't blow away when empty.
Now all I had to do was wait for the rain. Well it took three days, but I finally saw it coming. We rushed out to the tarp with camera and video camera in hand and a large umbrella to protect the equipment.
At first it was only a medium rain and the bucket was filling slowly. However, I could hear thunder and knew a heavier rain was coming, and it did. The first five gallon bucket filled in a matter of minutes and I ran and got another bucket that filled in two minutes. The rain continued very heavy for another ten minutes or so and I could have filled many more buckets.
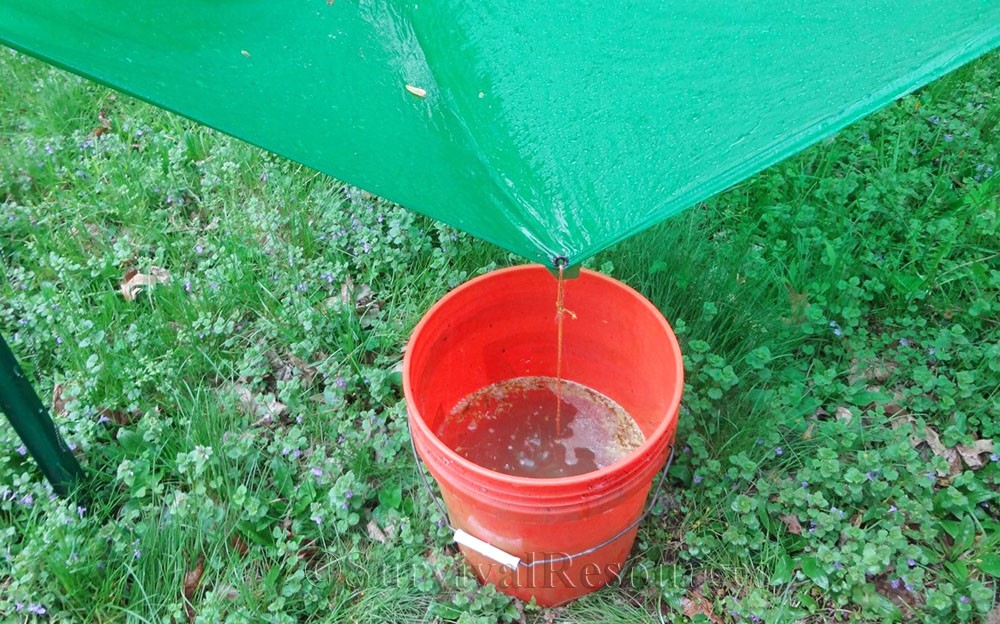 This shows the five gallon bucket filling slowly with a medium rain.
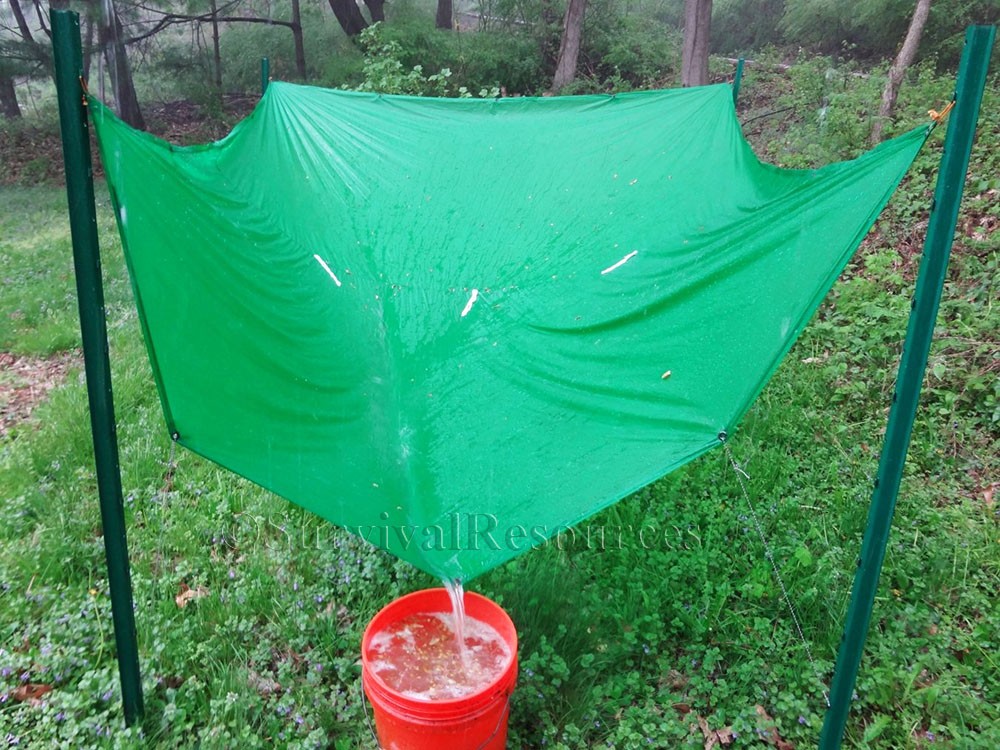 This shows the bucket being filled quickly with a heavy downpour.
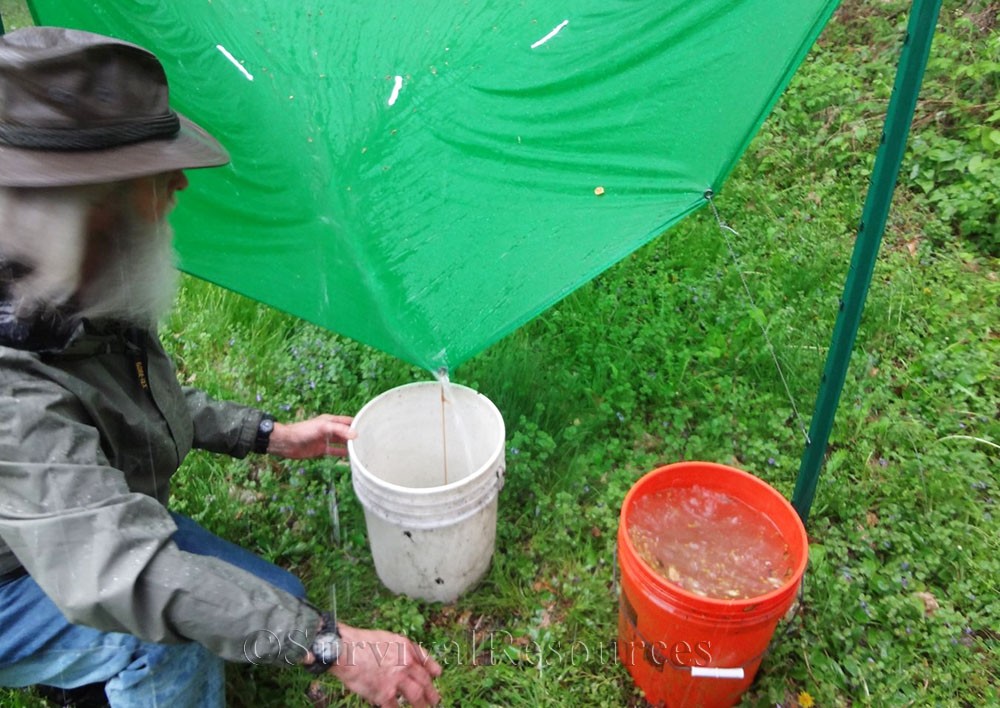 A second bucket was filled in two minutes with a heavy downpour.
This illustrates that with a medium rain, you will still be able to collect some rain water. But with a heavy down pour, you can fill bucket after bucket. This definitely shows the advantage of a system like this for gardening, or emergency needs. If you can't utilize the down spouts from your gutters, this might be an option.
Copyright © 2014 by John D. McCann