
- New Products
- Exclusive Gear
- Bushcraft Gear
- Containers
- Cooking
- Fire
- First Aid
- Food Gathering
- Knives & Tools
- Knife Collectors Corner
- Light
- Logo Gear
- Misc. Items
- Navigation
- Packs, Pouches & Bags
- Personal Care
- Repair Gear
- Shelter & Protection
- Signaling
- Urban Survival
- Water
- Writing Gear
- John's Books
- Bargain Bin

Simple Techniques For Better Photos
I do a lot of photographing of products for my Survival Resources website, as well as taking photos for articles that I write. I also, on occasion do a YouTube video. Over the years I have learned some simple techniques which allow me to enhance my photos, as well as videos. I thought I might share some of these techniques so you can do so as well.
Oftentimes when shooting photos of products, or doing a video, I need more light to enhance a specific area. A good example is when I need a head shot, but the brim of a hat shades the eyes.
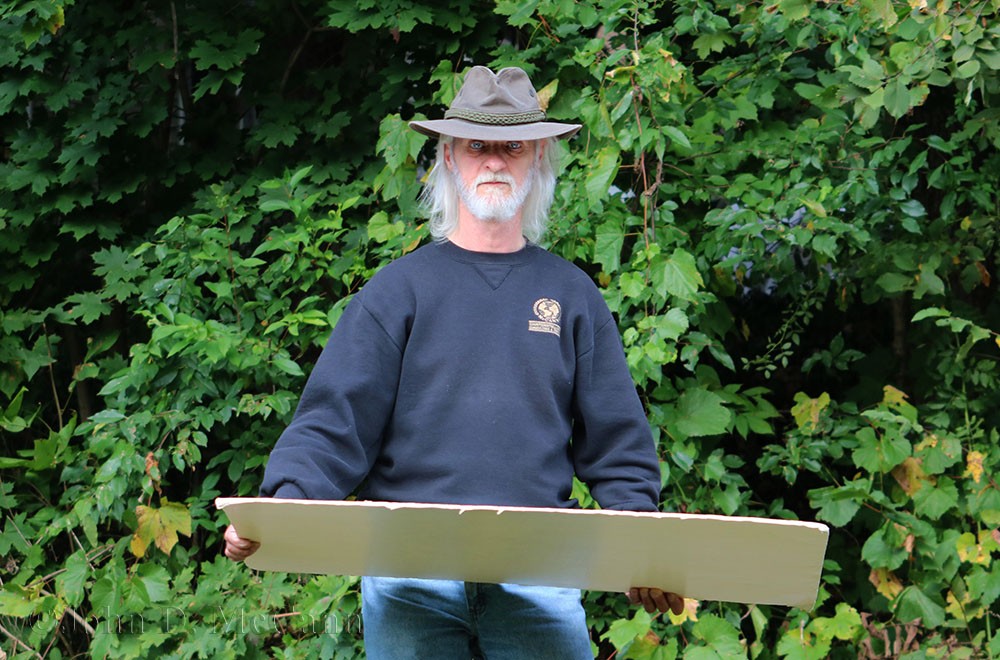
A quick, easy, and inexpensive aid is a White Foam Core Board. They are available in various sizes at most stationary stores, like Staples. I like to keep a few around that are 30" x 40" and I use them when shooting around the property or when I have the advantage of my truck being with me. They are light and can be held to direct light on a subject, or leaned against something to direct light on yourself. Often when doing a video, I lean a white board against the tripod holding the camera, to direct light on my front if my back or side is to the sun. You wouldn't want to be carrying a couple around on a hike, but there is an option for that which I will discuss shortly.
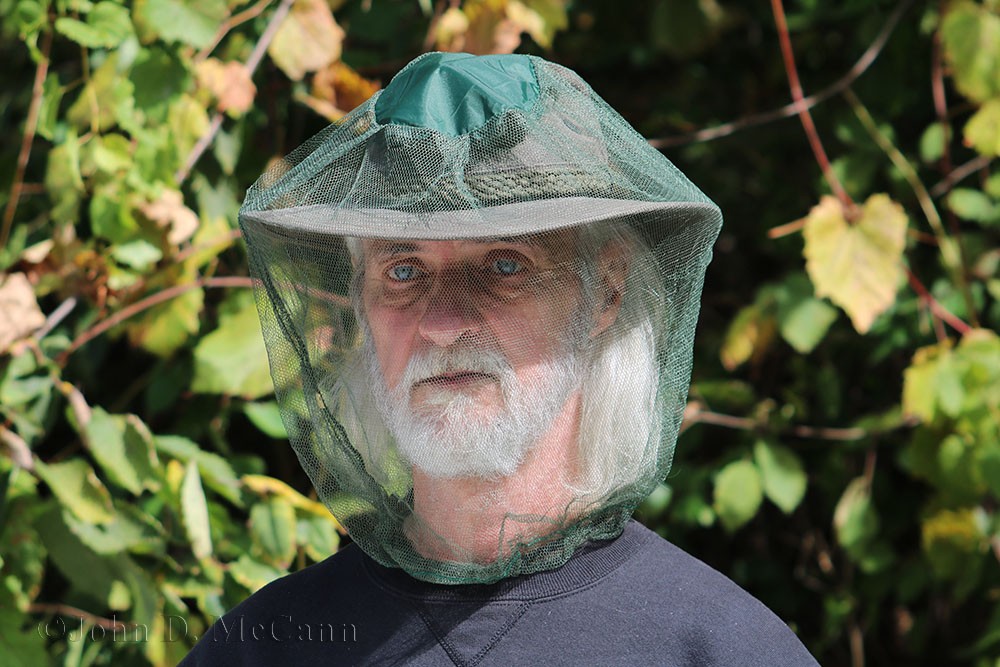
The other day when I needed my wife, Denise, to take a photo of me wearing a head net. After the first shot, we could see that the brim of my hat was shading my face so I went and got one of my white foam core boards and held it in front of me directing the light from the sun up under the brim of the hat. The result was a much better picture.
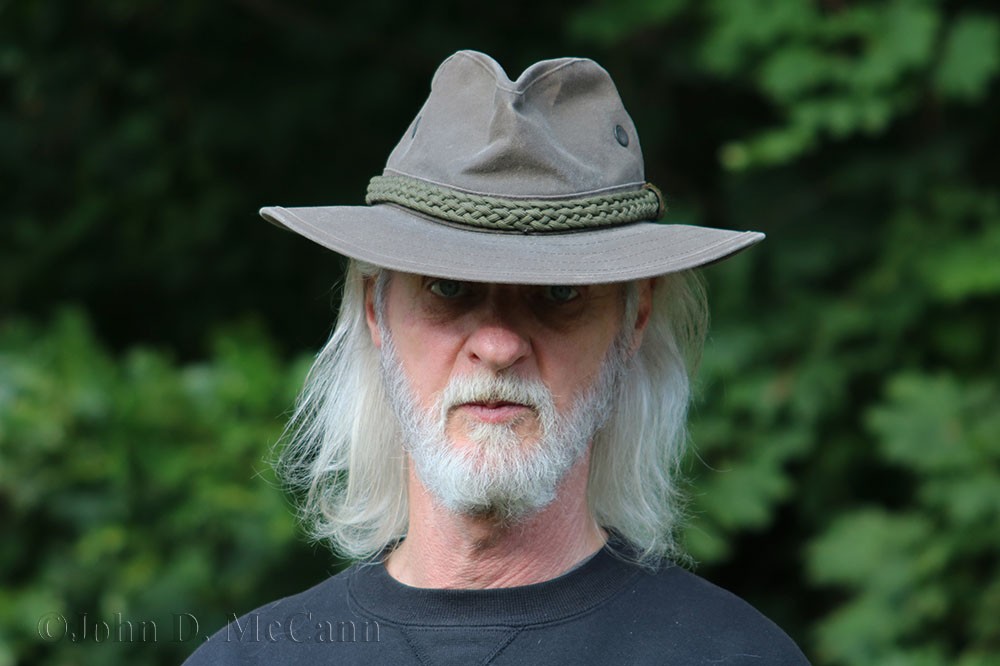 This shows how a hat brim can shade the eyes in sunlight.
 This shows me using a white foam core board to reflect the sunlight up under the brim of the hat.
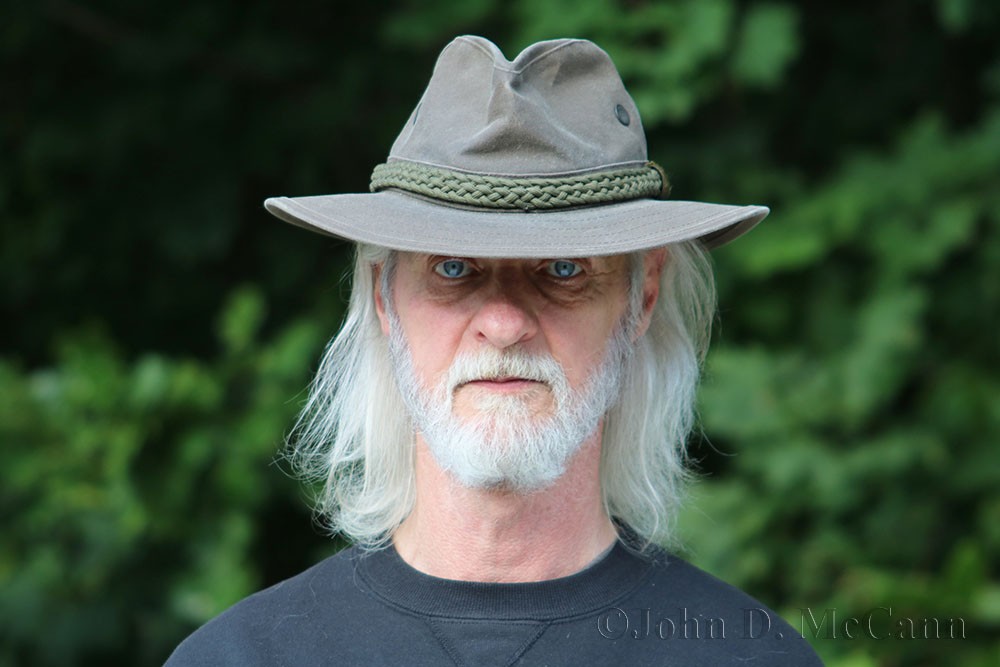 Compared to the first photo, you can see that using the white foam core board to reflect the light up
under the brim of the hat, the eyes are better seen in the photo.
 In this photo, while trying to shoot a picture of a head net, the brim of the hat again created a shadow.
 Again, by using a white foam core board to reflect light, the shadow was not totally eliminated, but
the clarity of the face was enhanced, providing more detail.
Of course, it is handy to have a second person handy to move and position a white foam core board to direct the light where you want it. But the advantage of simple foam core board is it is rectangular and can be leaned against something if you don't have an assistant. I have often leaned one against the tripod holding my video camera in order to direct light onto myself, if the sun is to my side or back.
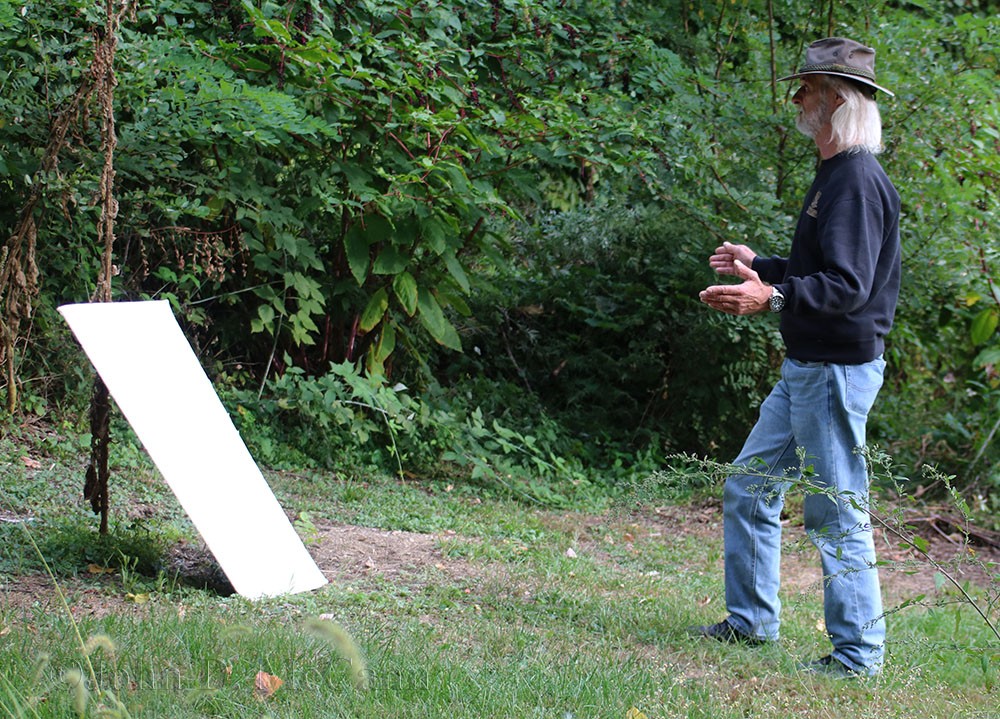 This shows how a white foam core board can be leaned against something to direct light where you need it.
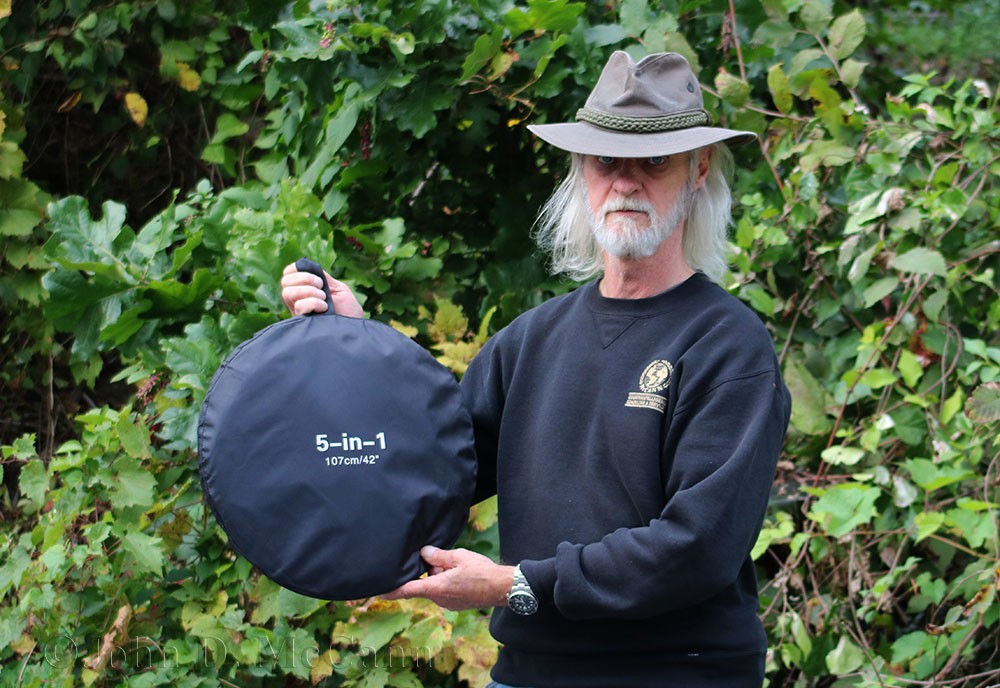
Even though the white foam core boards are inexpensive, as I stated above, they are difficult to carry in the field. However there are inexpensive options such as the 42" 5 in 1 light reflector kit, which can be purchased between $19.95 and $39.95. I believe I paid about $20.00 for mine.
The light reflector kit provides you with various options for reflecting light as well as restricting light. When the pouch for the system is closed it is only 16" in diameter. But when you unzip the pouch and withdraw the reflectors, they spring open into a 42" diameter reflector. There is a silver, gold, black and white reflector, as well as a 42" ring that is made from a translucent fabric which is used to diffuse light. All the reflectors and diffuser are collapsible by easily twisting them in a circular manner so they fit back into the 16" pouch.
 This shows the size of the commercial 5 in 1 Reflector kit when in its pouch.
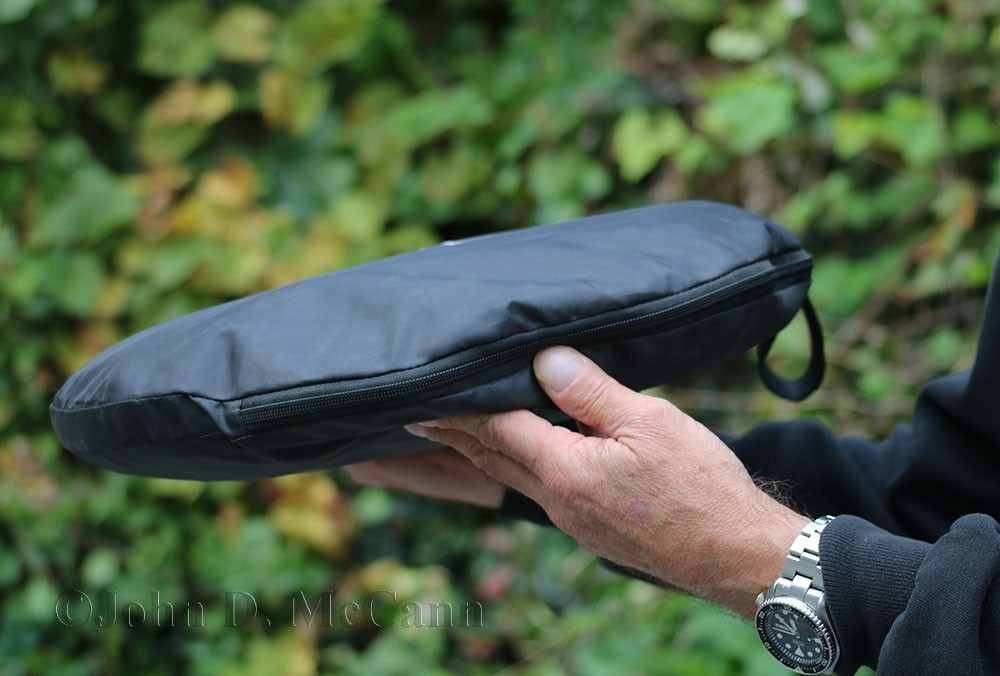 The pouch for the 5 in 1 Reflector kit is small enough to carry in the field and is very light.
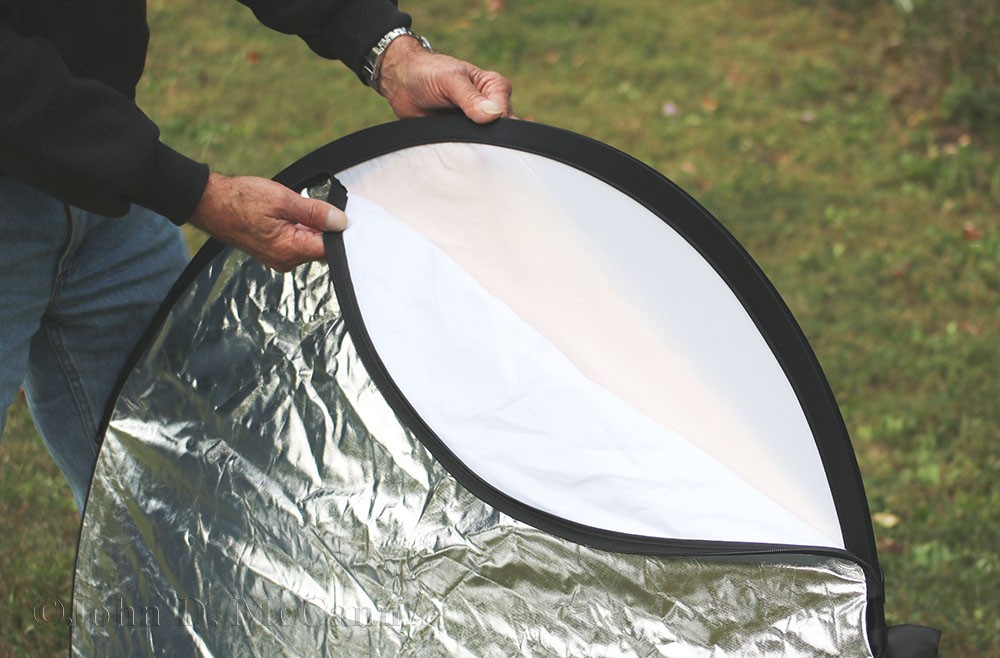
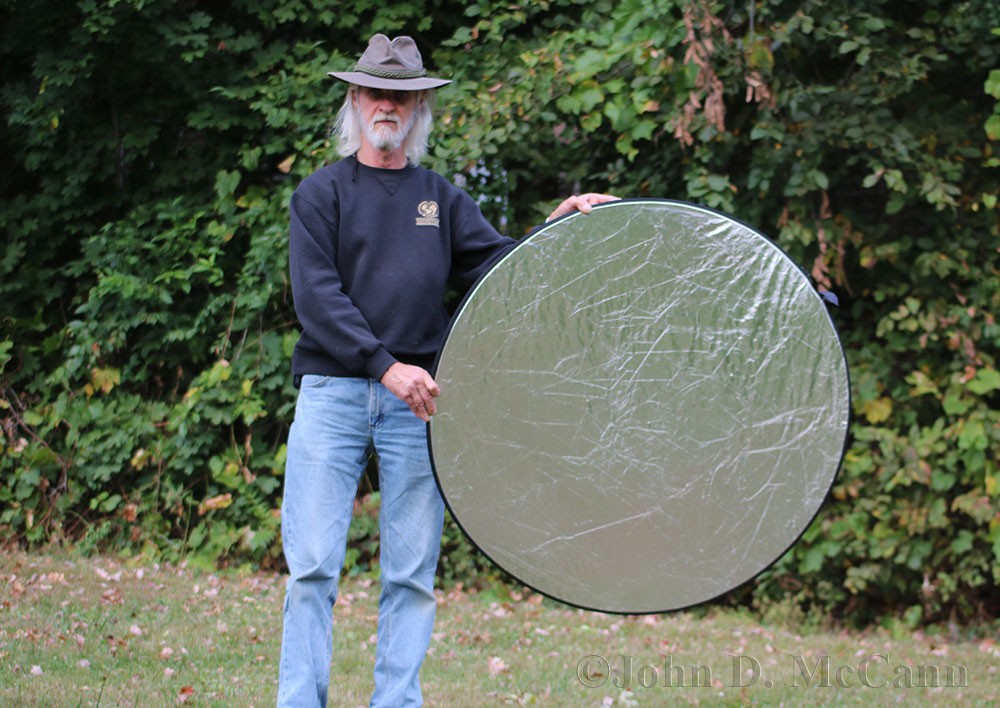 When the reflector is taken out of the pouch it springs into a 42" circular panel. This is the silver side.
 The reflectors are kept open by the frame of the diffuser on the inside. The black and silver side can
be turned inside out to reveal the white and gold side. It is then slipped back over the diffuser.
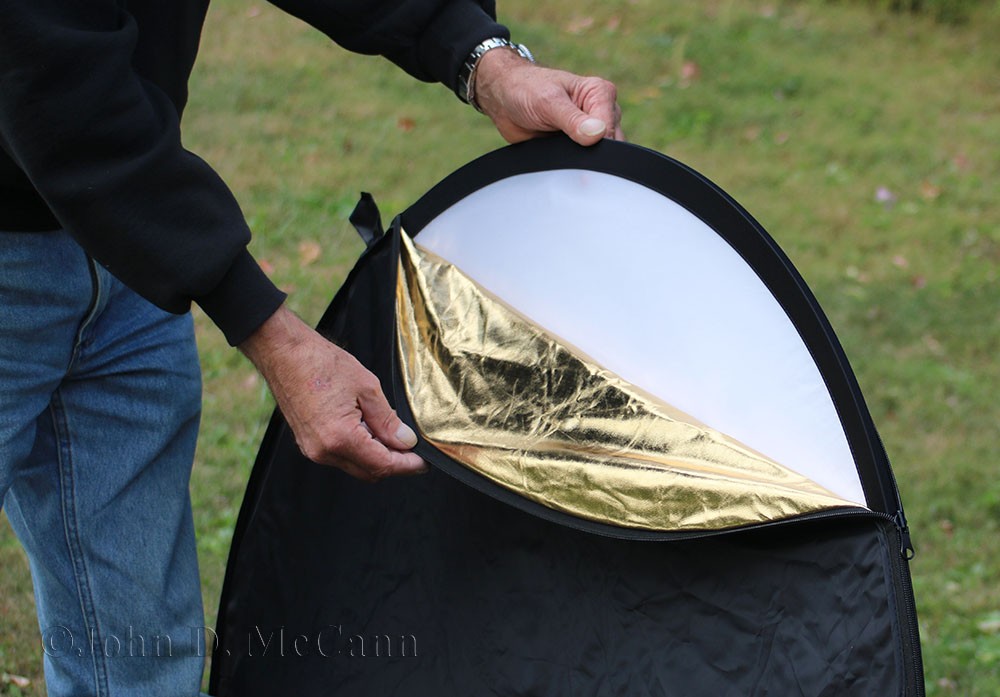 This shows the gold side of the reflector. The various colors provide you with various options for reflecting light.
The thing I really like about this 5 in 1 commercial kit is the diffuser. I'm sure many of you already know that it is better to photograph when it is overcast. Not dark, but when the light from the sun is diffused by light cloud cover. It reduces shadows and can provide more detail of a subject. I find this particularly helpful when photographing products for my website. It is also handy to reduce glare on your face when you are trying to take video and the sun is on your face, Of course, I can't always wait for an overcast day, and this is when this commercial diffuser comes in handy. Sometimes it helps to have somebody who can hold and move the diffuser where it needs to be, but being light, I can often handle it myself.
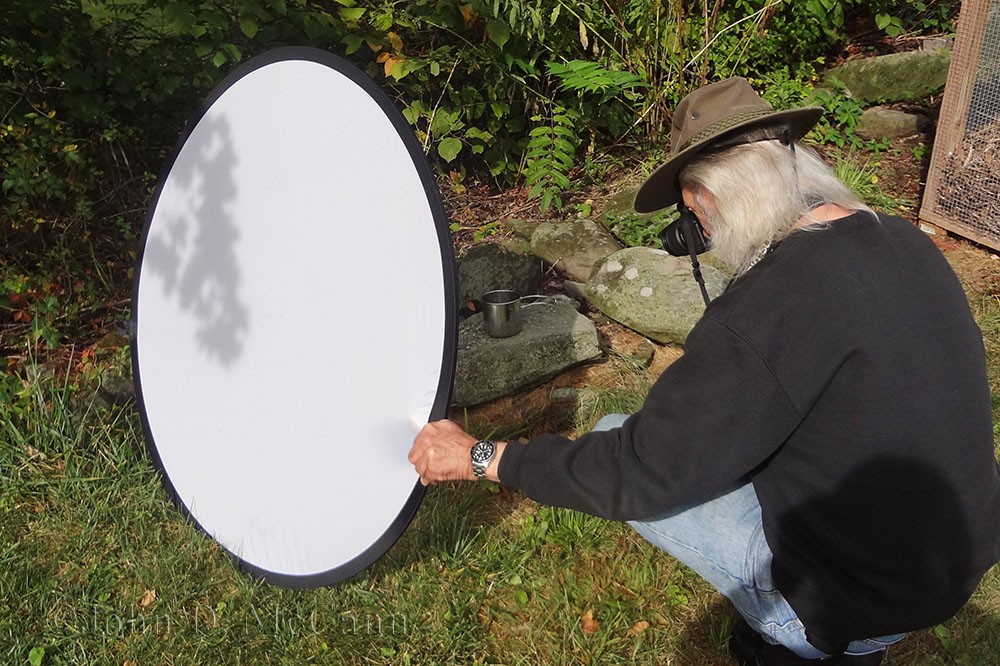 This shows me using a diffuser to eliminate shadows on a product I am photographing.
 This photo shows a mug without using a diffuser. You can see the shadow of both the mug and the handles.
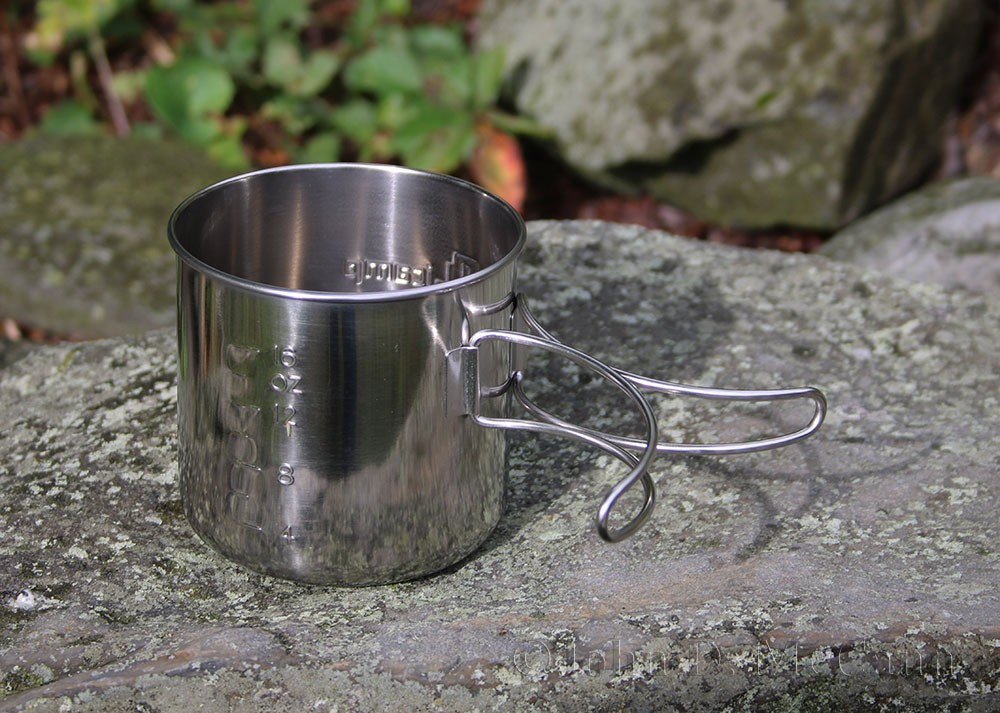
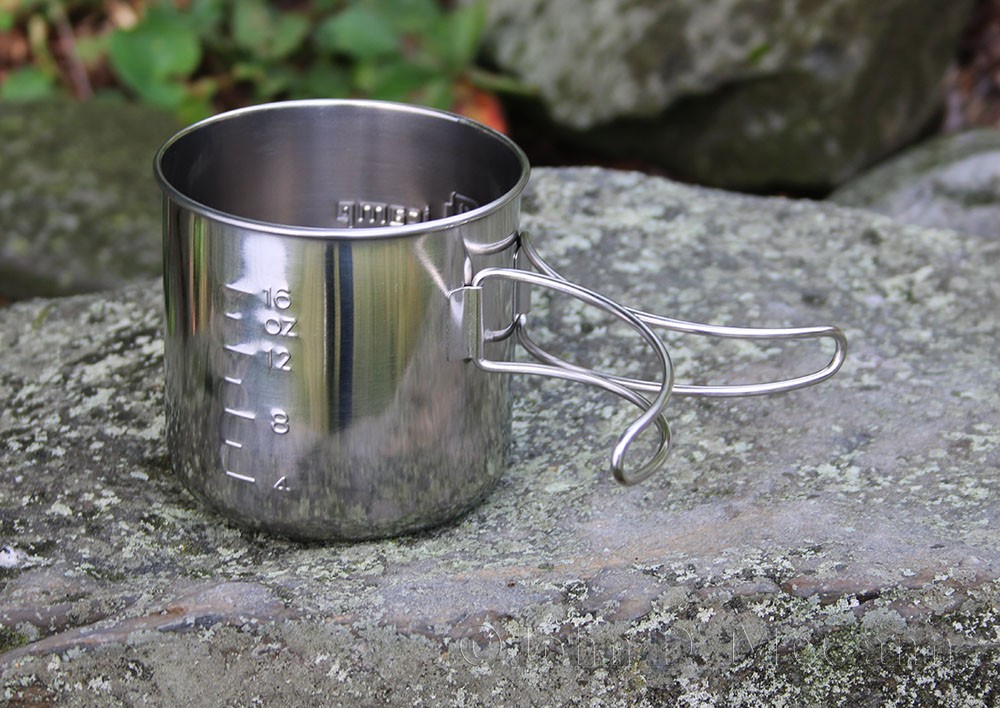 As you can see in this photo, the use of a diffuser eliminated the shadows of the mug and handles.
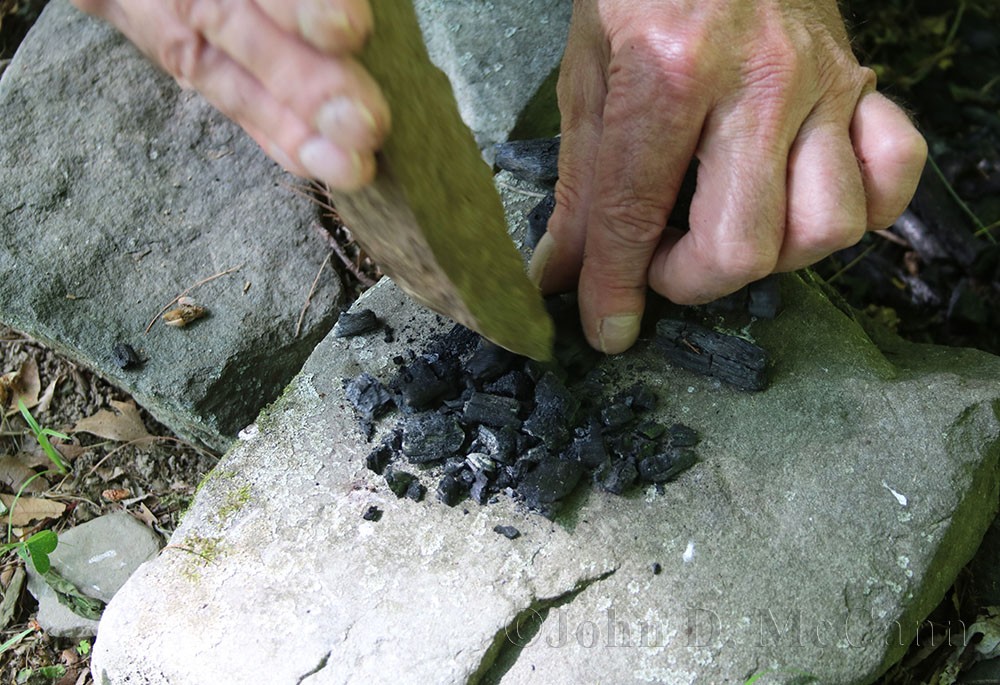 In this photo being taken for an article, I am trying to show how to reduce charred wood for use in a
field made water filter. The sun is bright and ruins the shot.
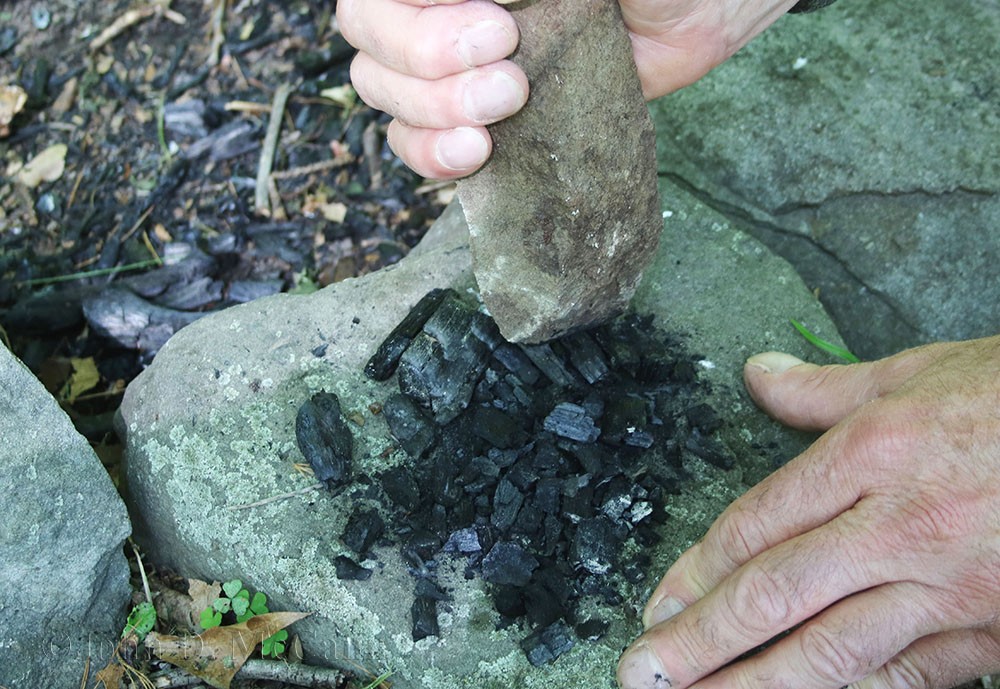 In this photo, a diffuser was used which provides more clarity to the final photo.
Well there you have it. Some simple techniques I have learned over the years, and hopefully they will help you when taking photos or videos. Of course they are not all inclusive and I'm sure you will devise some of your own techniques over the years. If you do, share them with others.
We hope you enjoyed this article and will help support our efforts by checking out our products. As always, Be Prepared To Survive!
Copyright © 2017 by John D. McCann