
- New Products
- Exclusive Gear
- Bushcraft Gear
- Containers
- Cooking
- Fire
- First Aid
- Food Gathering
- Knives & Tools
- Knife Collectors Corner
- Light
- Logo Gear
- Misc. Items
- Navigation
- Packs, Pouches & Bags
- Personal Care
- Repair Gear
- Shelter & Protection
- Signaling
- Urban Survival
- Water
- Writing Gear
- John's Books
- Bargain Bin

Drinking Glasses From Bottles
My wife, Denise, and I believe in self-reliance and therefore we are always looking for ways to provide for ourselves. Whenever we can, we would rather make something instead of buying it. This not only saves money but provides us with a real sense of accomplishment. While looking through a catalog Denise saw a set of drinking glasses, and the catalog indicated they were made from old wine bottles. Drinking glasses are something that always seem to get broken so she said, "We should try doing this".
The first thing we would have to do is cut the wine bottles at a length appropriate for using as drinking glasses. The first thing would be to score a line around the bottle and I already had an idea for doing that. But then we had to break the bottle around the score line. Denise said she had seen somewhere that you could use boiling water and cold water to break glass along a score line. Now it was my turn to say, "Let's try it".
As a kid, my father had taught me how to use a small hand-held glass cutter to score a line on a piece of glass in order to break it along that score to replace a broken window. I figured all I had to do was make a device that would hold a glass cutter and allow me to score a line around a wine bottle and keep that line at the same point so the score would remain level all the way around and meet perfectly at the starting point.
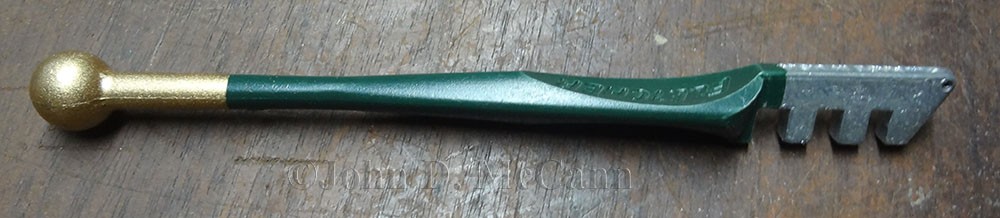 This is a view of a typical glass cutter available at any hardware store.
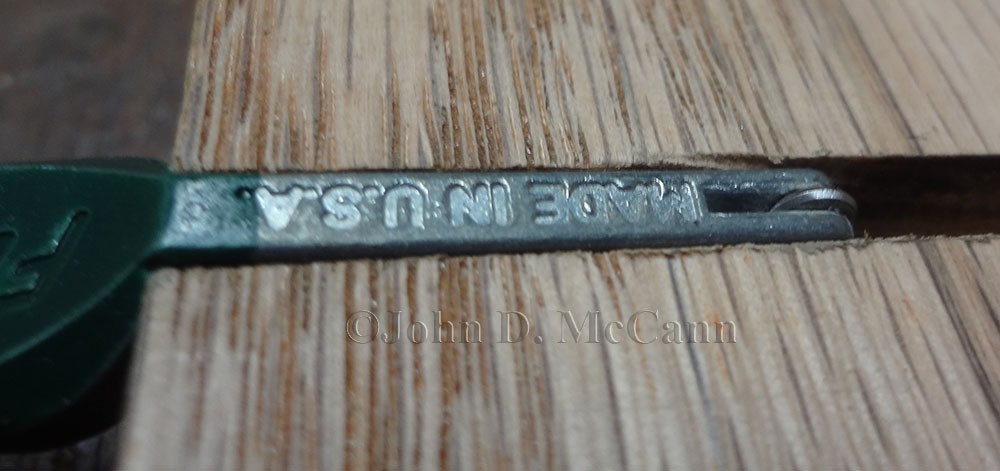
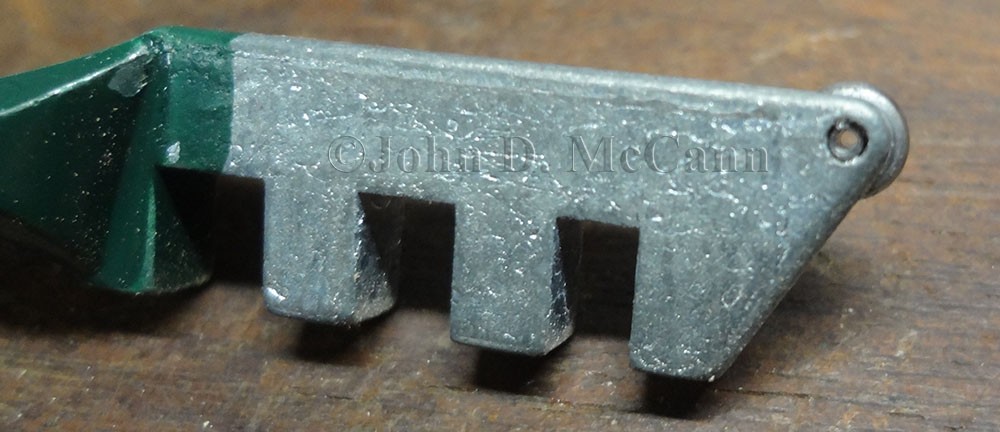 This is a close-up of the scoring wheel at the top front of the glass cutter.
I headed to the workshop with some ideas swirling around in my head and grabbed a couple of pieces of oak I had leftover from a garden bench refurbishment project recently completed. I figured if I screwed two lengths together a bottle could set in the ninety degree angle and be spun by hand. With a bottom attached the bottle would turn evenly. This should make an adequate jig for my needs.
The following part may sound technical but the entire process of designing and building the jig took only about fifteen minutes. Now all I needed to do was get a hand-held glass cutter attached so the wheel that scores the glass would score the bottle as it was turned by hand. I made some measurements for two heights of drinking glasses we wanted to make from wine bottles and marked those measurements (4-3/4" and 6-3/4") on a piece of oak.
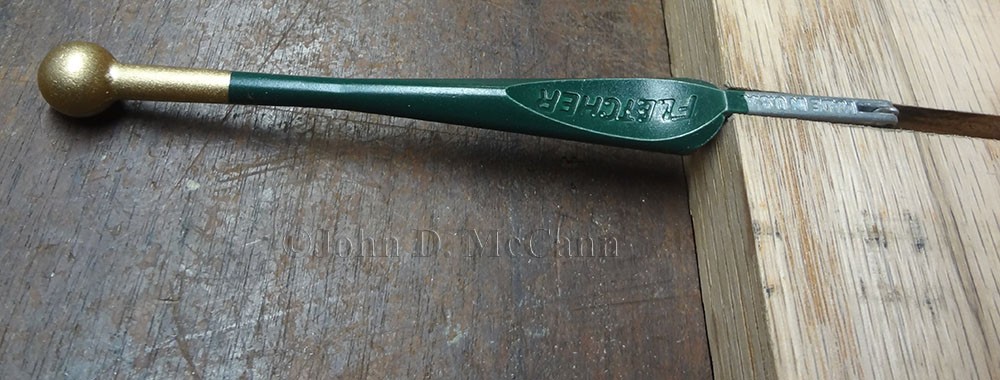
Next, I took some measurements of a glass cutter I had. I determined that the front cutter section was 7/16" high and 2/16" wide. I also determined that the front straight section holding the score wheel was 1-1/8" long before it bowed out into the shoulders of the thumb pad. I would need to cut grooves into the piece of oak, at the height measurements previously marked, so the glass cutter could slide into groove, being stopped by the thumb pad shoulders, leaving the score wheel above board level.
Now most of my old wine bottles average about 3-1/4" in diameter so I wanted the scoring wheel of the glass cutter to hit the approximate center of the bottle when it was laid in the wooden jig and turned. I knew the center should be approximately 1-3/8" (half of the diameter) and the glass cutter would slide into the groove 1-1/8" (the length of the front before the shoulders), so I wanted the board 2-1/2" wide. The length could be anything but I choose one foot as that should accommodate any wine bottle I wanted to use.
I then set the depth of the blade on my circular saw to exactly 7/16". I placed the piece of oak in a vise so it was held horizontally and did not block the marks where I needed to cut the groves for the glass cutter. Using my best eye and steadiest hand I hand cut the grooves in the oak. I had to take a couple of passes to get the width of the grooves exactly 2/16" wide. I checked the grooves with the glass cutter after each pass as I wanted the glass cutter to fit tight in the groove, not loose. Of course this could have been accomplished more precisely with a table saw, but this didn't need to be pretty, just functional.
Once the grooves were cut I used another 2-1/2" x 1' piece of oak and screwed it to the side of the piece with the grooves cut in it. I then cut a piece 2-1/2" x 3-1/4" for the bottom and screwed that on as well. All I had to do now was place the glass cutter in a chosen groove, lay a bottle in the jig, and turn the bottle by hand. If all my calculations were right, it should work.
 This is top view of the wooden jig as described in the article.
 This a closer view of the glass cutter in the groove of the jig with the scoring wheel up.
 A closer view of the cutting wheel on the glass cutter in the wooden grove.
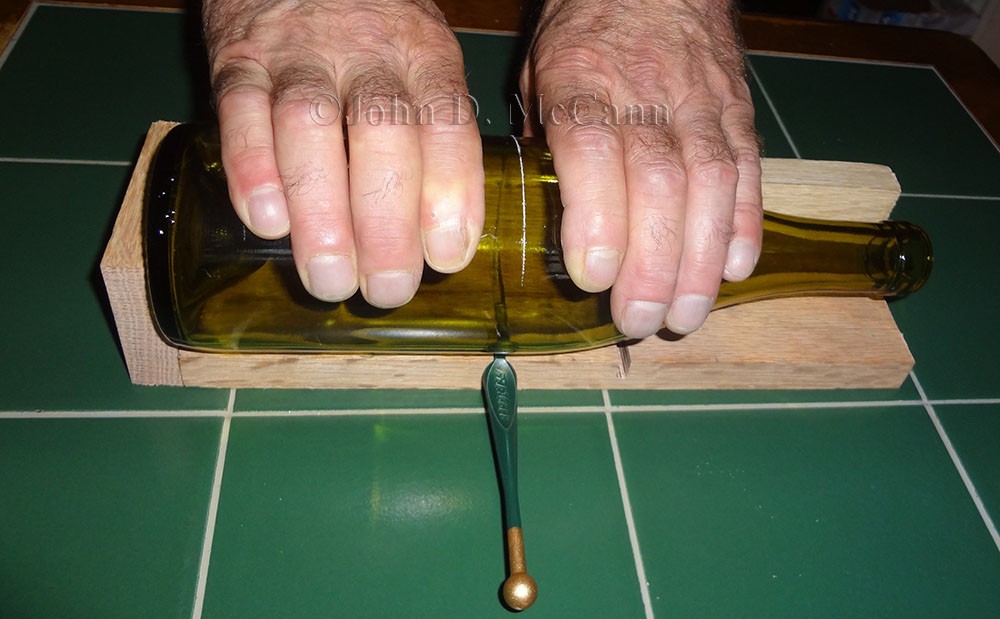
A wine bottle was laid in the jig with the bottom of the bottle on the bottom of the jig. I held the bottle in place with both hands with my thumbs over the back of the jig, keeping the bottle tight against the back and the bottom. I started turning the bottle by rolling it forward (away from me) but pulling it tight against the back. I didn't want to roll it backwards as it might slide the glass cutter out of its groove. By rolling forward, the bottle could pull the glass cutter into the groove, against the shoulder of the thumb press, whereby it would stay at that position. This should keep the glass cutting wheel where I wanted it.
I rotated the bottle and heard a gritty sound as the cutting wheel started scoring the bottle. This was good as it indicated the wheel was in good contact with the bottle. I could see that I was getting a good precise score all the way around the bottle. The score line met exactly at the finished end and I could tell the jig was working. I continued rotating the bottle (about 6-7 times) and I stopped hearing the gritty sound I figured I was done.
 A view of a wine bottle in the jig from the front. You can see the score line as it is rotated.
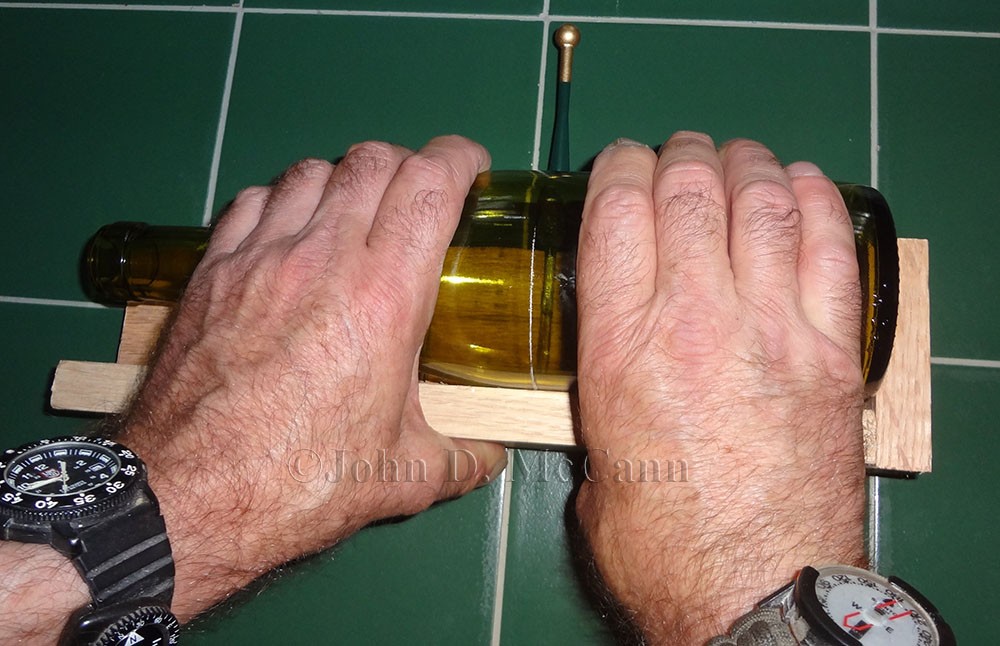 This is view from the top showing the thumbs at the back of the jig. As you roll the bottle forward
with the hands, the thumbs keep the bottle tight against the back.
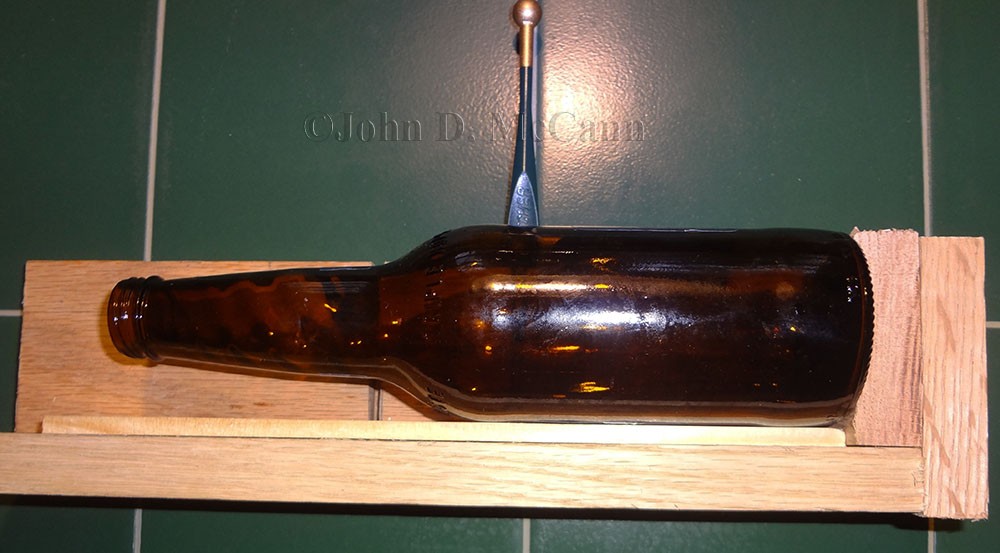
 A view of a completed score line completely around the bottle.
In further experimentation when I tried beer bottles to get a smaller juice glass, I found that some of these bottles are concave on the side. In this case, I've had Denise press down slightly on the handle of the glass cutter which raises the scoring wheel and makes a tighter contact against the bottle. In regard to smaller bottles like beer bottles I made some blocks of wood to place in the bottom of the jig in order to get the length I wanted without the need for more grooves in the jig, and small lengths of thin wood in the back of the jig to compensate for the narrower bottle.
 A beer bottle in the jig using wood blocks to adjust the length and width of the scoring wheel.
Well the jig worked as designed. Keep in mind that I didn't research a means to make a jig and I'm sure there are various homemade or manufactured devices for scoring a bottle. Some may be better than my way, but I always try to design something myself in the event that this is my only option.
Now for breaking the bottle around the score line. This part is much easier than I anticipated. First, put on a tea kettle of water, go get your safety glasses, and wait for the water to boil. Before starting this step, put the safety glasses on. I have never had a bottle explode during this process but it doesn't mean it couldn't so I highly advise protecting your eyes.
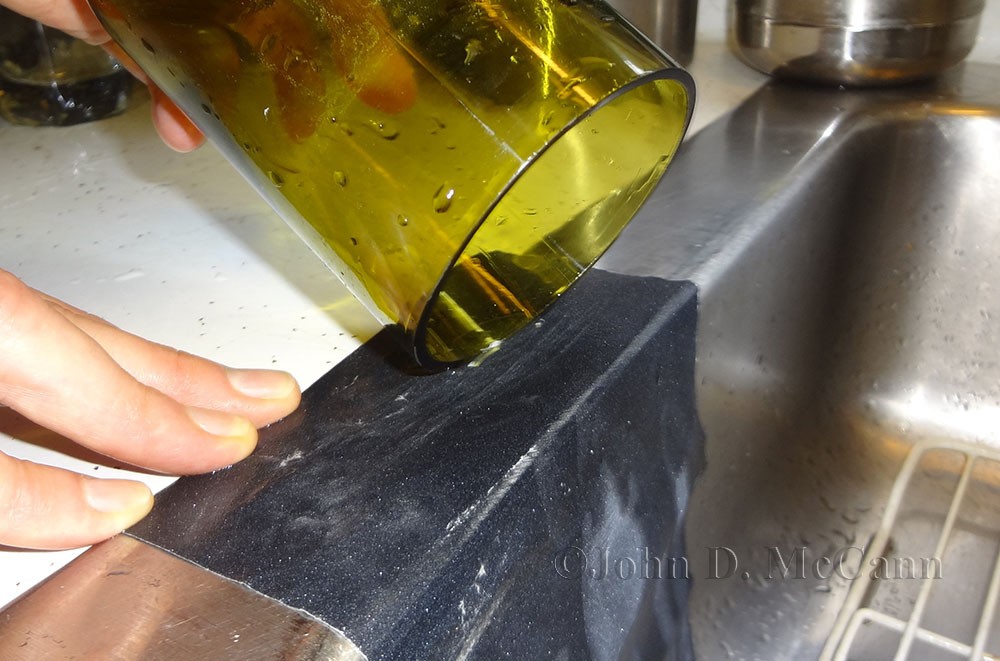
Once the water has boiled, take the scored wine bottle and go to the sink. Hold the bottle at the bottom, neck down, and pour boiling water around the score line, by spinning the bottle around, making sure the bottle is hot. Then run cold water over the score line until the bottle is cool. It should take two or three times doing this and the neck of the bottle will fall off right around the score line. It almost seems like magic.
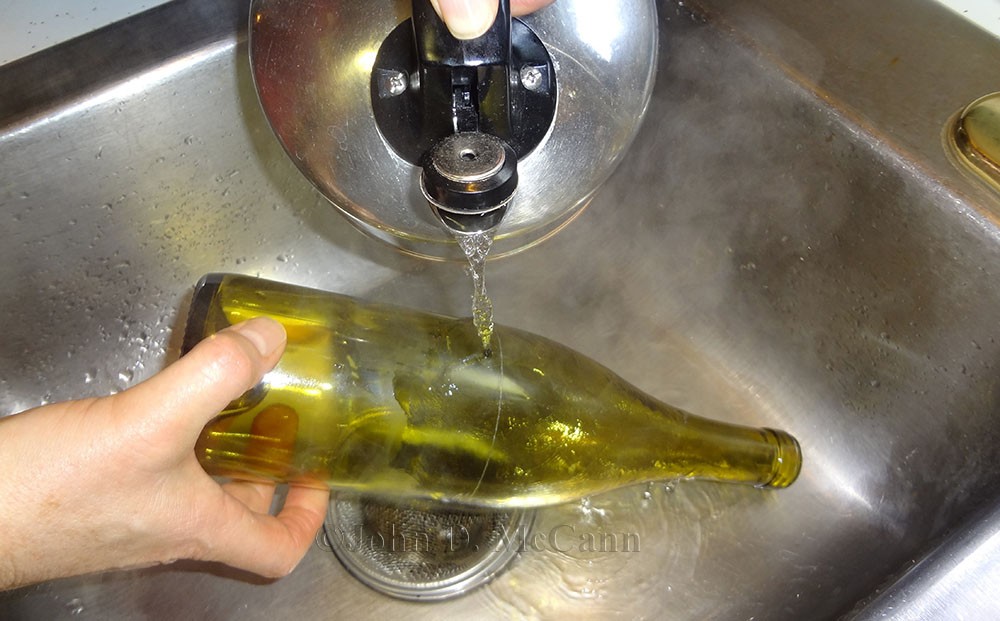 This shows boiling water being poured on the score line while the bottle is spun around.
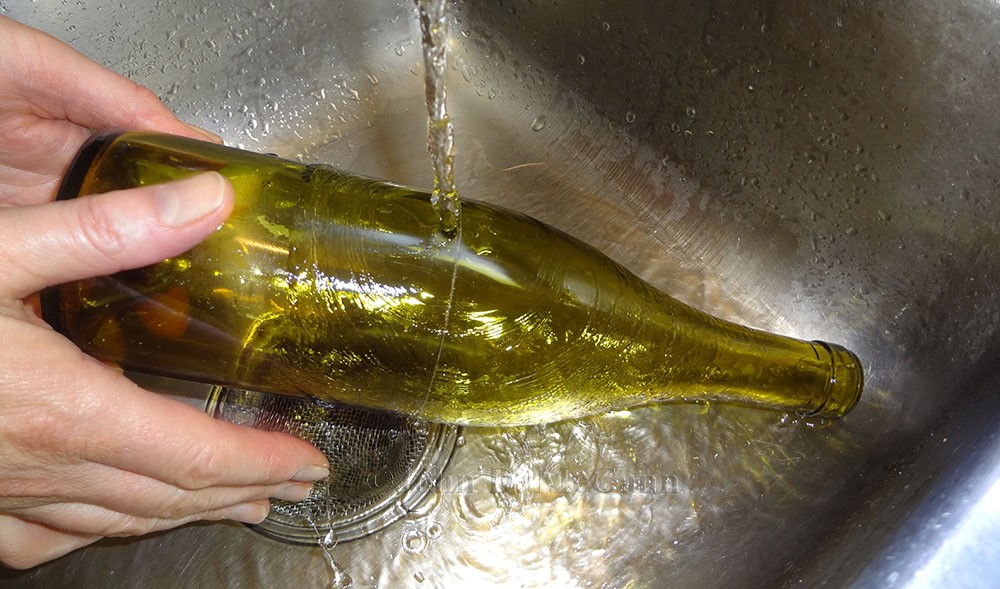 This shows cold water being run on the score line as the bottle is rotated.
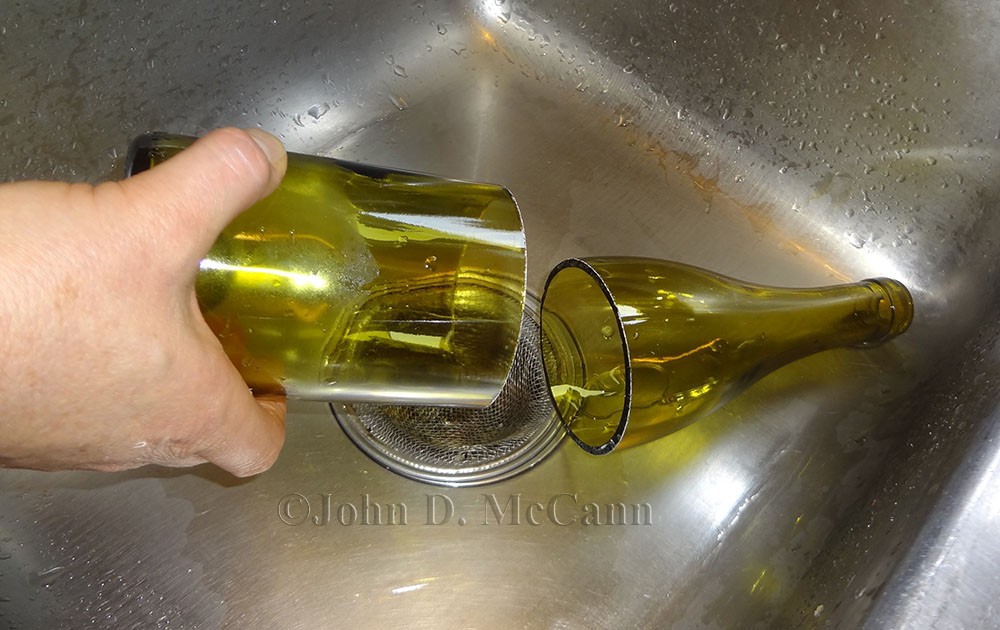 And the neck of the bottle falls off like magic.
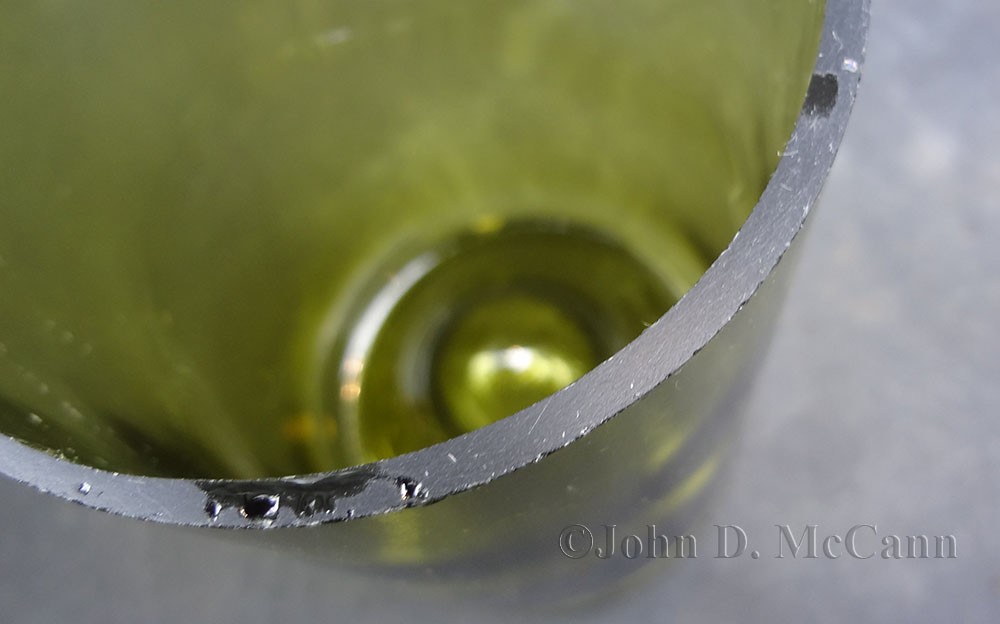
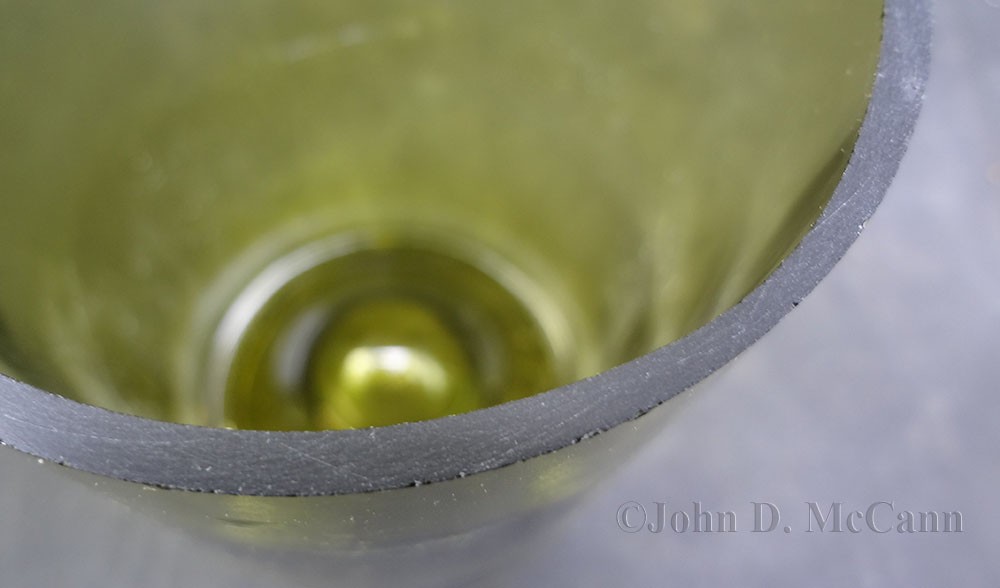
 A view of the edge of the rim after cutting the bottle.
My wife, Denise did some initial research on the internet and learned that you must wear a respirator when dry sanding glass as the glass particles in the air (glass dust) can be breathed into your lungs causing damage. This sounded hazardous to me, and having a beard, respirators never seal well on my face. Further searching indicated that you could wet sanding which holds down the dust. I remembered using wet-dry sandpaper back in my body shop days where I would keep sticking the sandpaper in a bucket of water for finish sanding. But I was working on metal cars, not glass.
But this got me to thinking. If I used wet sandpaper (this doesn't mean using regular sandpaper but using what is called "waterproof sandpaper") and kept it underwater while sanding, there wouldn't be any glass dust in the air. What I envisioned was using a small metal or glass pan that was shallow. I could then place the waterproof sandpaper in the pan and fill the pan with water. I could place the rim of the drinking glass down into the water and twist the rim back and forth on the sandpaper, sanding the rim. Being submerged there would not be any dust to breath in. I felt that the twisting action might cause the sandpaper to twist as well, so I could wrap the sandpaper around a piece of stiff plastic before submerging it.
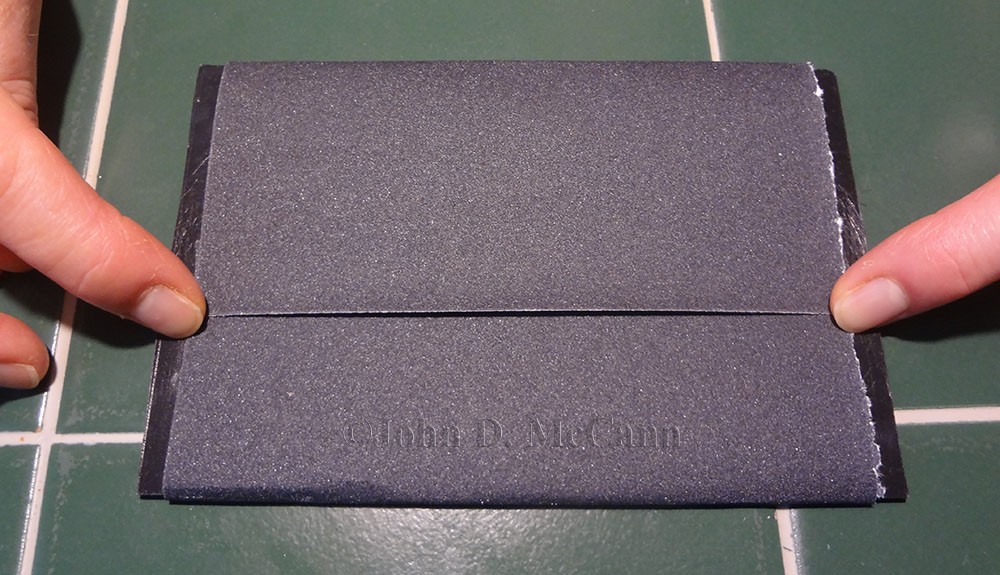
What I came up with was this. I looked around and found a small Pyrex® pan for making small Lasagna. It measured 7" x 5" x 1.5" deep and it looked perfect for my needs. I then needed a piece of plastic to wrap the sandpaper around. Being I make Kydex sheaths I went to the workshop and selected a piece of Kydex 3/32" thick. I cut a piece 4" x 6" as the pan I chose had slanted sides and this was the approximate measurements of the inside bottom. I would now wrap one half sheet of sandpaper around the Kydex, and with the seam down, submerge this in the pan with about an inch of water.
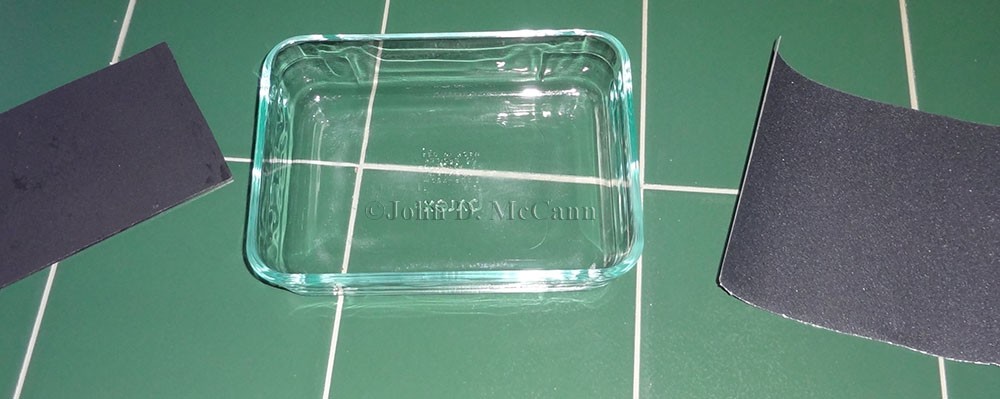 This is view of the Kydex plastic, Pyrex® dish, and waterproof sandpaper.
 This is a half sheet of waterproof sandpaper wrapped around the piece of Kydex.
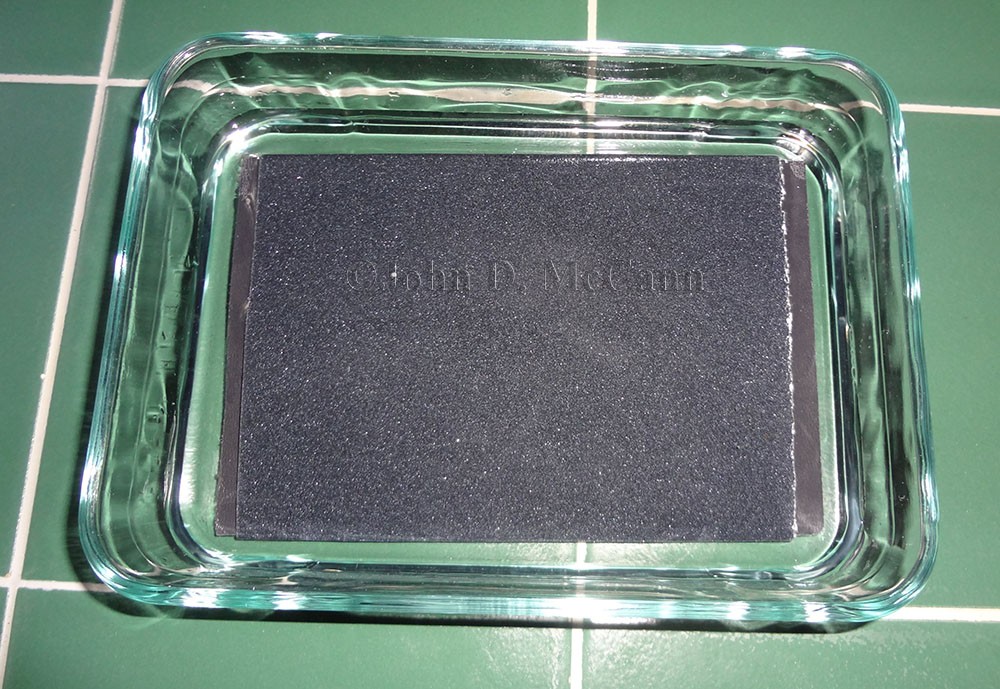 This shows the piece Kydex with waterproof sandpaper in the Pyrex® dish with about an inch of water.
The seam on the sandpaper is placed down so it is under the Kydex.
I set this up, and using a piece of 600 grit waterproof sandpaper, I gave it a try. I placed the rim of the cut bottle down in the water and held it against the sandpaper with one hand over the bottom. Pressing down, I twisted the rim by rotating the glass left and right in a circular motion, against the sandpaper. I did this for some time and checked the rim. It was definitely sanding, but not very fast. I figured if a little grit was good, a lot more would be better. I dropped down to 310, 120, and finally 60 grit.
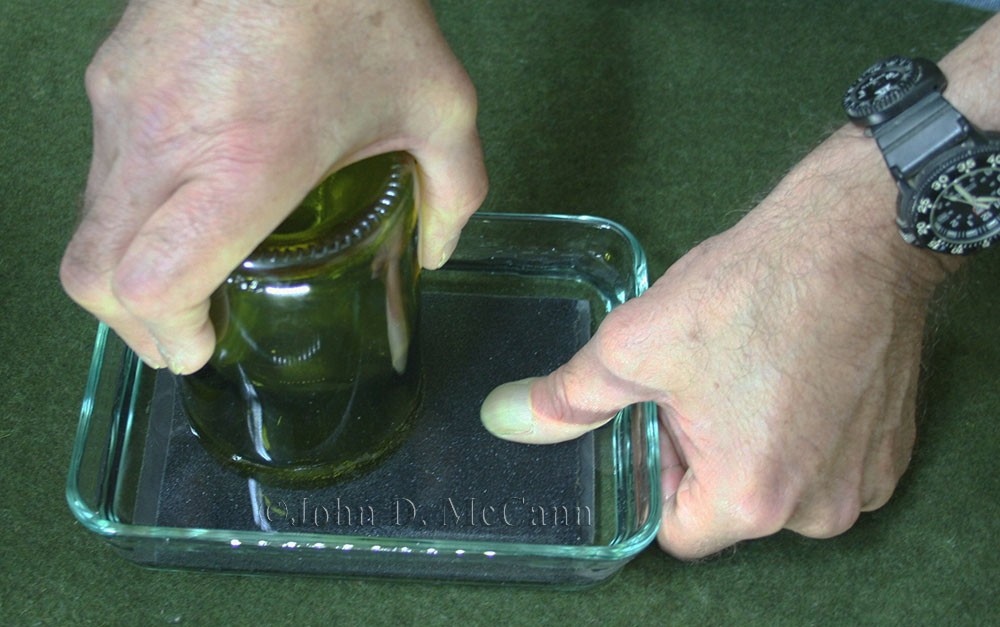 This shows how the glass is held with the rim against the sandpaper. It is then twisted by rotating the
glass left and right in a circular motion on the sandpaper.
The 60 grit was just what I needed for the initial sanding. It quickly smoothed the rough rim whereby I could then move up to finer grits to finish off the rim. I now start with the 60 grit and move to 120, 320, and 600 for the final sanding. A finer grit will provide even a smoother more finished rim, but I figured I'm not making these to sell but to use. The initial sanding with the 60 grit sandpaper can take 10-15 minutes to remove all imperfections from the cutting. The final sanding with the other grits take about 5 minutes each, depending on the final finish you desire.
 This is a view of the initial sanding and you can see that although it is getting smooth it needs more sanding.
 This shows the rim after continued sanding and it is now getting smooth all the way around.
 This shows the rim after using various grits of sandpaper and it is smooth enough to use as a glass.
Once the rim is flat and smooth you will need to sand the sides of the rim in order to bevel it slightly so you don't have a sharp ninety degree edge. This took some experimentation as well. At first I tried to angle the outside edge in the pan and spin the outside edge on the submerged sandpaper. This didn't work so well as I couldn't get the angle I wanted and the glass kept banging on the edge of the glass pan.
Next I went to the sink where I could keep the sandpaper wet and started with a 120 grit waterproof sandpaper. At first I tried wetting a small piece and wrap it around the top of the rim. It worked, but it resulted in scratching the glass below the rim. Denise finally tried placing the sandpaper on the top edge of the sink and, holding the glass on the bottom, spin the rim on the sandpaper. She was able to work the rim up and down beveling the rim nicely. Let the weight of the glass do the sanding and remember to keep the sandpaper paper wet!
 This is a view of the process we use to sand the outside of the rim.
Now for the inside of the rim. At this point the only thing we have been able to come up with is hand sanding with a small piece of sandpaper. We keep it wet and place it over an index finger and sand the inside rim being careful not to sand the inside of the glass below the rim. Again this will scratch the glass and look unsightly (but still be functional).
 This is the only way we have been able to come up with for sanding the inside edge of the rim.
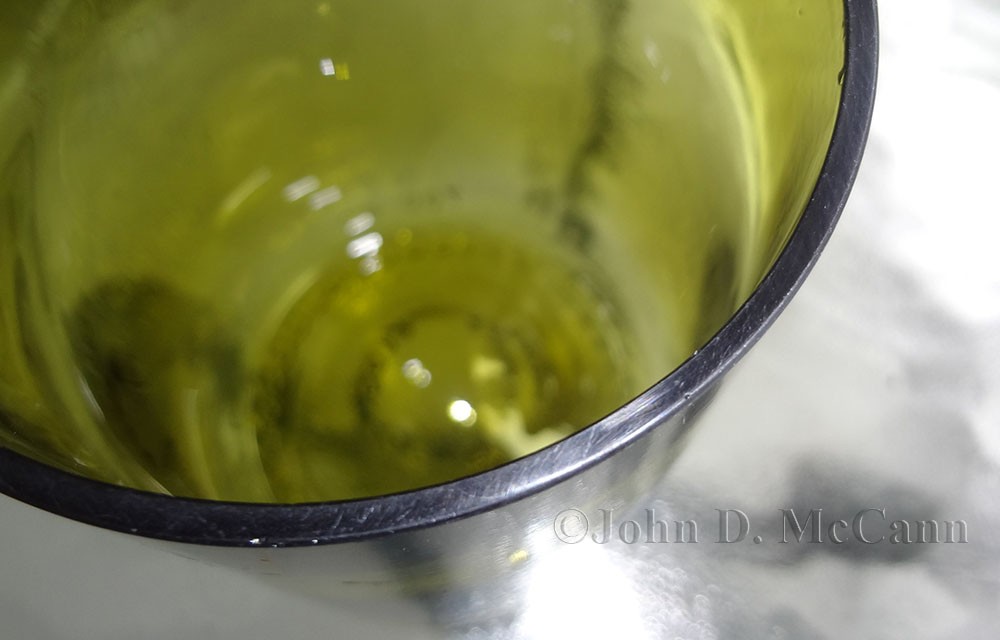
 This shows one of the finished rims on one of our homemade drinking glasses.
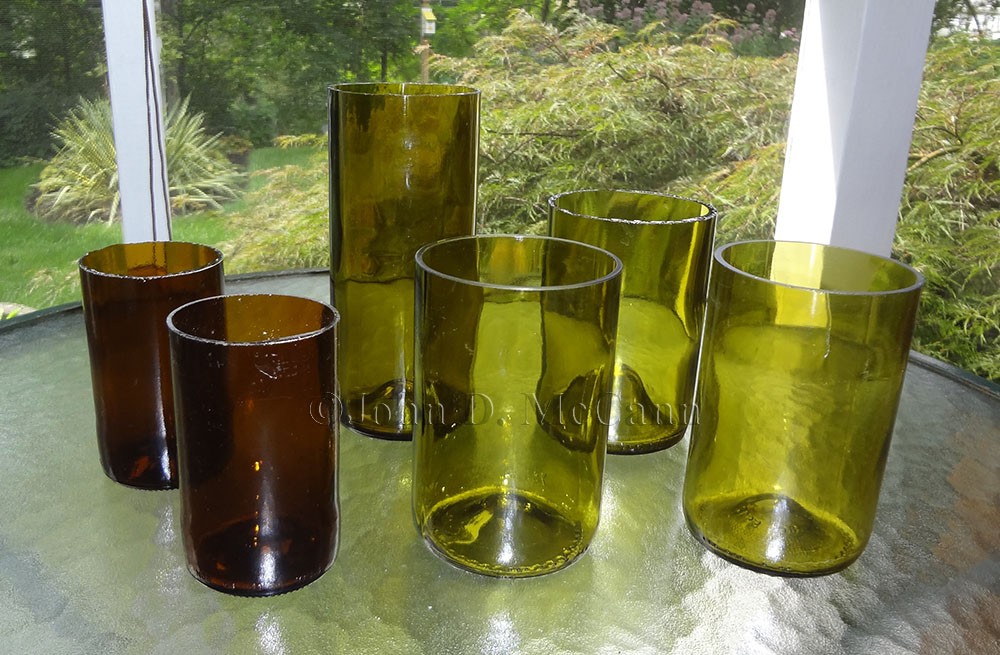
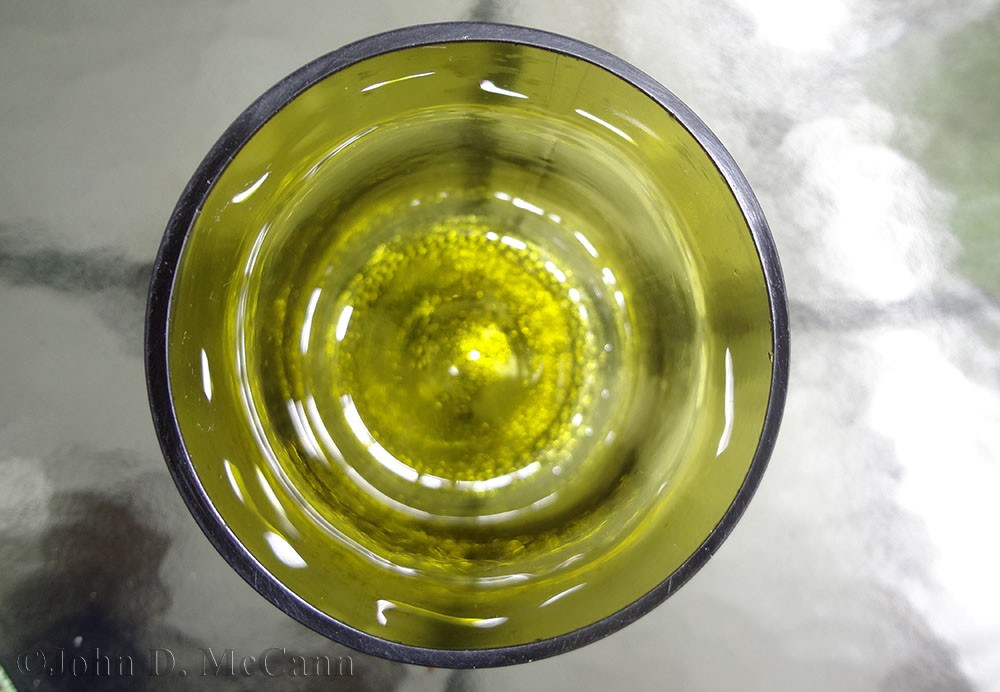
 A view of various sizes of glasses in various stages of completion.
After making your glasses you will have the necks of the bottle left over. We had the tops setting around for quite a while. Always wanting to recycle whatever we can, we knew eventually we would come up with a use for them. Then one day while playing with a new oil lamp that uses a Mason jar as the bottom, we wondered if the tops of the old wine bottles could be used as emergency globes for oil lamps. This would be especially useful in an emergency situation as replacement globes if some got broke.
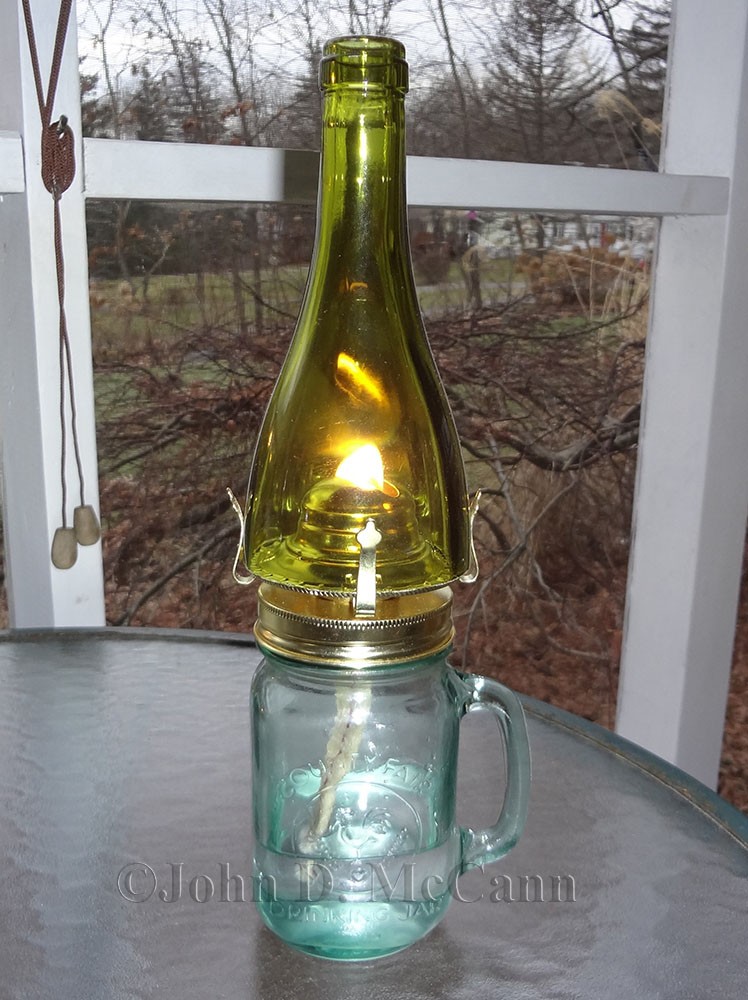 Here is wine bottle top used on an oil lamp top made for a mason jar.
We found that the many different lamps we had used different sized globes, but using various sized bottles to make glasses, we were able to find some to fit various sized lamps. Keep in mind, not all bottle tops will fit all oil lamps. If you want a top for a particular oil lamp, you might want to measure the diameter of the bottle before cutting it for a drinking glass.
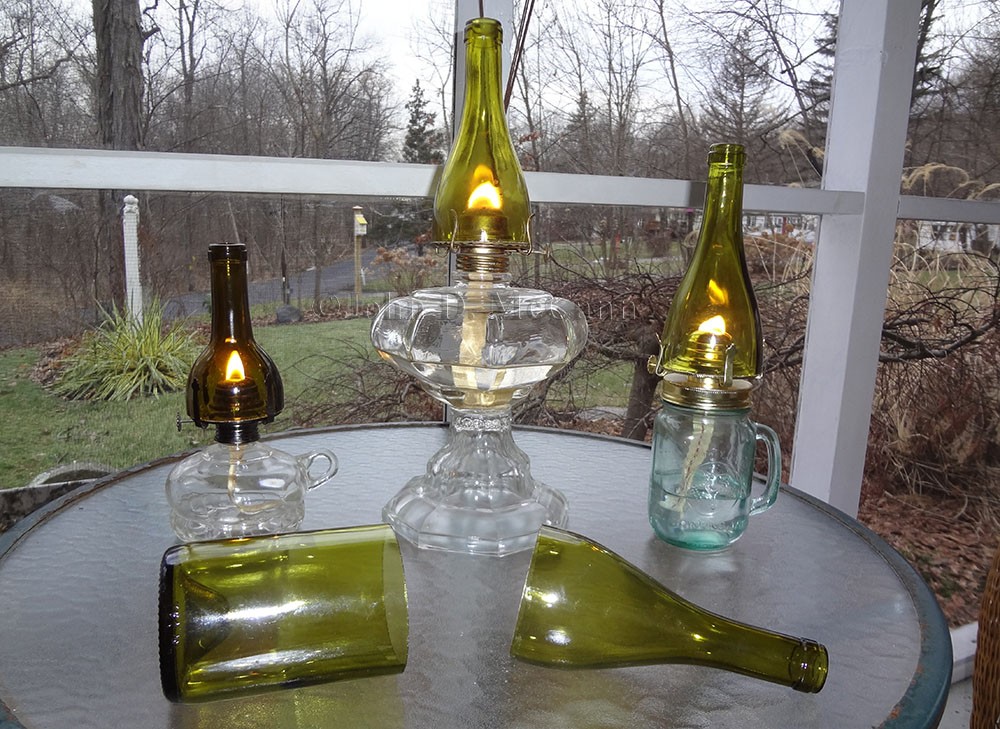 This photo shows a cut wine bottle with both bottom and top, and three different oil lamps we were able
to use bottle tops as globes. The one on the left is actually a beer bottle top.
Well this is the process we have devised to make drinking glasses from various wine and beer bottles. It may not be the best or fastest process but it works and we can make our own glasses. There may be some process out there for alternative cutting or sanding glass. You can research that yourself. We are happy with our ability to do it our self and it provides us with another way to be self-reliant.
We hope you enjoyed this article and will help support our efforts by checking out our products. As always, Be Prepared To Survive!
© 2014 by John D. McCann