
- New Products
- Exclusive Gear
- Bushcraft Gear
- Containers
- Cooking
- Fire
- First Aid
- Food Gathering
- Knives & Tools
- Knife Collectors Corner
- Light
- Logo Gear
- Misc. Items
- Navigation
- Packs, Pouches & Bags
- Personal Care
- Repair Gear
- Shelter & Protection
- Signaling
- Urban Survival
- Water
- Writing Gear
- John's Books
- Bargain Bin

Weaving In The Field

Oftentimes in the field, it might be handy to make a straw mat, a windbreak for a survival shelter, or other type device from dried grasses, reeds, etc. A simple way is by hand weaving or loom weaving.
Hand weaving is the simplest, but is also slow going. A method that works well is starting with a loop over a pole, with the running ends pulled back through the loop, like starting a prusik loop.
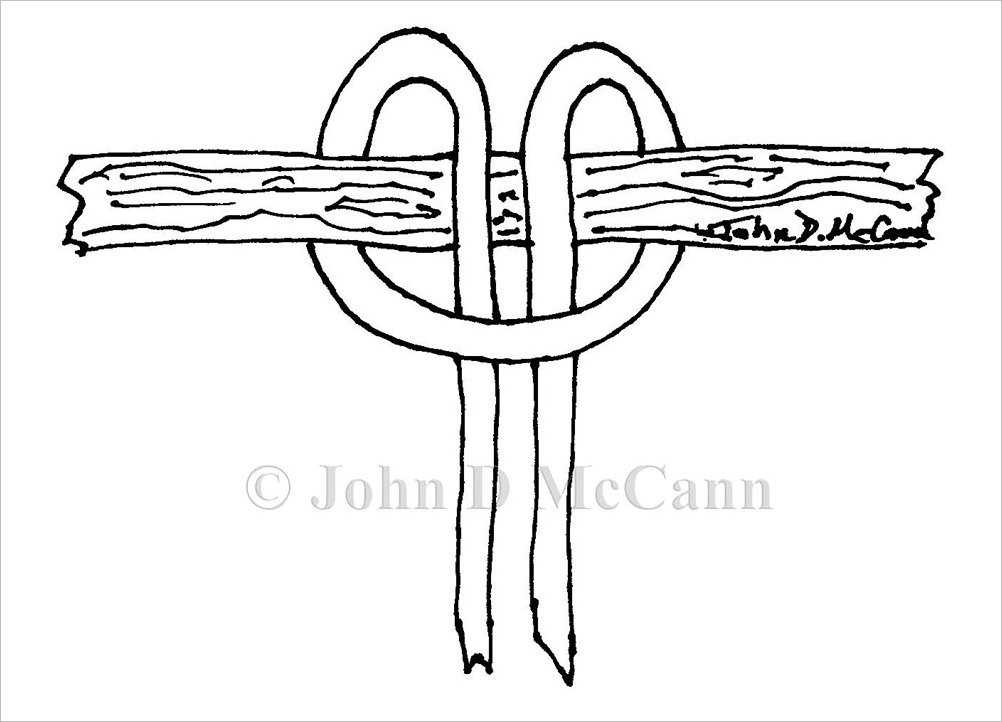 Hand weaving using a loop over a pole with the ends pulled back through the loop.
Weaving is then normally accomplished by placing a reed or small bundle of dried grass in between the running ends (I call these the runners and you need 2 or more runners in order to weave). Each running end (there are 2 on each runner) is wrapped around the reed or bundle from opposite sides, wrapping around the bottom, until they cross. You then add another reed or bundle, again wrapping the running ends around from opposite sides, each time crossing the bottom from opposite sides. Although this works fine if you are working on a flat surface, if you are working by hanging the runners vertical, I find it is best to use a simple overhand knot each time you cross the bottom of a reed or bundle (see photos below for clarification).
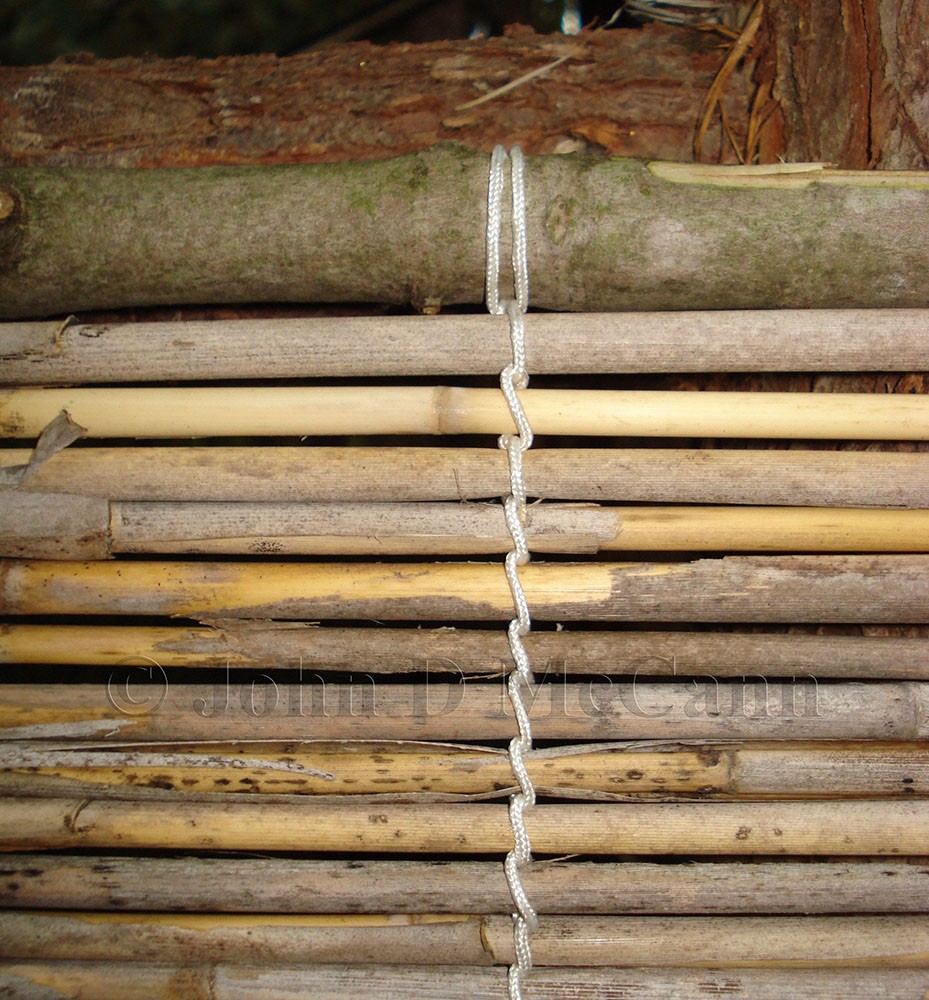 The initial loop at top with a simple overhand knot after each bundle.
 A close view of the simple overhand knot after each bundle.
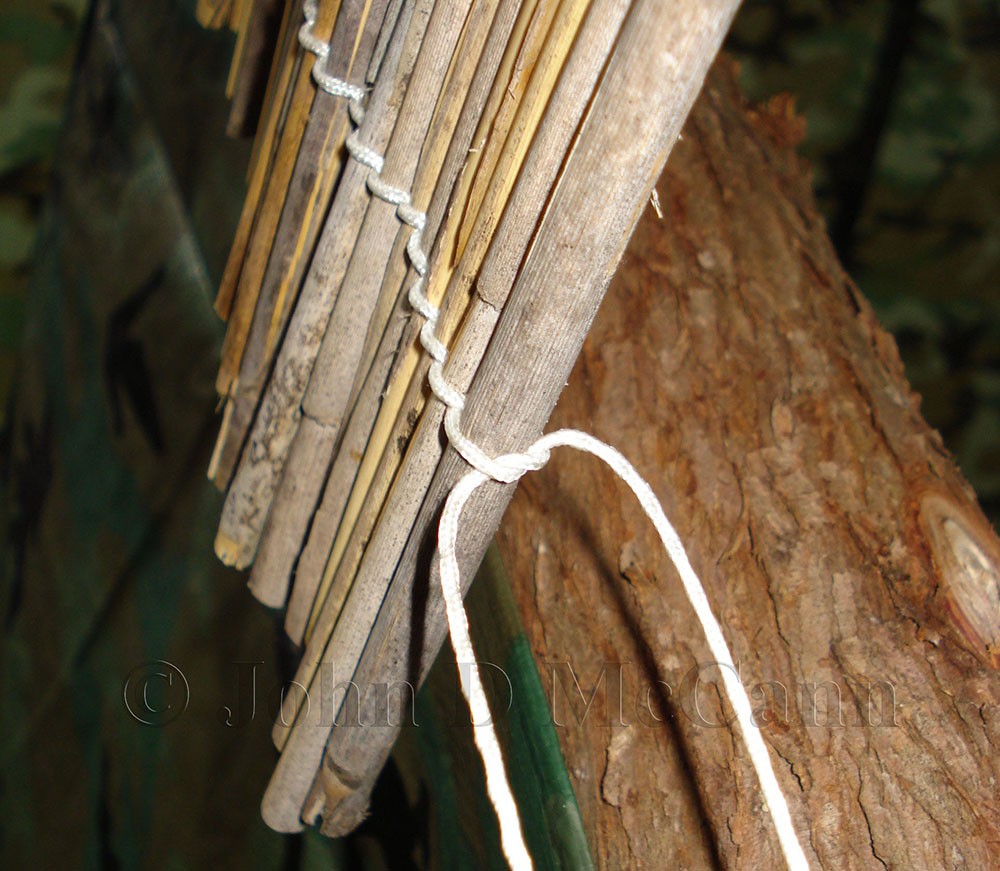
 A view of a three runner project making a simple reed door.
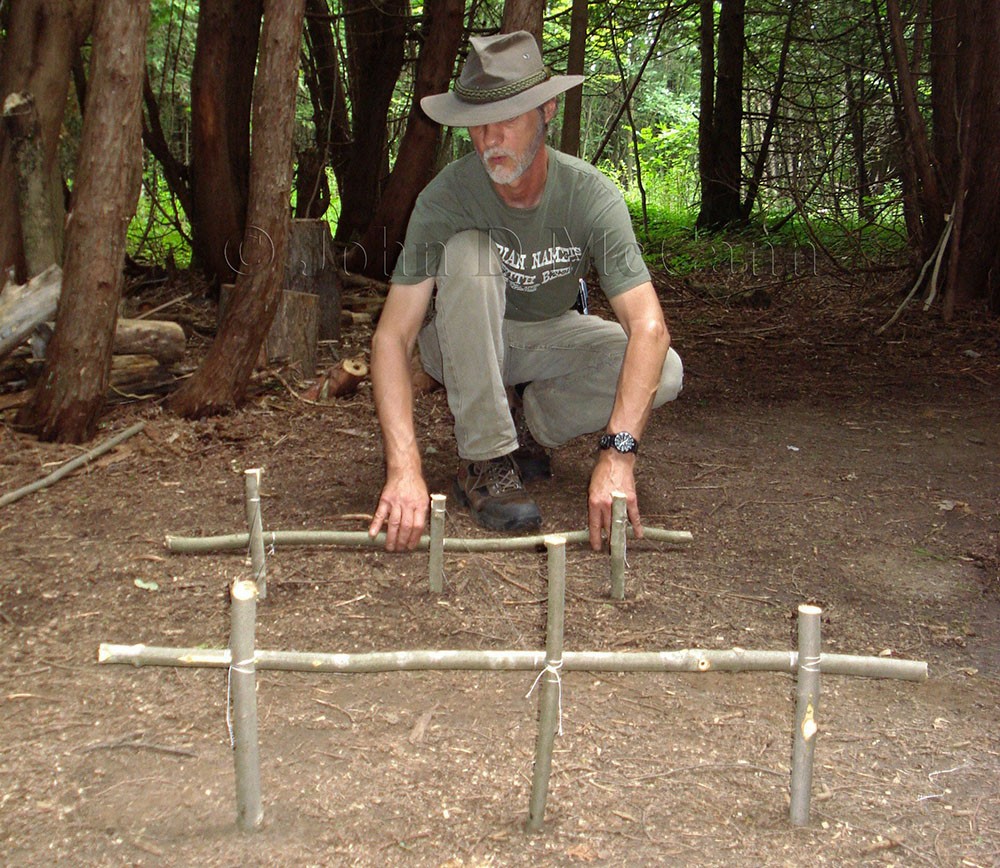
Although hand weaving works well, as we indicated earlier, it is slow going. Therefore, if you have time, it is better to make a Field Expedient Loom. A loom allows you to weave much quicker than hand weaving. A Field Expedient Loom can be made easily and quickly using four or more stakes as uprights and three cross bars. The quantity of stakes is determined by how many runners you desire. You need a front stake and a rear stake for each runner. You need at least two runners but can use three, four, or more, depending on how wide you want your project (which is usually determined by the length of your bundles).
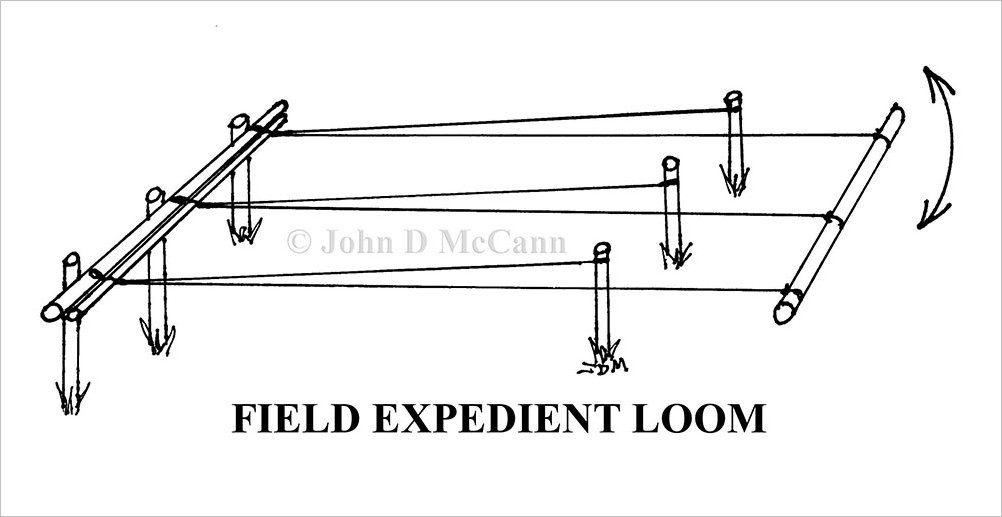 This diagram shows how a Field Expedient Loom is set-up.
As you can see from the above diagram, a cross bar is attached and secured to the rear uprights. Another smaller cross bar is then attached to the larger one and this is the first cross bar of the project you are making. A stake is then placed in front of each rear stake; at a distant further than the length you want your project. If you were making a long sleeping mat, the distance between the upright stakes would be far greater than those the above diagram.
 A view of the rear crossbar attached to stakes and the runner attached to the crossbar.
Next, one side of each runner is attached to the front corresponding stake, making it very taut. The other side of each runner is tied to the third crossbar (which becomes the loom handle). The third cross bar must extend past the front stakes. The distance is determined by the length of the project, keeping in mind that as you weave, the thickness of the bundles will take up a considerable amount of the runners. This will shorten the distance between the loom handle and the front stakes. You don't want to have the loom handle reach the front stakes, before your project is complete.
 Determining the length of the runners attached to handle.
Once the loom is completed, you pull the handle crossbar taut and raise it above the front stakes. You then place a bundle of dried grass, or whatever material you are using, across and on top of the horizontal runners tied to the front stakes. Push the bundle back against the rear crossbar. You then pull the handle crossbar down (keeping the runners taut), below the front stakes. You then load another bundle, but this time from below the runners tied to the front stakes, but on top of the runners tied to the handle crossbar. You then raise the handle crossbar above the front stakes and continue loading bundles in this manner until you get to the length of your project. When you get to the end, insert another small crossbar, and tie off to it.
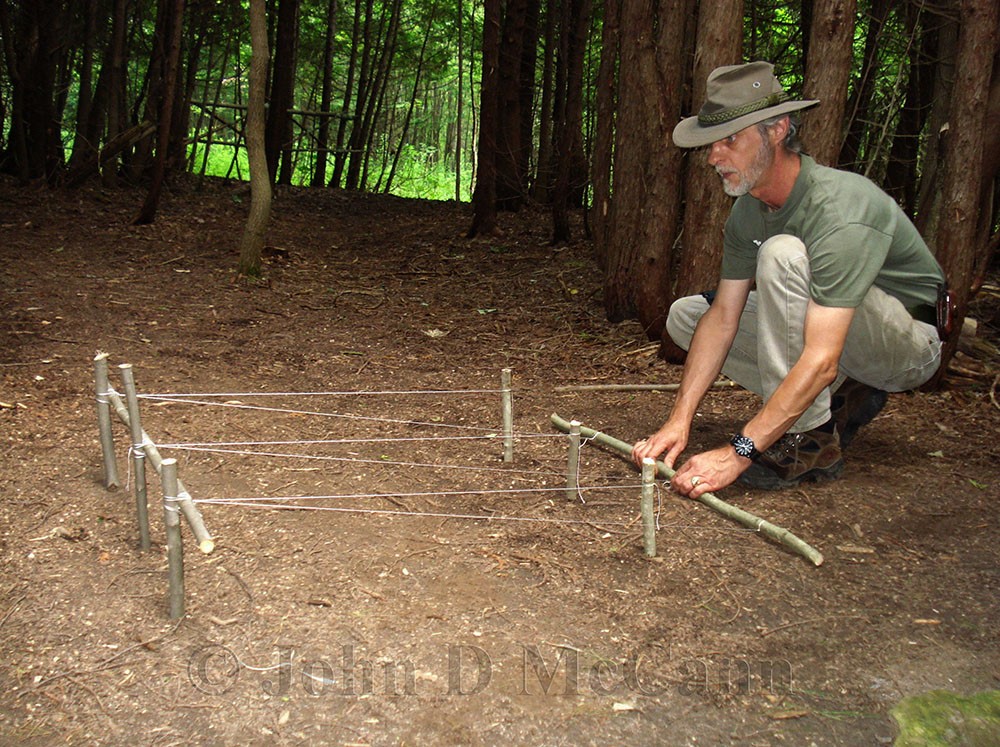 A view of the Field Expedient Loom ready to use.
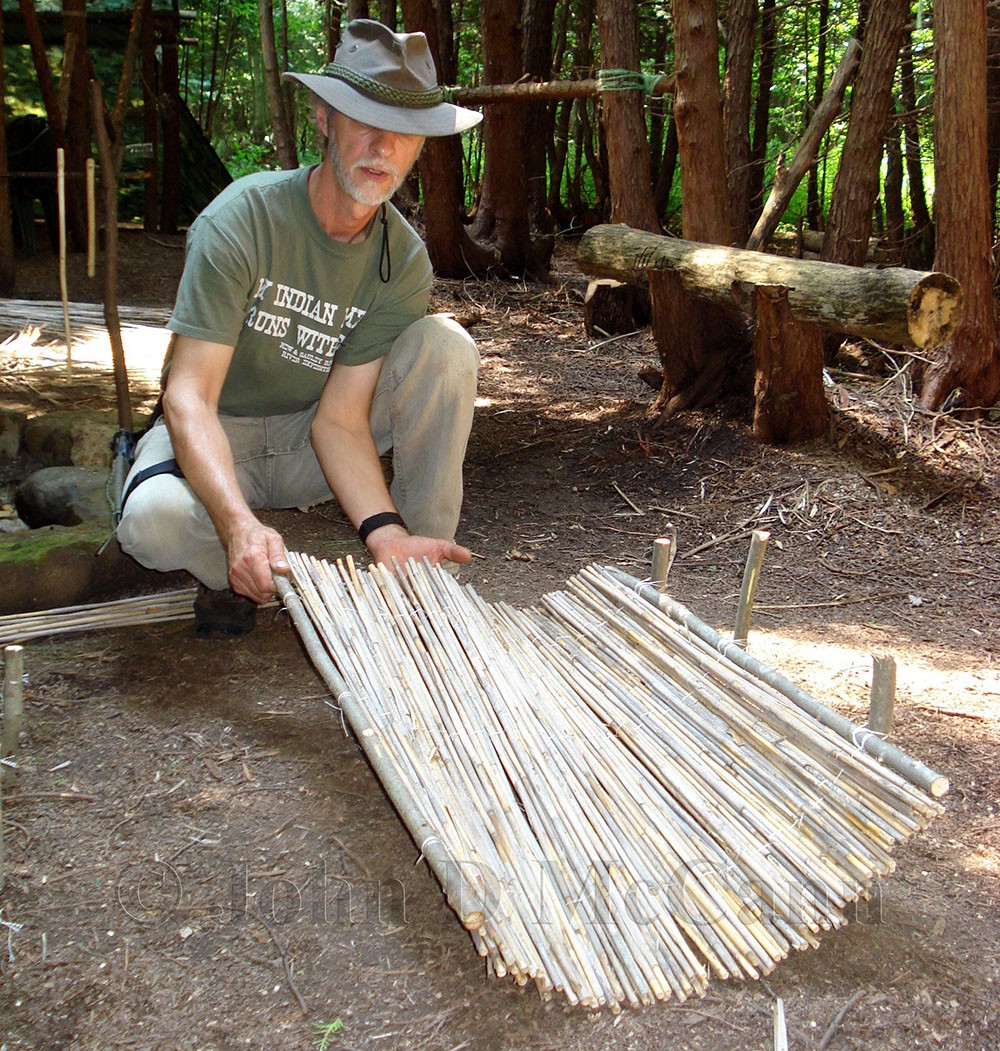
I had a project last summer, where I wanted to make a door for an A-Frame shelter that was built by some of our students. I decided to use reed, as there was a bunch in a swampy area a ways from our camp. I built a loom using six stakes and three crossbars. The inner strands of parachute cord was used as runners. The loom didn't have to be that long, as the door would not be very wide. A heavy crossbar was attached to the three rear stakes.
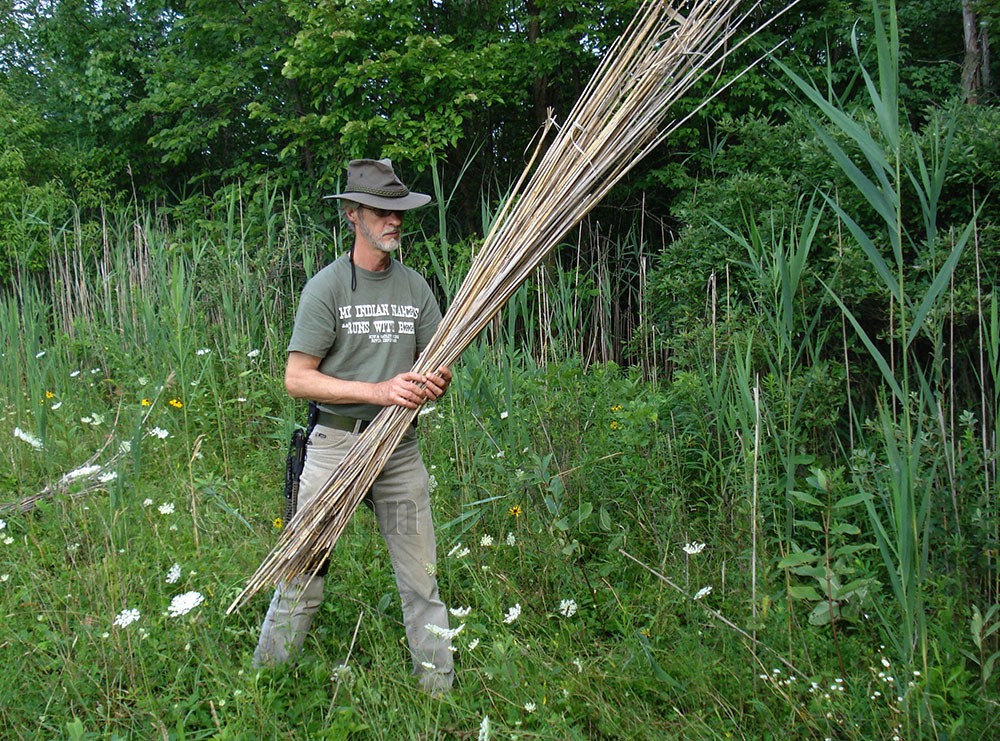 Here I am collecting reed for use in the loom.
A bunch of reed was cut and trimmed to length. The bundles of reeds were placed in the loom, raising and lowering the crossbar handle. It was determined that it was much easier to weave if a second person was available to load the bundles of material, while the other person operated the handle. One person can effectively operate the loom, but two makes it go a lot faster.
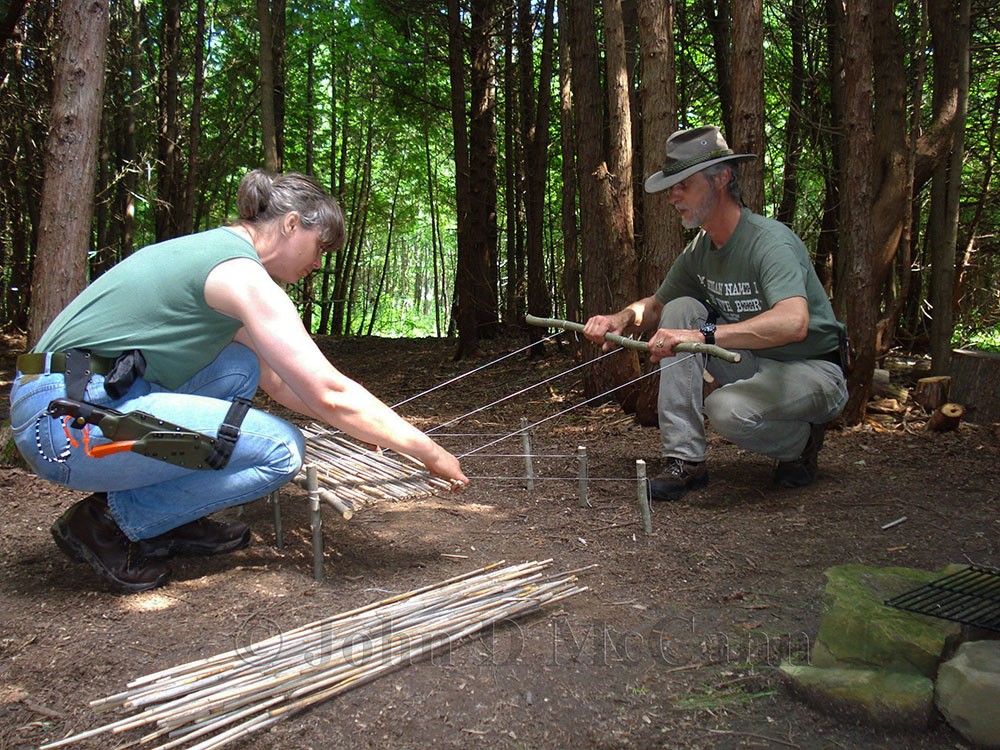 This shows me operating the loom while my wife, Denise, loads the reeds.
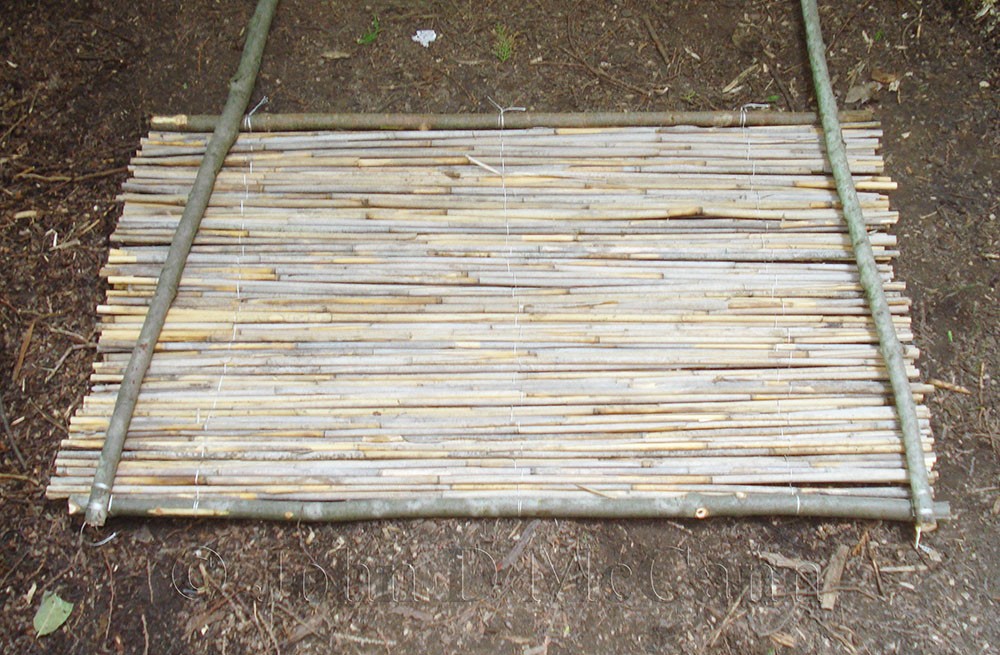
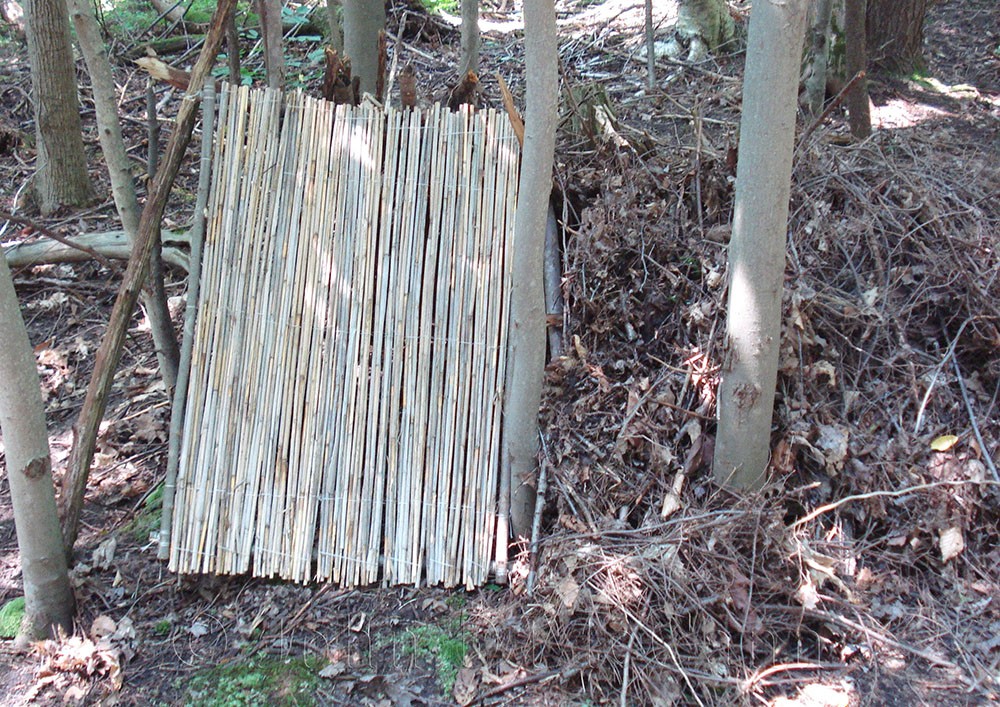
 A finished mat after weaving it on the loom and attaching another crossbar on the end.
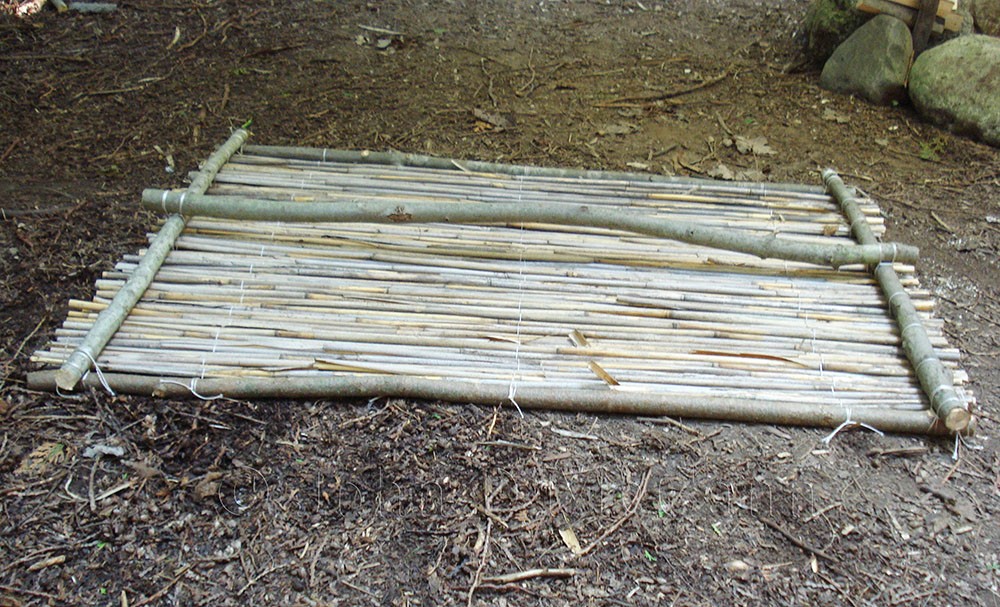
Once the reed mat was completed, a frame had to be lashed across the sides in order to make the mat sturdy and usable as a door. Once the frame was added and the mat was sturdy, a curved stick was lashed to the center to use as a handle so the door could be pulled closed from inside the shelter.
 Lashing crossbars to finish the mat.
 A handle is lashed to the woven door using a limb with a curve in it.
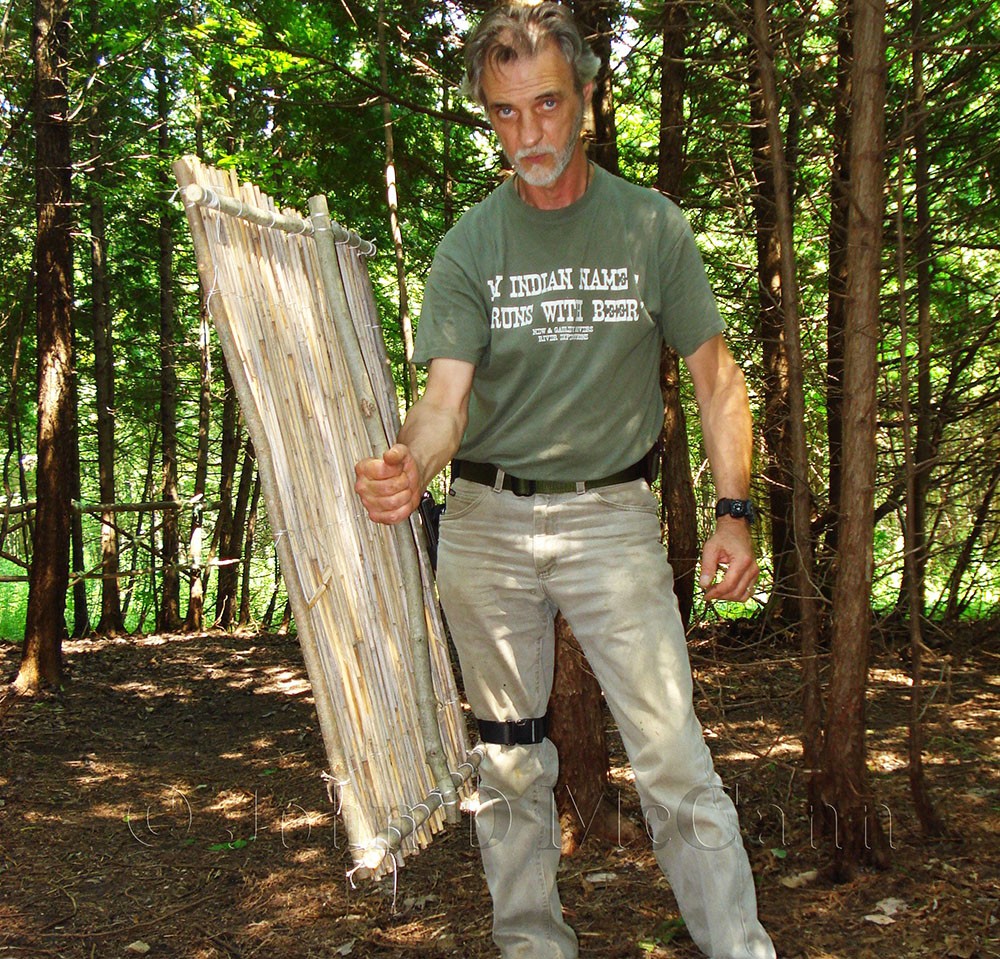 This shows me with completed door with handle.
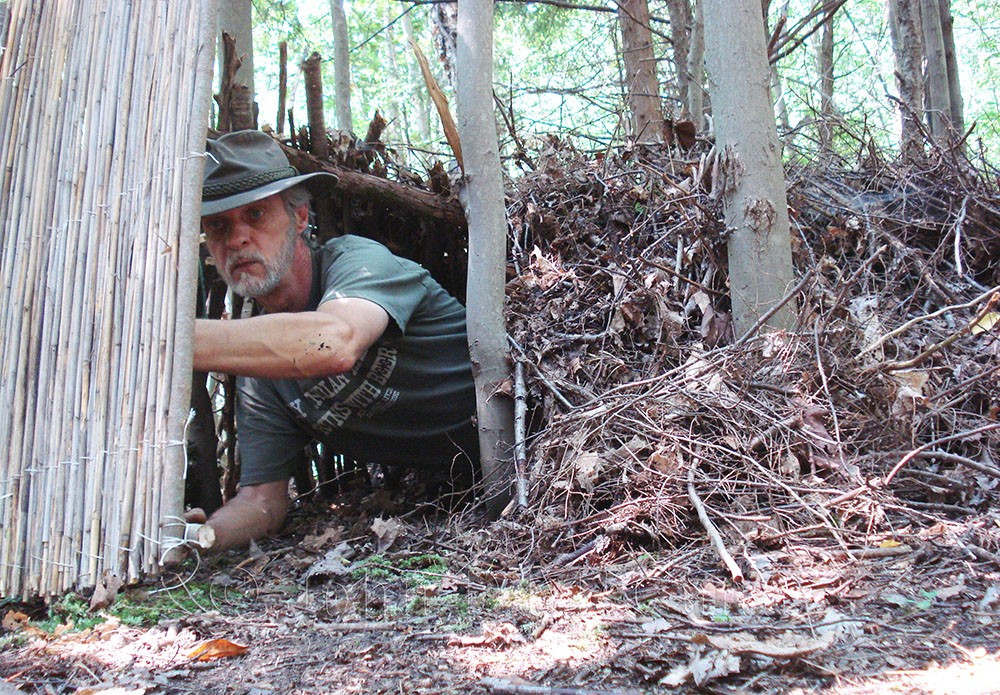 This shows the woven door being pulled up to the shelter doorway.
Obviously, the Field Expedient Loom can be used to make all kinds of things for the field, especially to make your camp more livable. Mats, screens, doorways, are only a few. You could even make the initial sides of a A-Frame shelter with mats, and then cover them with debris for insulation. The uses are only limited by your imagination.
We hope you enjoyed this article and will help support our efforts by checking out our products. As always, Be Prepared To Survive!
Copyright © 2016 by John D. McCann